
How to view transactions and process refunds
How to view transactions and process refunds
Use the Transaction tab in POS to search past sales, view invoices, and process refunds for products, services, and client account credit.
Before you begin
Make sure:
- You have selected the correct Current Location.
- You have the client name, mobile number, invoice number, or transaction ID ready.
- You have permission to process refunds. Refund access may be limited to manager or admin roles.
- You understand whether any refunded products should be returned to stock.
Step 1 — Open Transaction History
- Open POS.
- Select the correct Current Location from the location selector.
- Select the Transaction tab.
- Review the Transaction History list.
The list shows each transaction with its ID, date, client, status, total, type, operator, invoice status, and available actions.
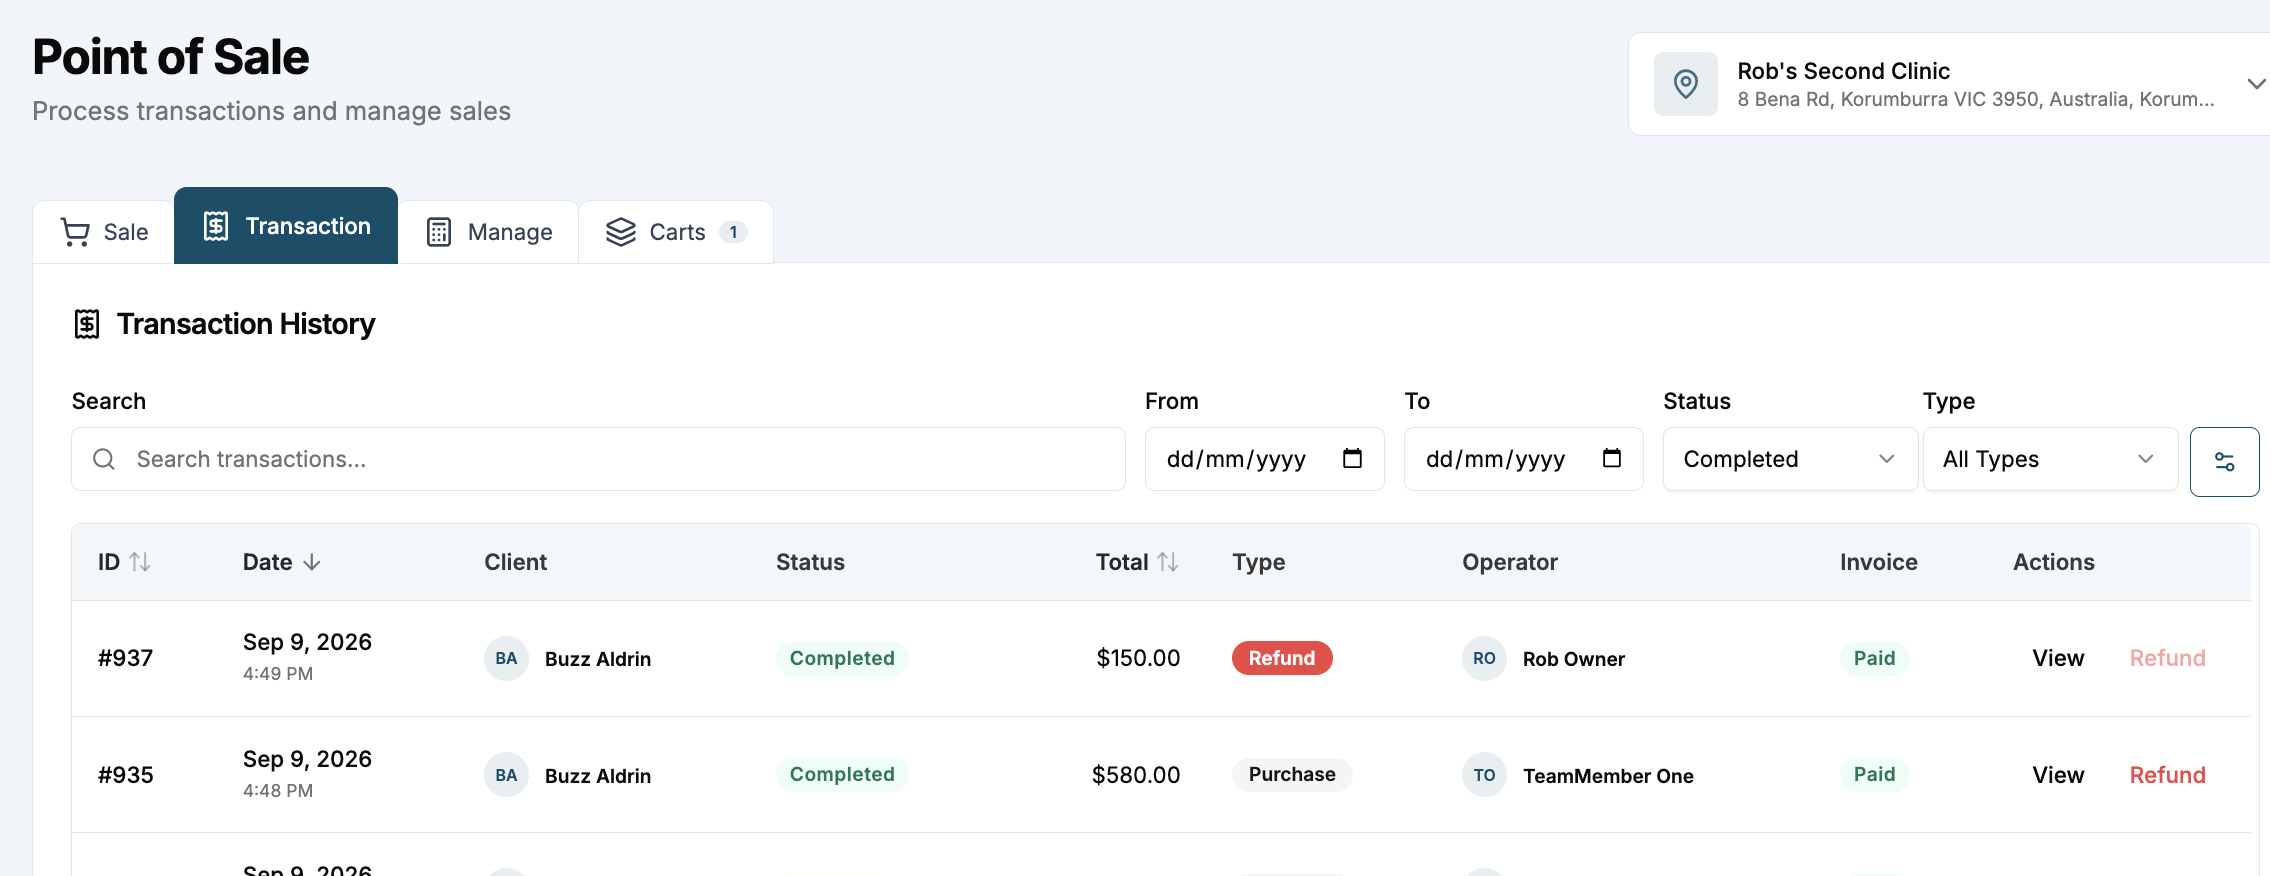
Screenshot – Transaction History: search, filters, transaction list, and View/Refund actions.
Step 2 — Search and filter transactions
- Use Search transactions to find a transaction by client name, mobile number, invoice number, or transaction ID.
- Use From and To to narrow the list by date range.
- Use Status to show transactions such as completed transactions.
- Use Type to switch between all transactions, purchases, and refunds.
- Select View to open the transaction invoice and review the itemised details.
Step 3 — Start a refund
- Find the completed transaction you need to refund.
- Select Refund.
- In Refund Transaction, select the items to refund.
- Use the quantity controls to choose how many of each item should be refunded.
- If products have been returned and should go back into stock, select Client has returned all product(s) to stock.
- Select Continue to Refund.
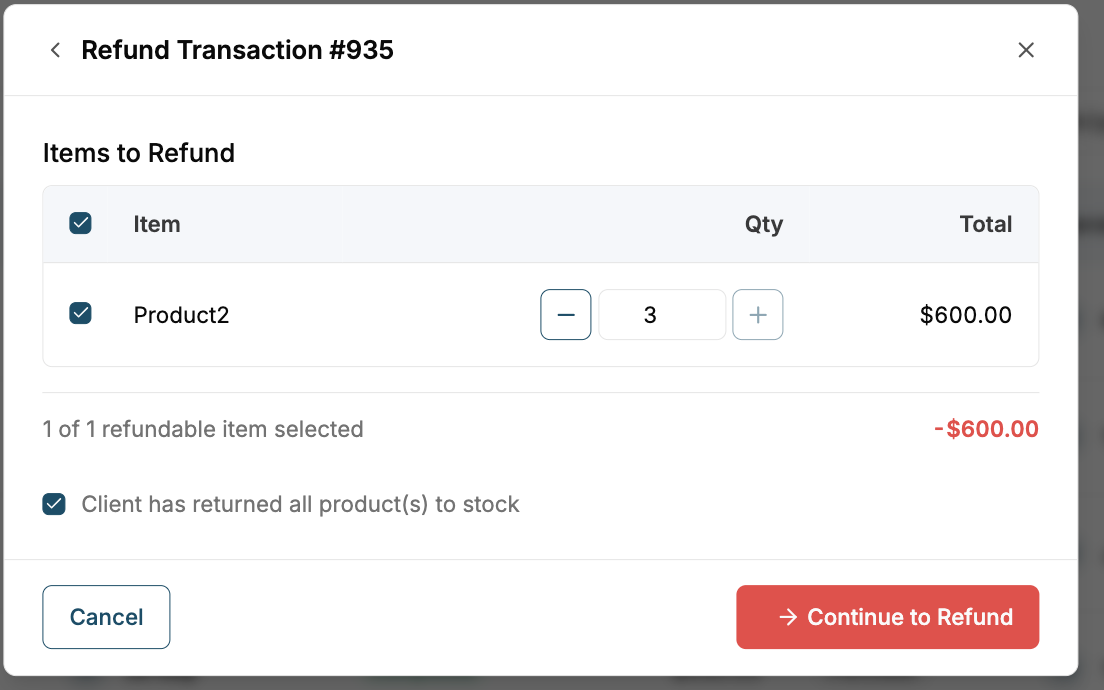
Screenshot – Refund Transaction: select items, adjust quantities, and choose whether products return to stock.
Step 4 — Choose the refund method
- Review the refund summary and total refund amount.
- Choose how the refund will be issued.
- Use Client Account when the refund should become reusable credit on the client's account.
- Use Cash or Card when funds are being returned directly to the client.
- If needed, select Add another payment method to split the refund across more than one method.
- Add a refund reason if your clinic records audit notes for refunds.
- Select Process Refund to complete the refund.
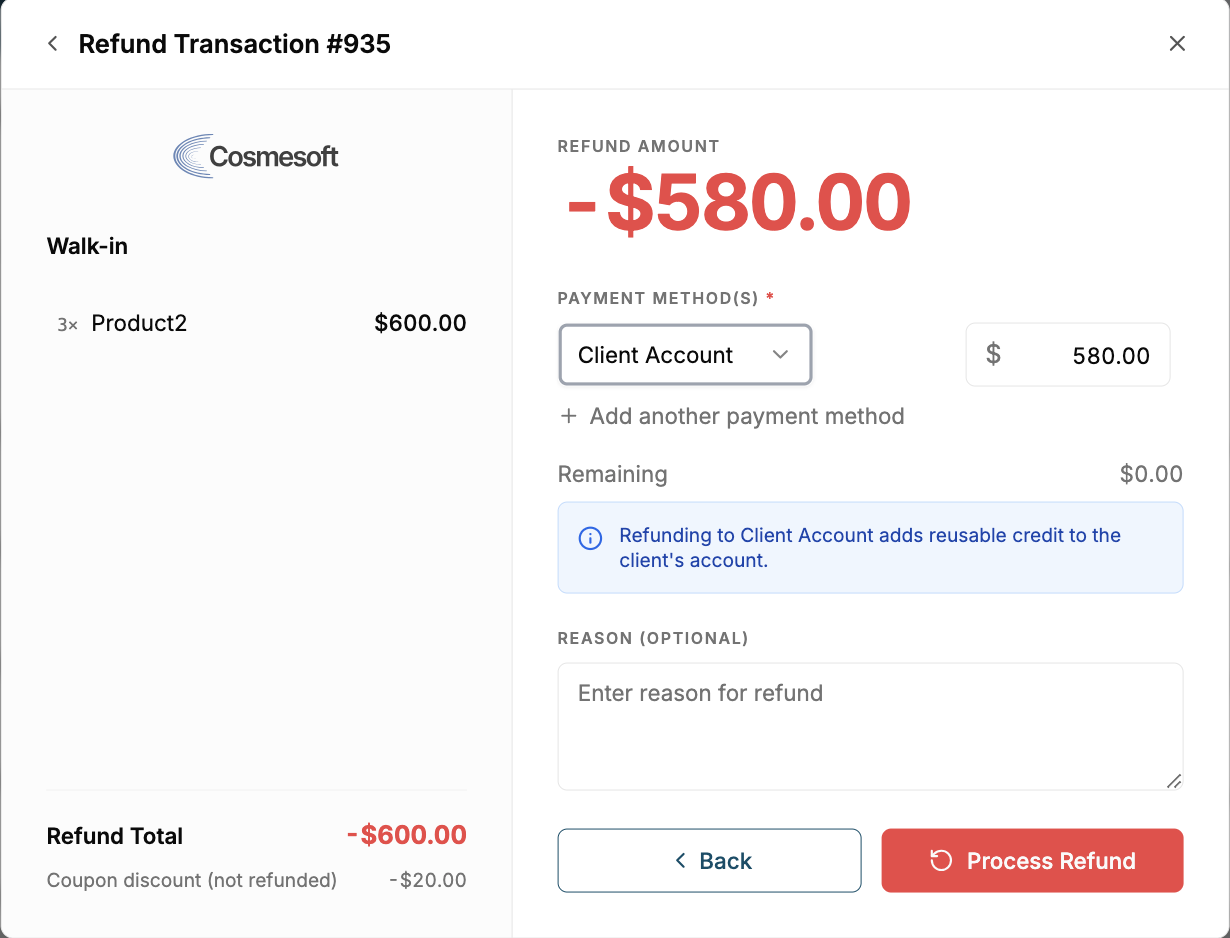
Screenshot – Refund method: choose Client Account, Cash, Card, or split refund payments before processing.
What happens next
- The refund is added to Transaction History as a refund record.
- The original transaction remains available for invoice review.
- If stock return was selected, returned product quantities are added back to inventory.
- If Client Account was selected, the refund becomes client account credit for future purchases.
Tips
- Search by invoice number when a client has multiple transactions on the same day.
- Only return products to stock when the item is physically returned and suitable to resell.
- Use client account credit when the client will use the refund for a future appointment or purchase.
What to do next
- Review how to manage client profiles to check account credits.
- Learn how to manage individual stock levels if returning products to inventory.
Last updated: 9/9/26, 12:19 PM