
How to create and manage a contract
Use this guide to define your terms, set up commission schedules, and activate agreements for your clinic.
For a high-level explanation of how contracts work, see About Contracts.
Where to find Contracts
- Navigate to Sidebar in the main menu.
- Click Contracts.
From here, you can view your full list of active, draft, and archived agreements.
Before you begin
Make sure:
- You have Admin or Owner access to create financial agreements.
- You have the practitioner's or partner's Payment Account details verified.
- You have decided on your Commission Rates (percentage or flat fee) for both services and products.
Step 1 — Start a new agreement
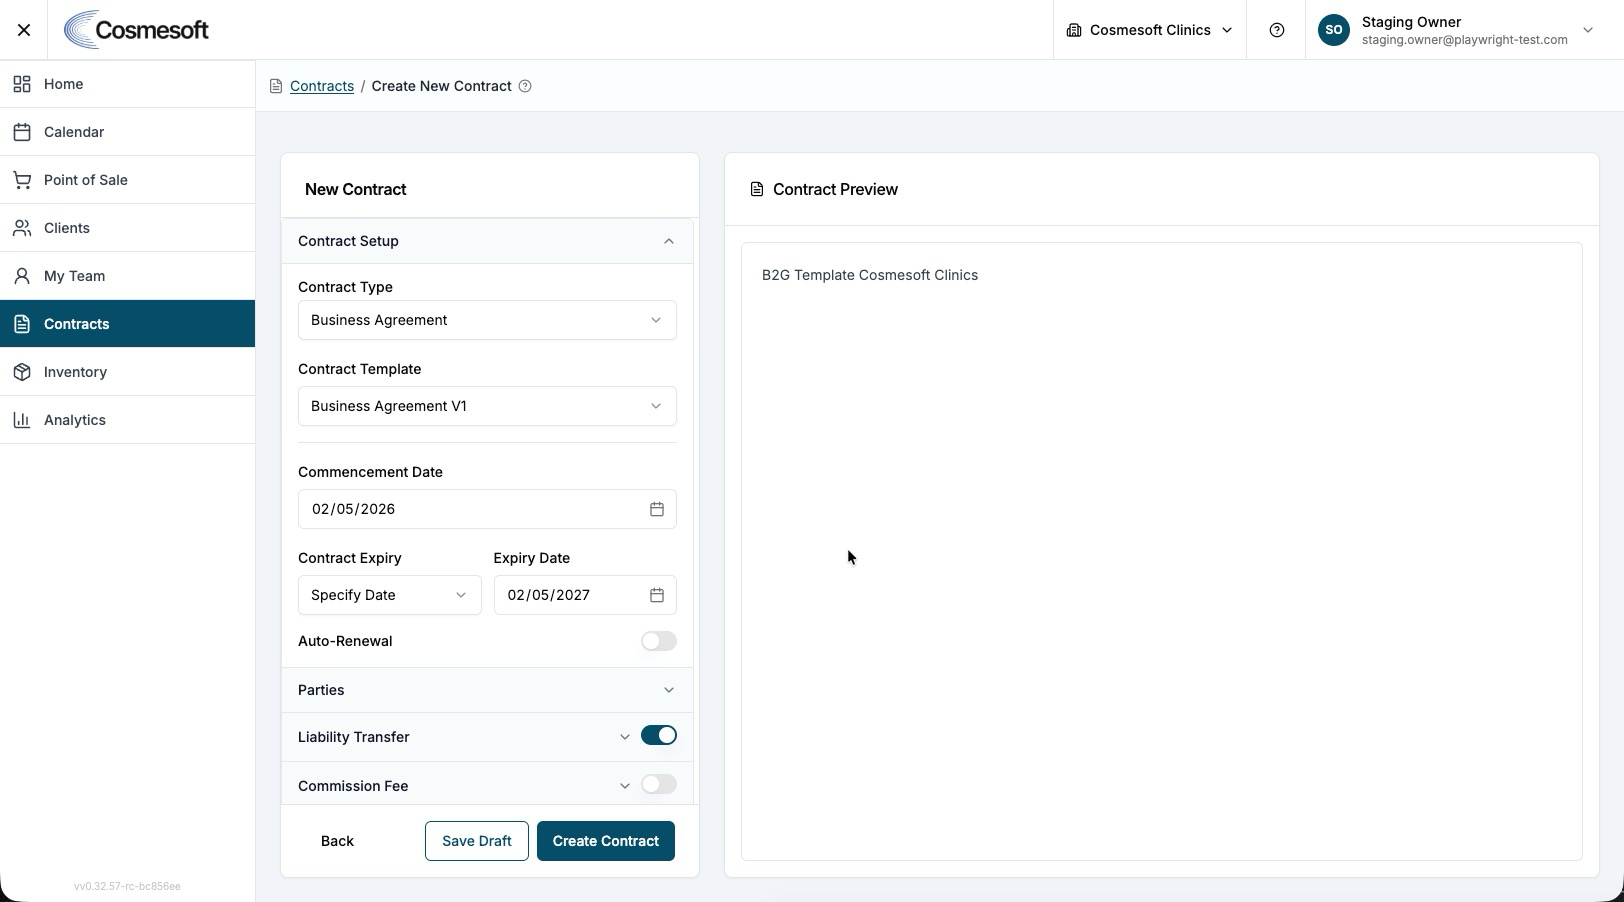
- From the Contracts dashboard, click New Contract.
- Select the Contract Type:
- Service Contract — For agreements with individual staff members or practitioners.
- Business Agreement — For B2B partnerships or group-wide clinic arrangements.
- Select the Contract Template.
Step 2 — Configure Details and Parties
- Set Dates — Enter the Commencement Date and optional Expiry Date. Toggle Auto-renewal if the agreement should roll over.
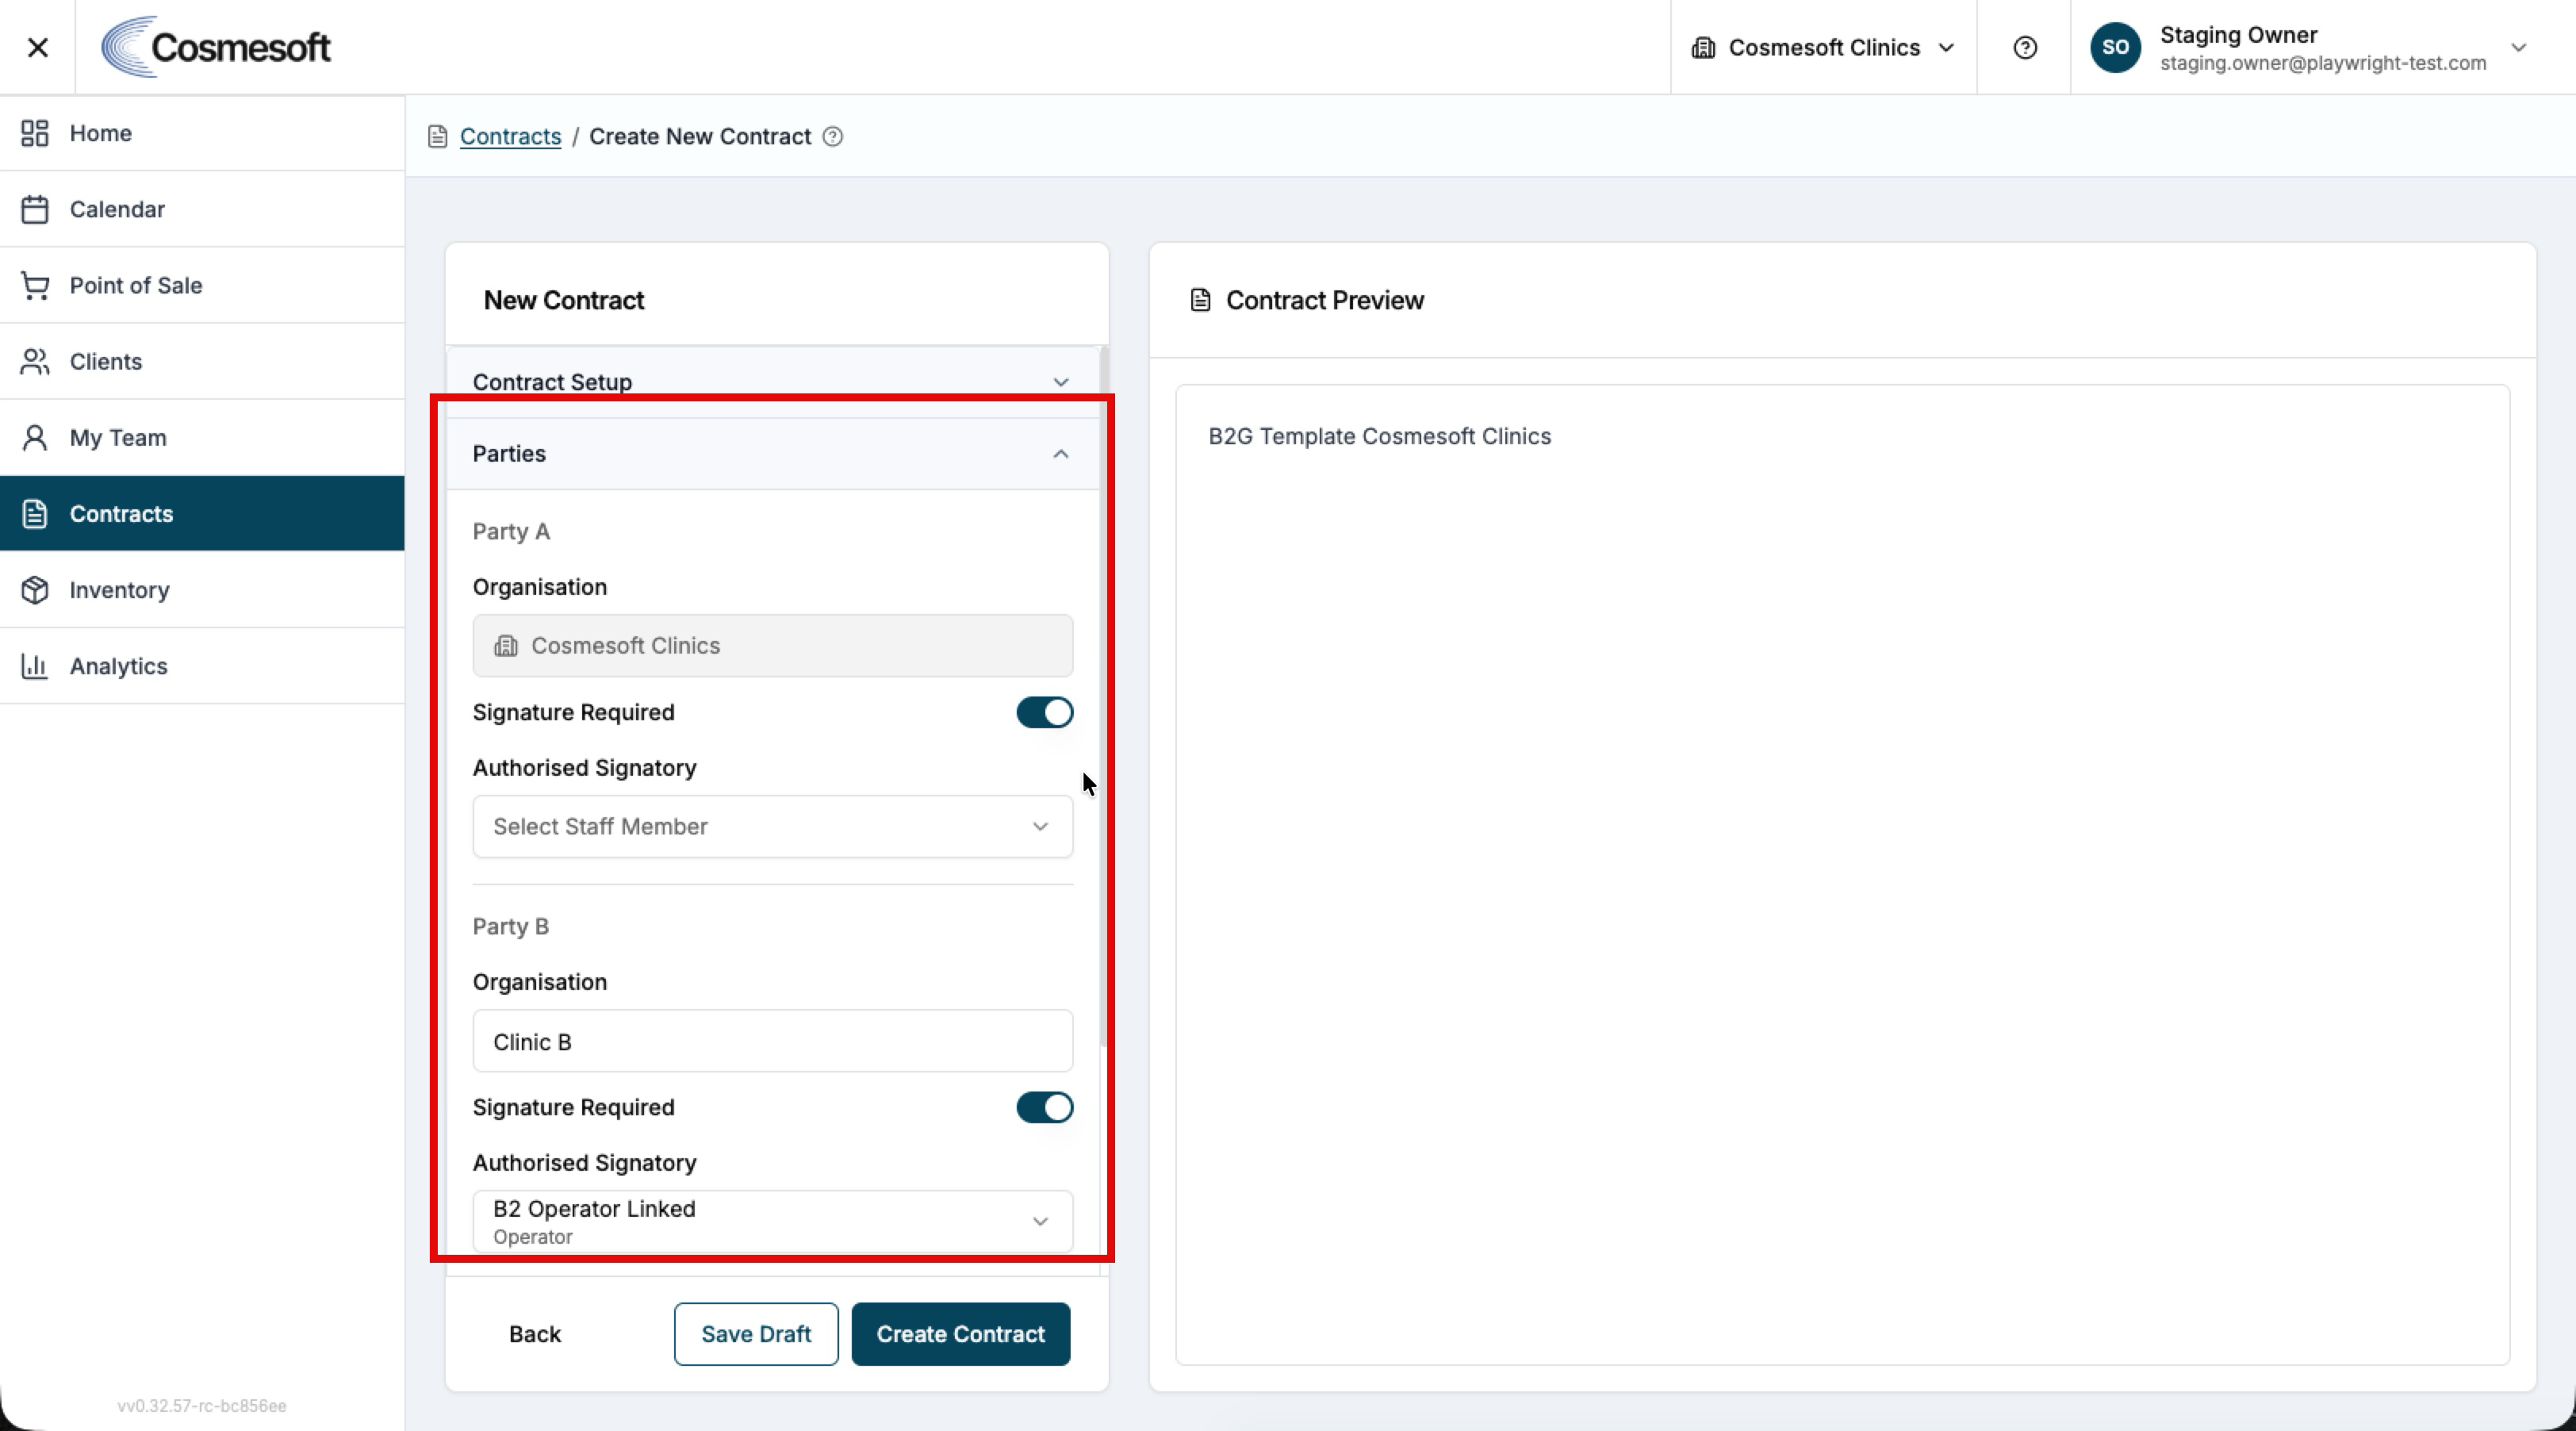
- Assign Parties — Select your organisation as the first party and the specific staff member or business as the second party.
- Set Signatories — Define the signature requirements for each party (e.g., mandatory digital signature before activation).
Step 3 — Set Commission and Payout Terms
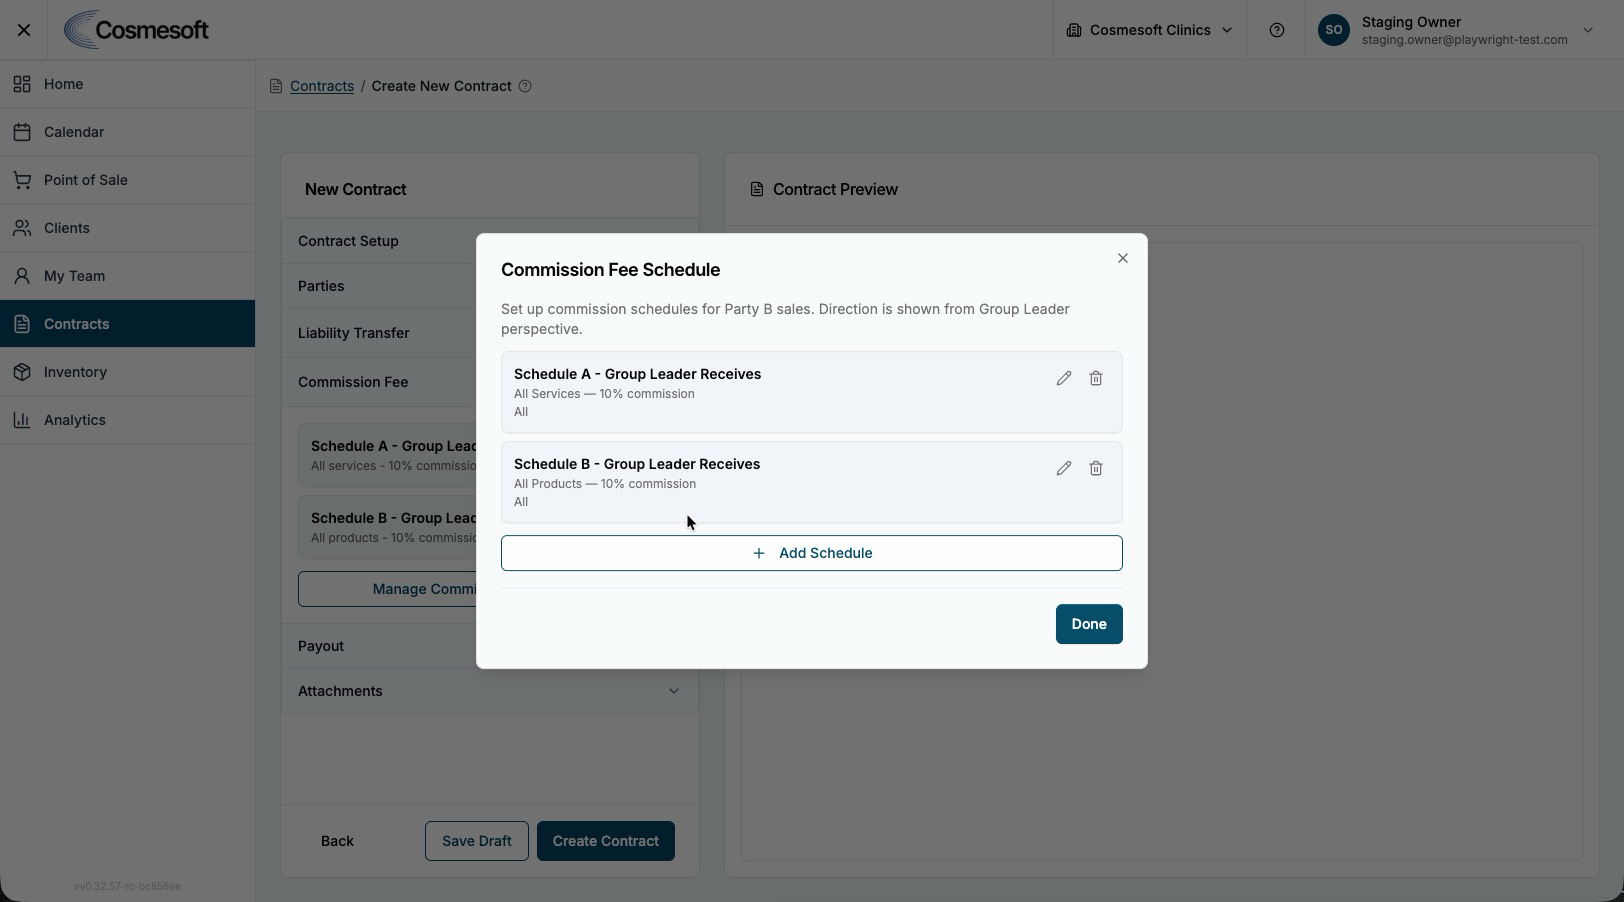
- Open the Commission Fee tab and click Manage Commission Fee Schedule.
- Define the recipient and the commission rate (e.g., 40% for services, 10% for retail).
- Select the specific items this rate applies to if necessary.
- Navigate to the Payout tab to set the Settlement Frequency (e.g., Monthly) and the Settlement Day.
- Attachments — Upload any extra documents relevant between the parties. This may be an already signed document between the two parties.
- Click Create Contract.
Step 4 — Activate and Monitor
- Review all terms in the Overview tab for accuracy.
- Use the top panel to View, Edit, Start or Archive the contract.
- Click Start to activate the contract once the Overview is complete.
- Mandatory signers receive email alerts to sign.
- The contract status remains Pending until it is signed.
- Settlements, Transactions, and Activity activate once the contract is signed, enabling immediate transaction tracking.
- Use the Settlements and Transactions tabs to monitor performance and upcoming payouts.
What to do next
Last updated: 9/5/26, 1:47 AM