
How to create a Quick Consult
Use Quick Consult to record an appointment agreed outside the normal roster and start its consultation workflow.
Where to find Quick Consult
Open Consultations, then select Quick Consult.
Before you begin
- Use Quick Consult only when the appointment was agreed outside the normal roster.
- Confirm that you are signed in as the practitioner completing the consultation.
- Check the client, location, service and time carefully.
A Quick Consult is not checked against your roster. It appears in My Consultations, not on Calendar.
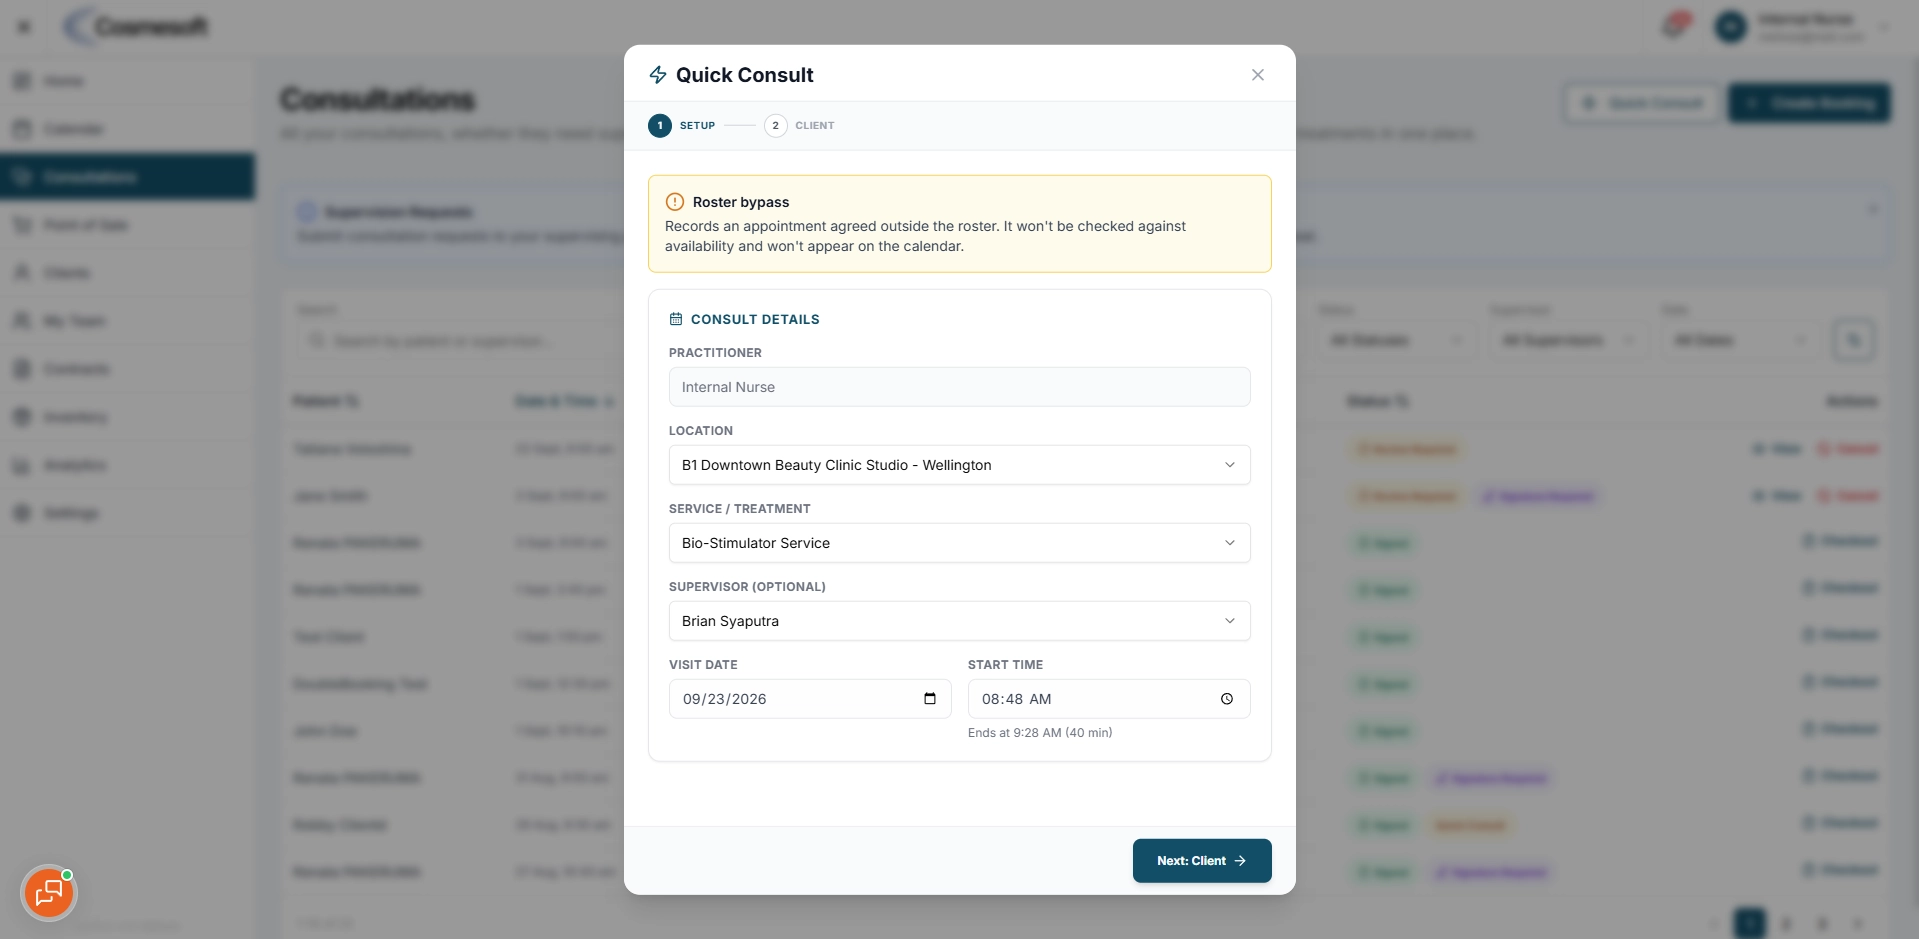
Step 1 – Complete Setup
In the Setup step:
- Confirm the practitioner.
- Select the Location.
- Select the Service / Treatment.
- Select a supervisor when the service requires supervision.
- Confirm the Visit Date and Start Time.
The end time is calculated from the service duration.
Step 2 – Select the client
Select Next: Client.
Search for the client by name, date of birth or phone number.
If the client does not exist, select New client and create their record.
Step 3 – Create the Quick Consult
Review the client and setup details, then select Create Quick Consult.
Cosmesoft confirms that the Quick Consult was recorded.
Step 4 – Start the consultation
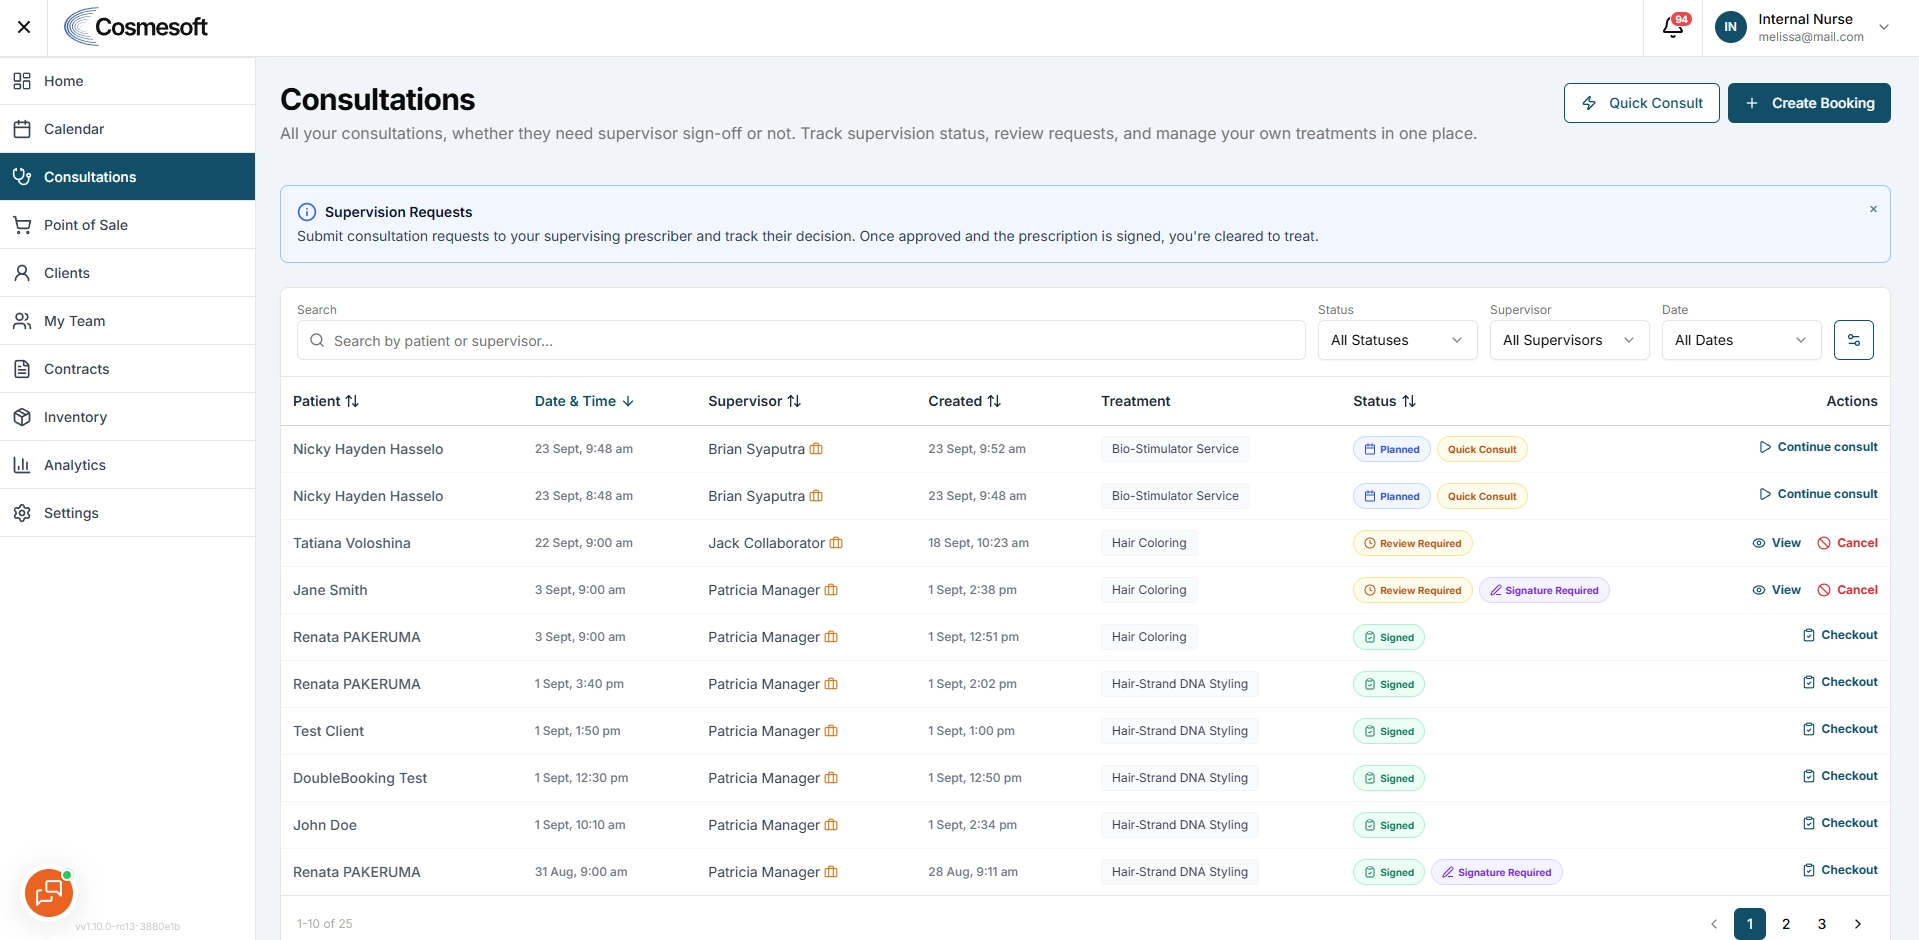
Find the new item in My Consultations.
Select Start Consult. If the consultation has already started, select Continue Consult.
What to do next
Complete the consultation and follow the standard Sign-off process.