
How to Book an Appointment
Use this guide to create a new appointment in the Calendar, with the options to choose practitioner, client, service/s, date, time, and location. You’ll learn where you can start a booking, how to fill in the key details, and how to confirm the appointment so your reception and treating team can see it straight away.
Before you start
Make sure you have:
- At least one Location set up.
For more on Locations, see: About Locations (Insert Link)
- Relevant Services created with correct durations.
- Practitioners added as Staff and included on the Calendar.
You’ll also need:
- Enough information to search for an existing client or add a new client (eg. name, mobile/email address).
- The service(s) they’re booking.
- The date and time they want.
Where you can book appointments
You can create a new appointment from:
- The Calendar of your chosen location.
- An existing booking (using Duplicate or similar actions, which are further explained in the article How to Adjust Appointments in the Calendar).
This article focuses on the first option, which is the most common path.
Step 1 – Open the Calendar and choose the correct view
- Select Calendar in left side main menu.
- Ensure the correct Location is selected (for multi-site clinics).
- Use the date selector to jump to the day you want to book.
- Check the Staff filter (if available) to show the practitioner(s) you want to book.
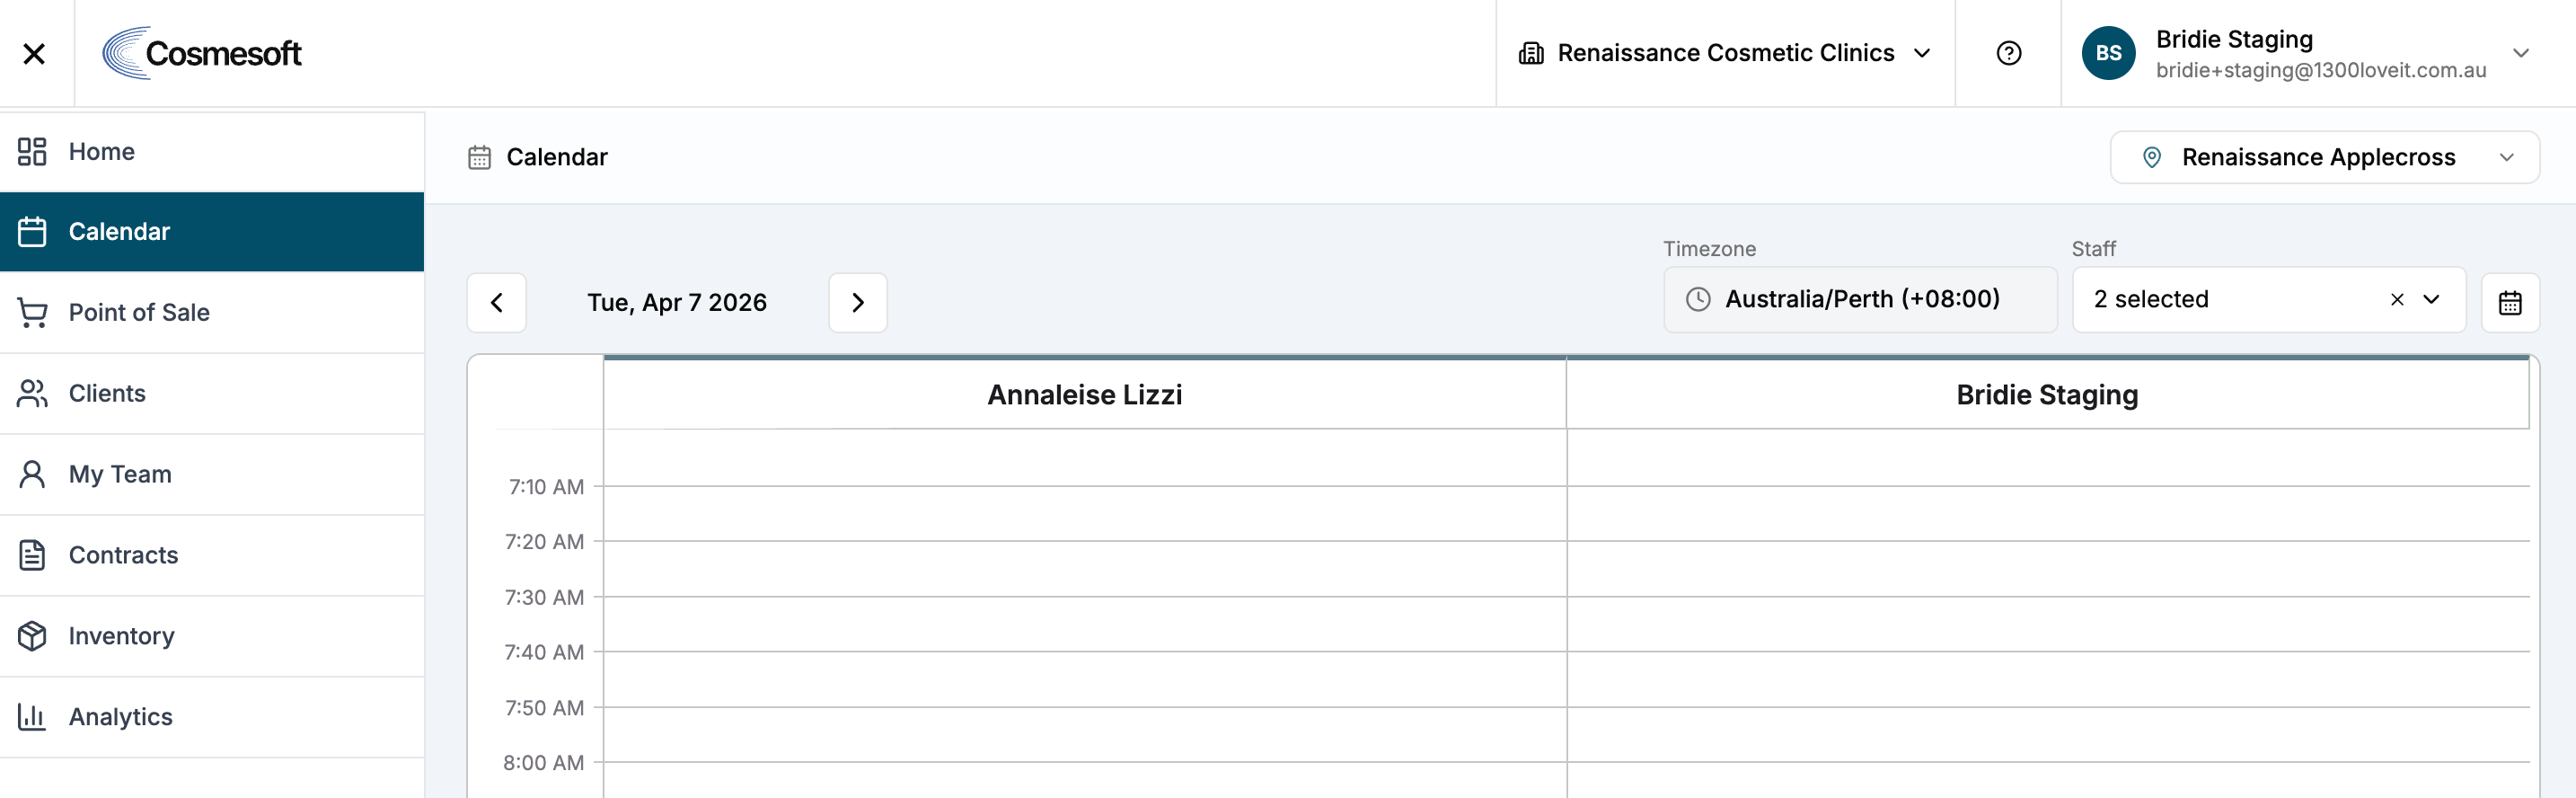
Step 2 – Start a new booking in the right time slot
- Find the practitioner column you want to book for.
- In that column, locate the time slot that matches when the client wants to come in.
- Click on the empty time slot to start a new booking.
This opens the booking panel for a new appointment.
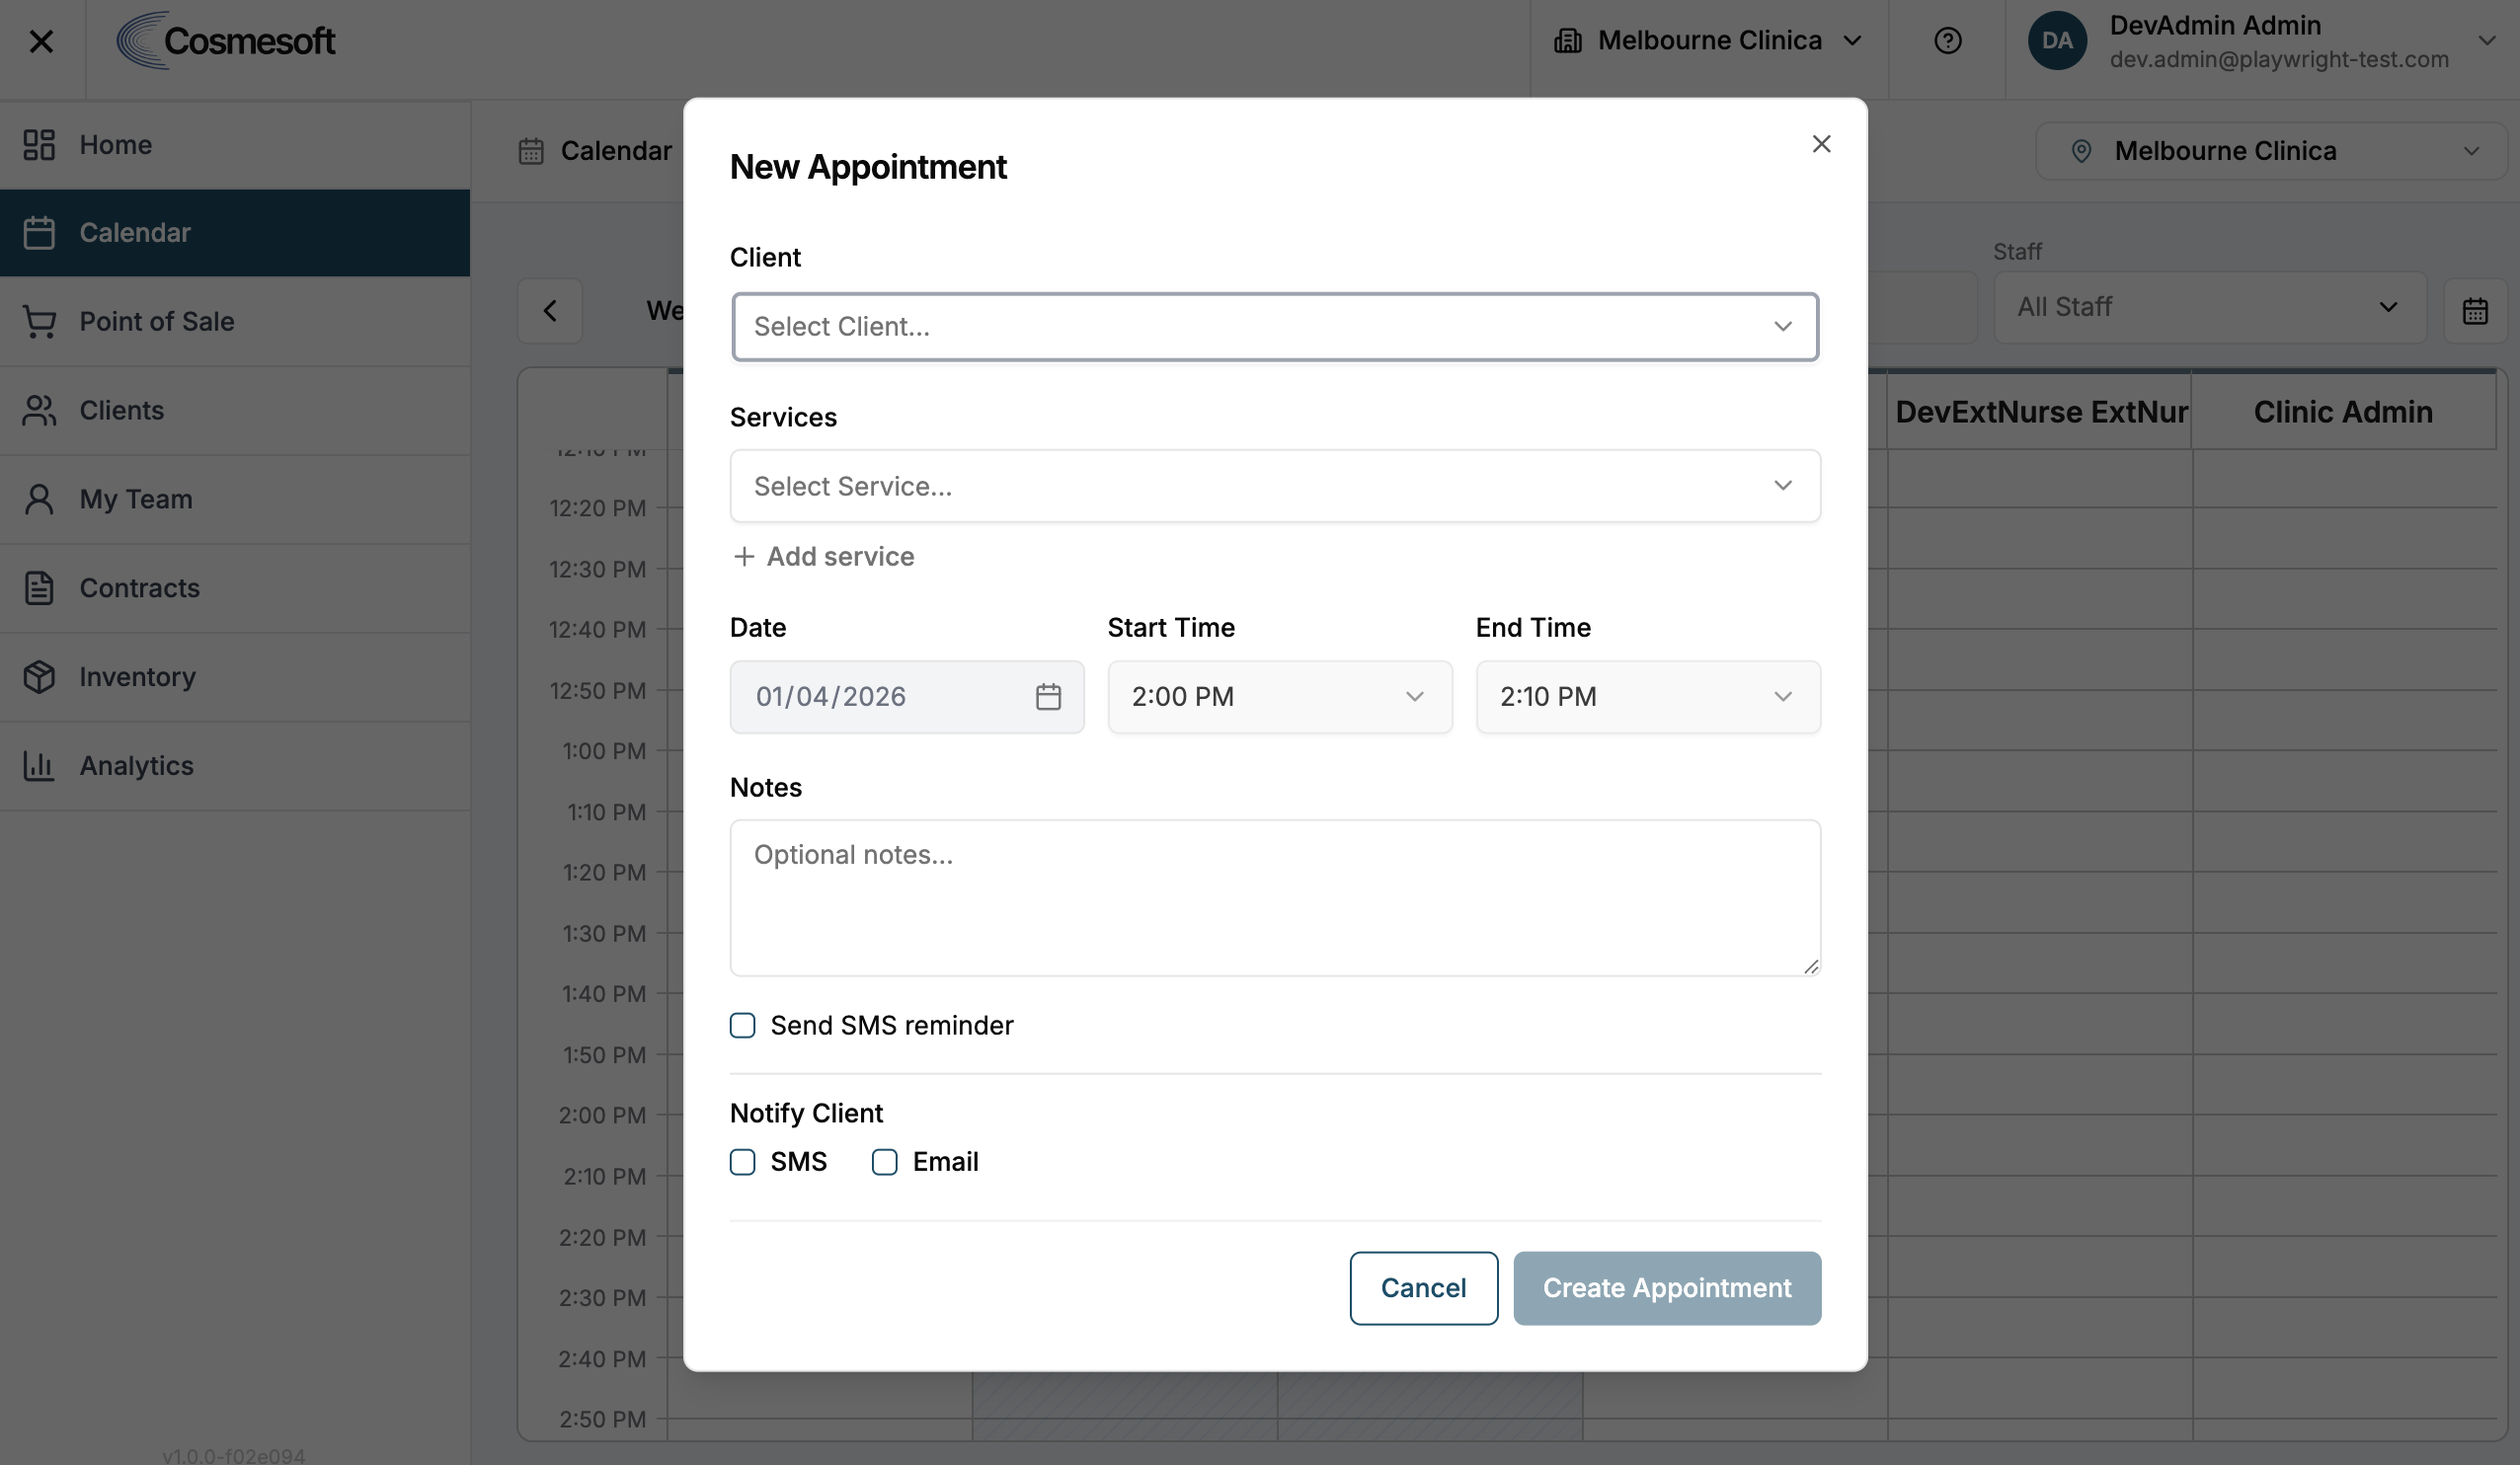
If you want to block out a time slot, select Block, enter a title and duration.
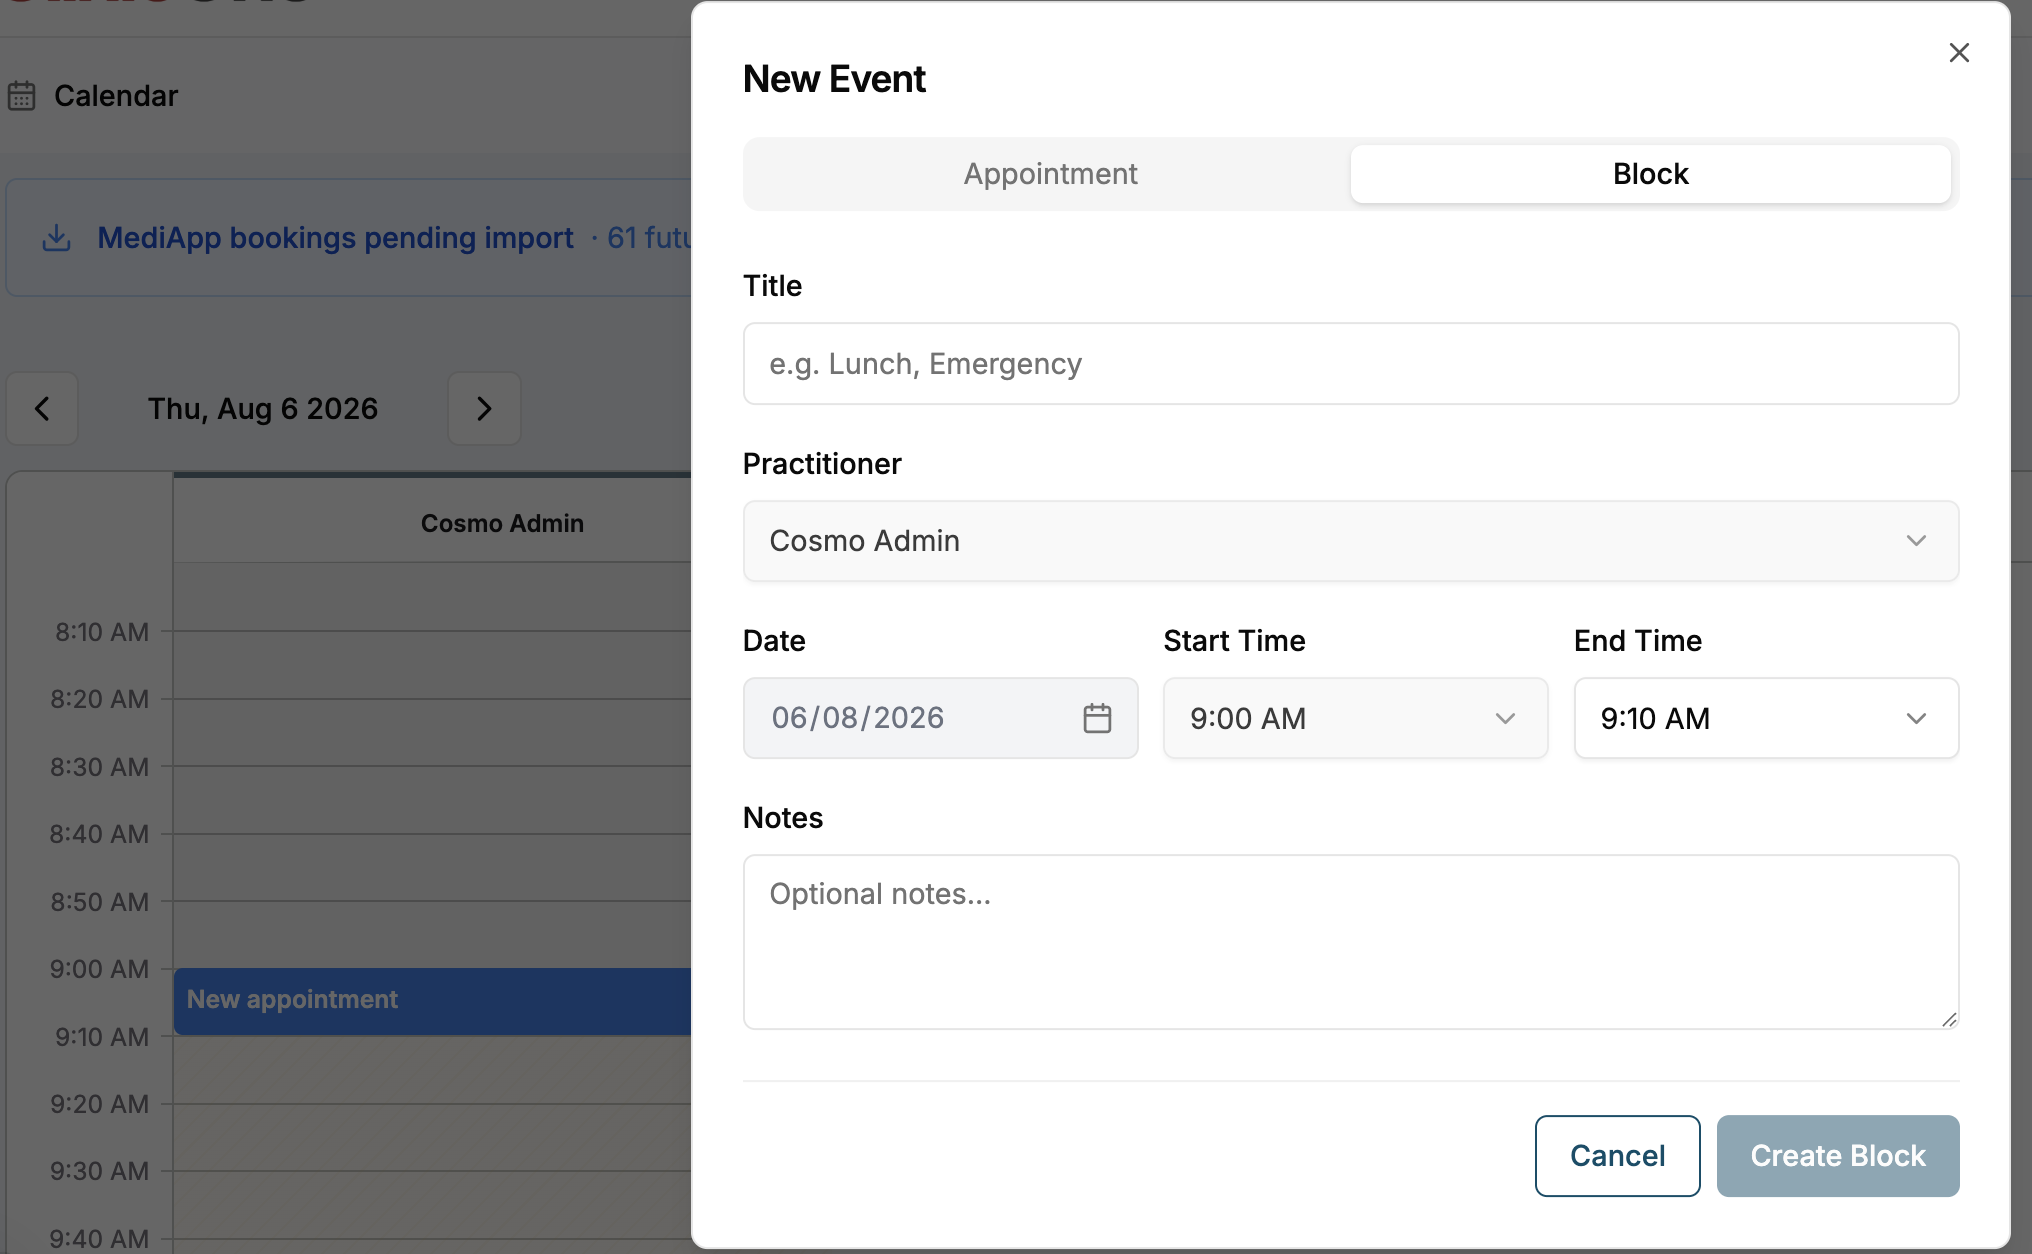
Step 3 – Select or add the client
- In the booking panel, locate the client field.
- Start typing the client’s name (or other identifier, such as phone number or email).
- From the results list:
- Click the existing client record if they’re already in your database, or
- Choose the option to create a new client if this is their first visit.
- If you create a new client, fill in at least:
- First and last name
- Contact details (mobile/email) so they can receive confirmations and reminders.
Step 4 – Add services to the appointment
- Select the Add Service drop down to select the service being booked. Note that the service time, as well as pre and post, buffer and gap times are all setup in the Service Settings.
- Search for and select the service the client is booking (e.g. “Chemical Peel”).
- For a multi-service booking, Select + Add Service to add further services.
- Confirm or adjust Service date and duration.
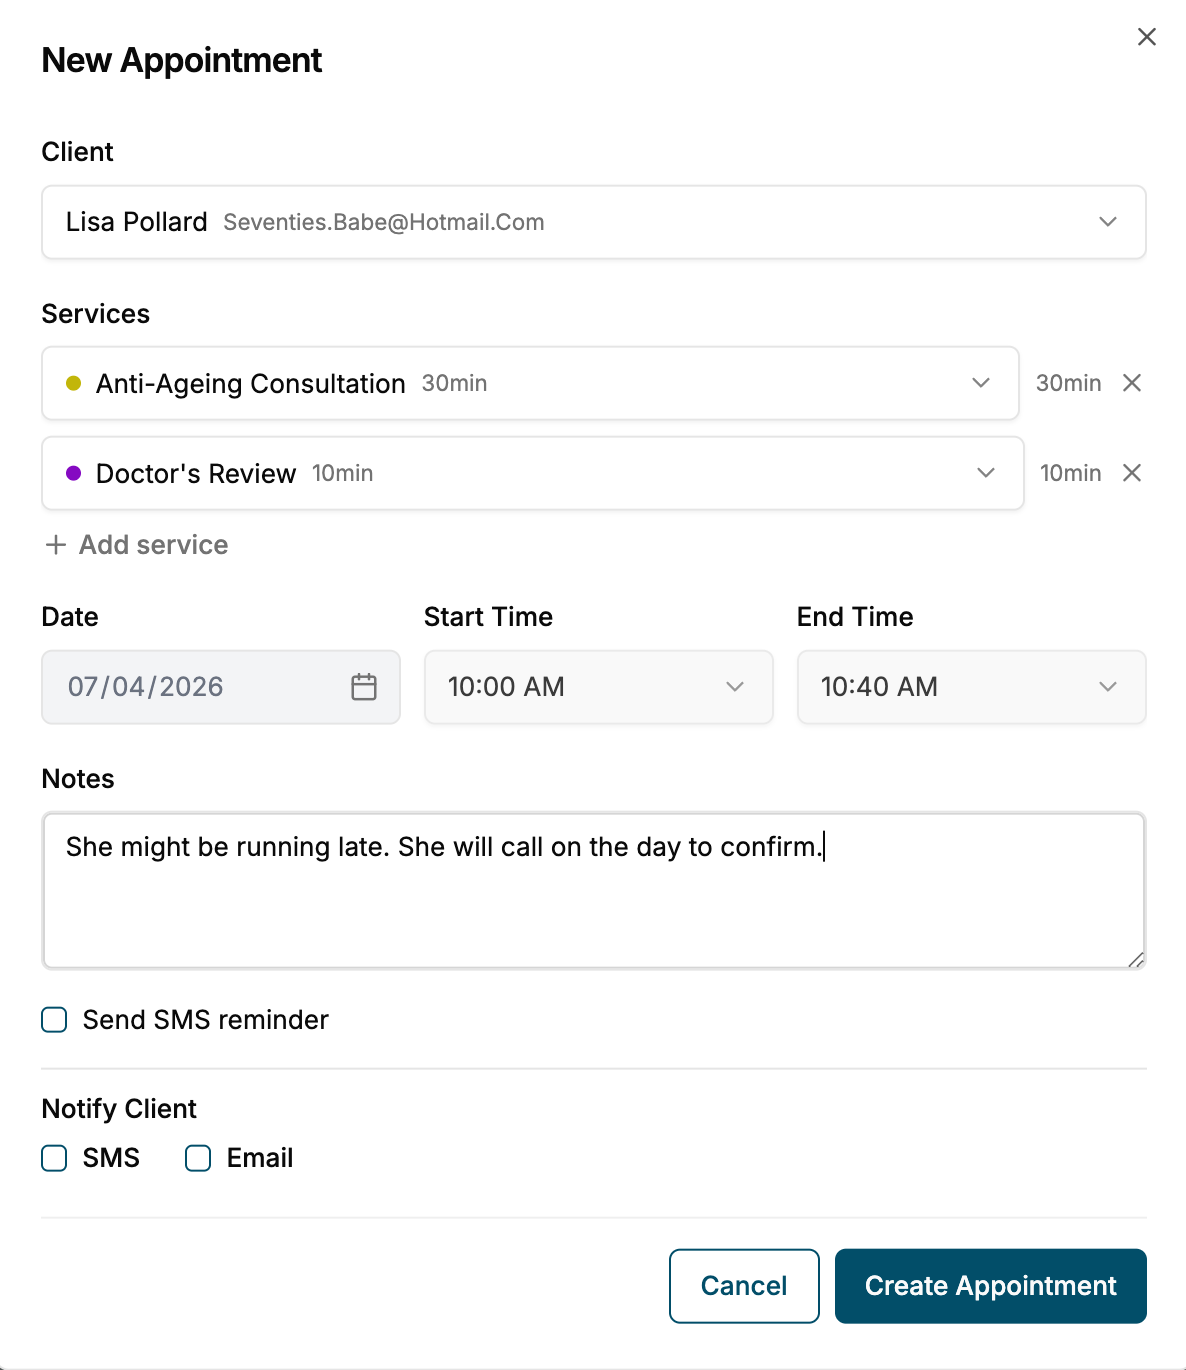
Step 5 – Add booking notes (optional but recommended)
- Add any Booking notes into the Notes field, for example:
- Key client preferences or sensitivities.
- Special instructions for preparation or follow-up.
- Context for why the client is visiting.
Notes help ensure everyone in the clinic has the right context for the appointment.
Step 6 – Confirm the Confirmation Methods to Notify the Client.
- Before you send a confirmation review the key details in the booking Summary tab:
- Client
- Date and time
- Services and durations
- Select the Notification method via SMS and or email.
- Select Create Appointment.
Step 7 – Select Pre-Consultation Forms to Send (Optional)
- Pre-consultation forms can help you to collect patient information prior to the appointment, and save time on the day. For example the Registration Form may be sent prior to any new appointment to all clients.
- If a form has already been linked to a service it should appear in the next pop-up for you to confirm the forms to be sent to the client.
- You can also select other forms to send to the client using the filter for form type.
- Review and select the relevant form and select Confirm and Submit.
Step 8 – Check the booking in the Calendar
- Return to the Calendar view.
- Confirm that:
- The appointment appears in the correct practitioner column.
- The date and time match what the client requested.
If anything is wrong (wrong practitioner, time, or service), you can open the booking again and adjust it. More details can be found in the next article: How to Adjust Appointments in the Calendar
What to do next
After you’ve booked the appointment, your team can:
- Update or move the booking if the client’s plans change.
- Track arrival, cancellations, and no-shows using appointment statuses.
- Start the consultation from the booking when the client arrives, so all treatment notes and documentation are tied to this appointment.
For a high-level explanation of how Booking Appointments and the Calendar work together, see:
About Booking Appointments – About Booking Appointments