
How to manage client profiles
How to manage client profile details
Use this guide to update client records, track treatment history, and monitor financial activity in Cosmesoft.
For a high-level explanation of client profiles, see About Client Profiles.
Where to find Client Profiles
- Navigate to Sidebar > Clients.
- Search for the client by name, email, or phone number and click on their name to open the file.
Before you begin
Make sure:
- You have the appropriate permissions to view and edit client records.
- You have the client's information ready (e.g., new contact details).
Step 1 — View and Edit Client Details
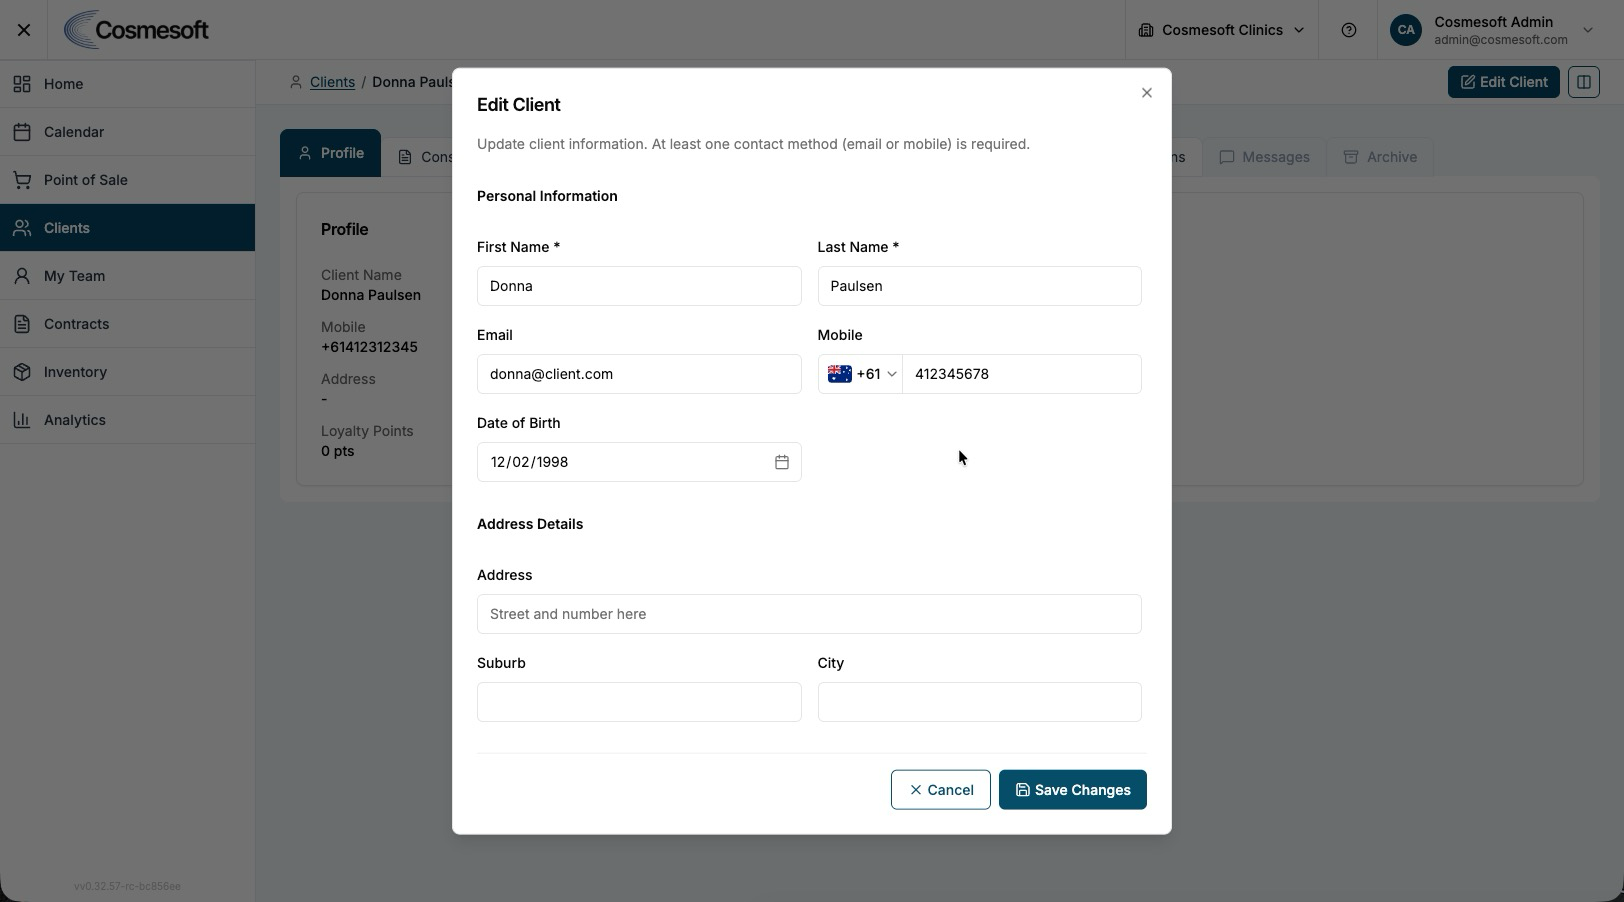
- In the Profile tab, review the client's current information.
- Click the Edit button in the top right corner.
- Update personal fields like Mobile Number and Email.
- Click Save Changes.
Step 2 — Review consultations and bookings
The Consultations tab provides a full history of the client's treatment journey.
- Click the Consultations tab within the profile.
- View History — Review past appointments and complete any outstanding consult notes from this panel.
- Clinical Notes — Click on any past session to view the detailed notes recorded by the practitioner.
- Quick Booking — Click the Create Booking button to schedule a visit for the current or future time directly from their file.
Step 3 — Manage client forms and consents
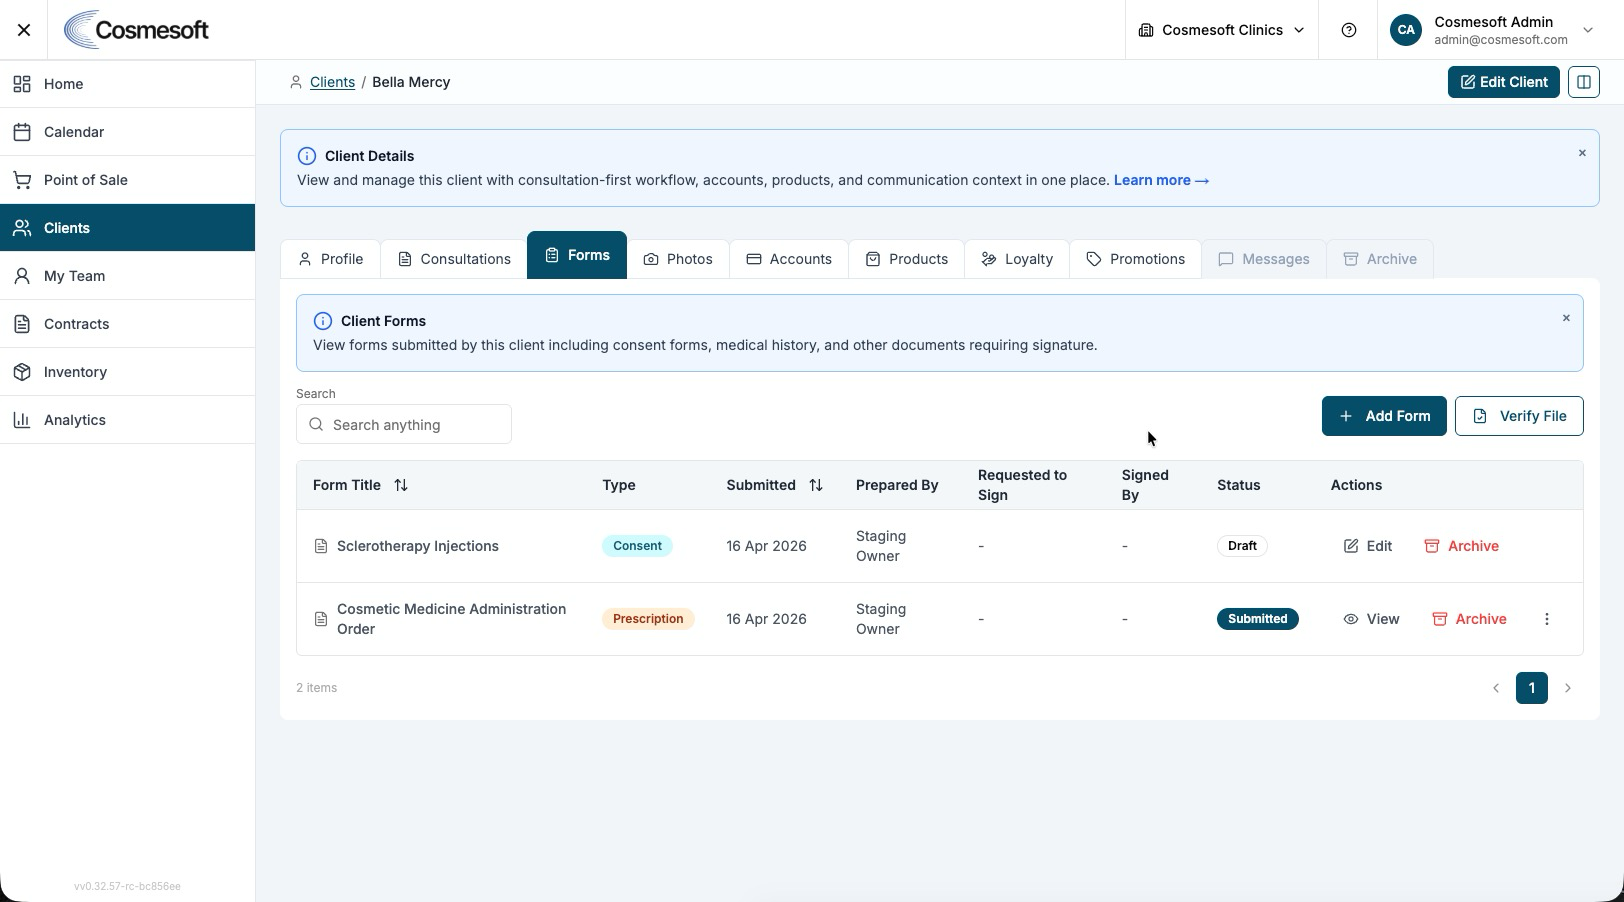
- Click the Forms tab in the client's profile.
- Review registrations, consents, prescriptions, and medical history forms.
- Add Form — Click +Add Form to create a specific digital template (e.g., "Botox Consent") and follow prompts to complete and sign.
- Status Tracking — Monitor forms that are completed, pending signature, or expired.
Step 4 — Upload and manage treatment photos
- Navigate to the Photos tab.
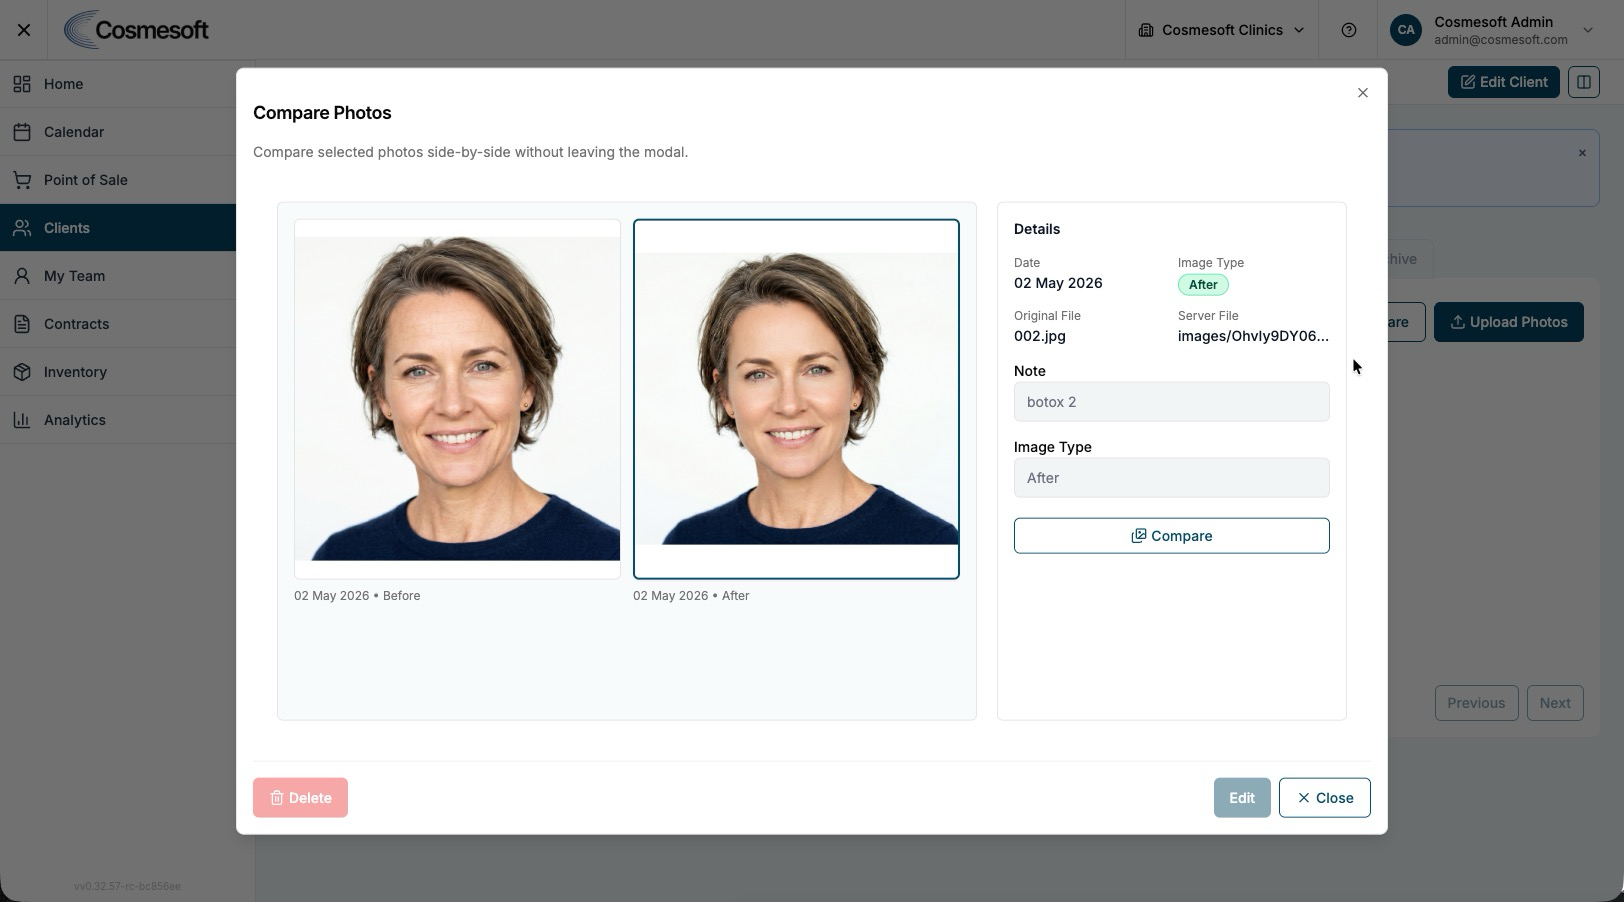
- Click Upload Photos. Select the images from your device, and label Before, After or Other, as well as leaving an optional note.
- Compare Photos — Select two or more photos and click the comparison tool to view them side-by-side for progress tracking.
Step 5 - View financials and purchase history
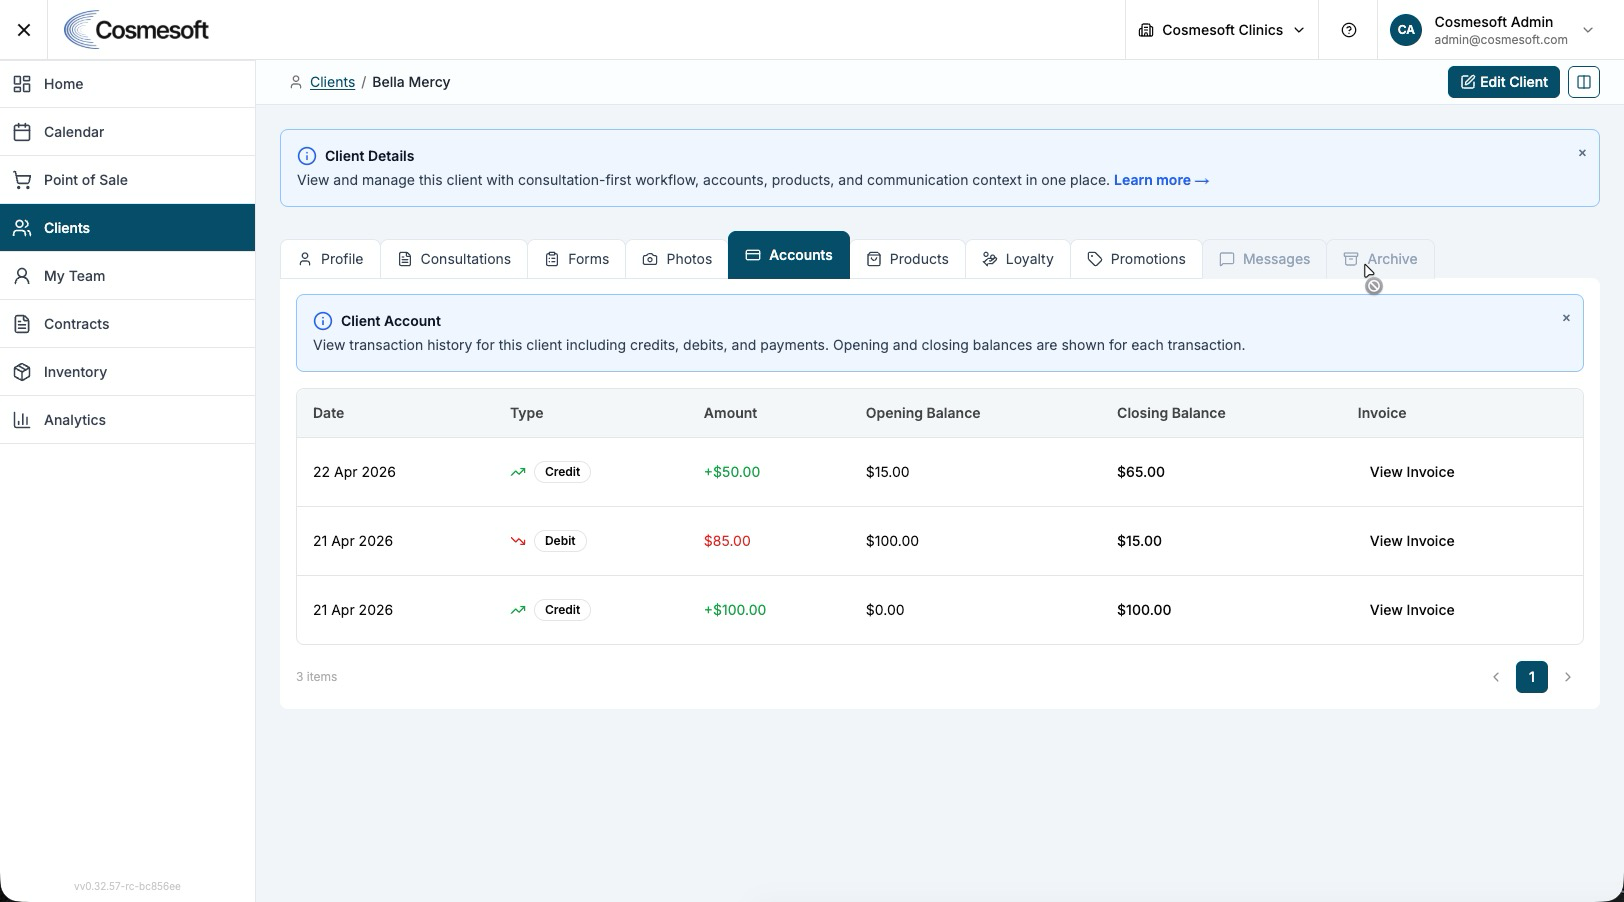
- Accounts Tab — View all invoices, payments, and credit notes. Check the Balance summary for any outstanding amounts.
- Products Tab — Review a record of all retail and clinical products the client has purchased or used.
- Loyalty / Promotions — Track points balances, active gift vouchers, and remaining treatment package items.
What to do next
- Learn how to manage client photos and forms.
Last updated: 9/5/26, 1:07 AM