
How to use stock functions
Use this guide to manage the end-to-end lifecycle of your products, from ordering and receiving to transfers and audits.
For a high-level explanation of these processes, see About Stock Functions.
Where to find Stock Functions
- Inventory > Manage (To view activity and receive stock)
- Inventory > Procurement Order (To create new supplier orders)
- Inventory > Stock Transfer (To move items between locations)
- Inventory > Audit Stock (To perform a stocktake)
Before you begin
Make sure:
- You have the necessary Inventory permissions assigned to your role.
- You have configured your Suppliers and Locations in Settings.
- You have configured you Products in the Products tab of Inventory.
- You have prepared your physical stock counts (for audits).
Step 1 — Monitor stock activity
To track the status of all inventory movements:
- Go to Sidebar > Inventory.
- Select the Manage tab.
- Review the list of all procurement orders, transfers, and audits.
- Use the filters to view specific statuses (e.g. Ordered, Received, Completed).
Step 2 — Create and manage purchase orders
- Go to Sidebar > Inventory > Procurement Order.
- Select the Supplier, the Receive Into (destination clinic) and the Expected Delivery Date.
- Add the products and quantities you wish to order. You will need to create a new Procurement Order for each different supplier.
- Review the total price and click Submit Order.
- The order will now appear in the Manage tab with an Ordered status.
Step 3 — Receive stock
When a delivery arrives at your clinic:
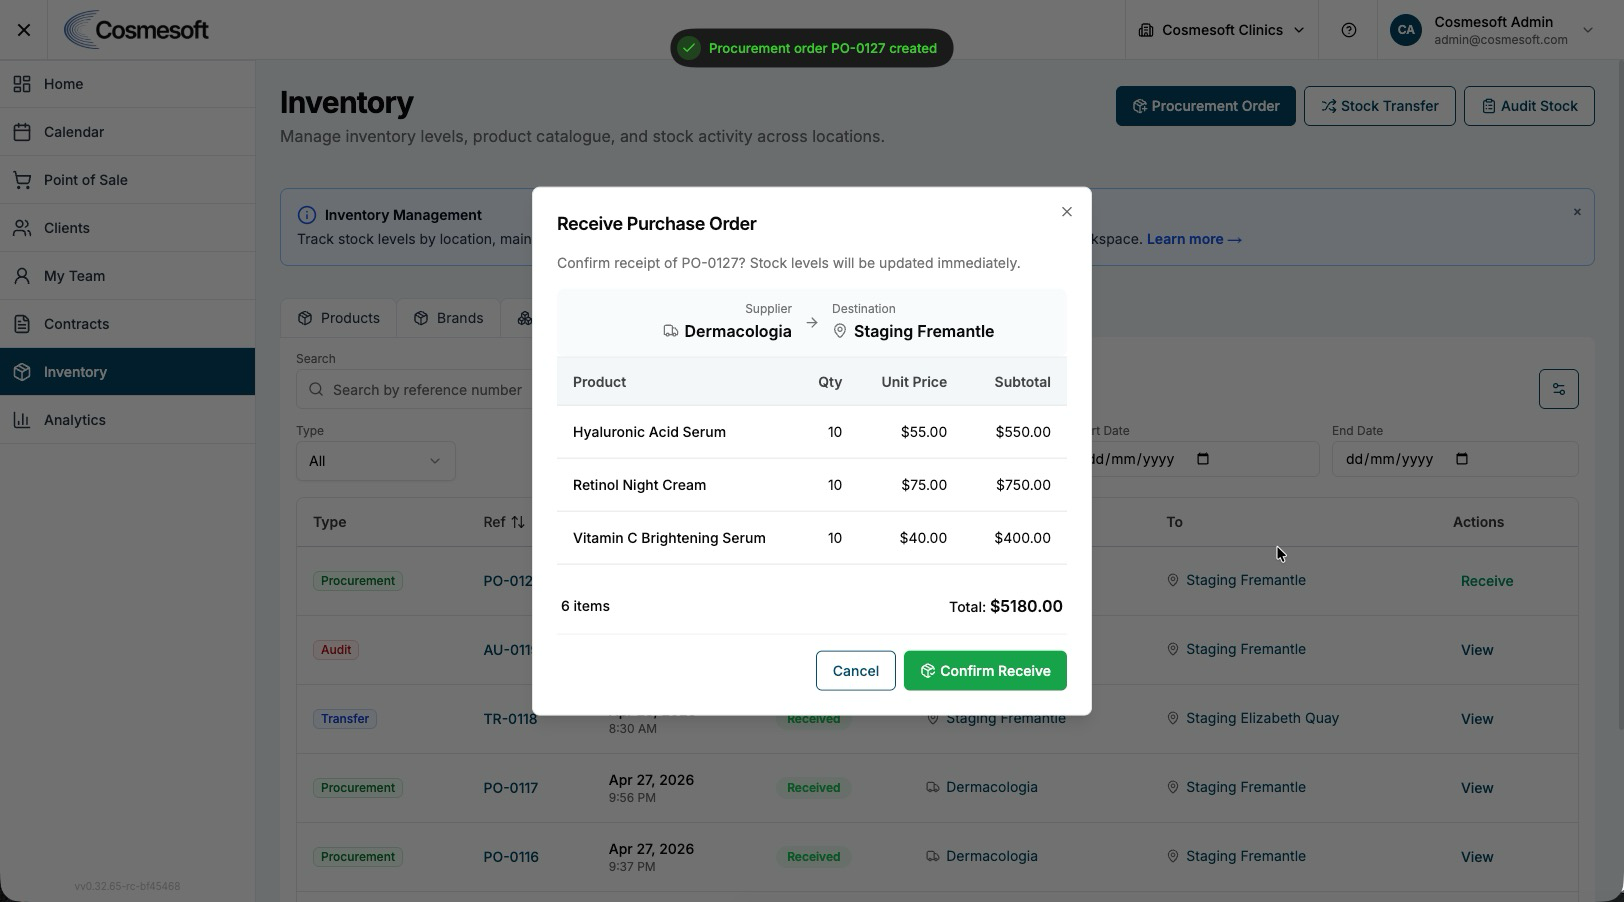
- Go to Sidebar > Inventory > Manage.
- Find the relevant procurement order and click the Receive button.
- Confirm the quantities received. If there are discrepancies, update the Received Qty field.
- Click Confirm Receive.
- The items will be instantly added to your Available stock levels for that location.
Step 4 — Transfer stock between locations
- Go to Sidebar > Inventory > Stock Transfer.
- Select the Source Location (from) and the Destination Location (to).
- Add the products and quantities you wish to move.
- Click Save & Transfer.
- Click Confirm Transfer.
- Go to Sidebar > Inventory > Manage.
- Find the relevant Transfer order and click the Fill button.
- Click Confirm Fill.
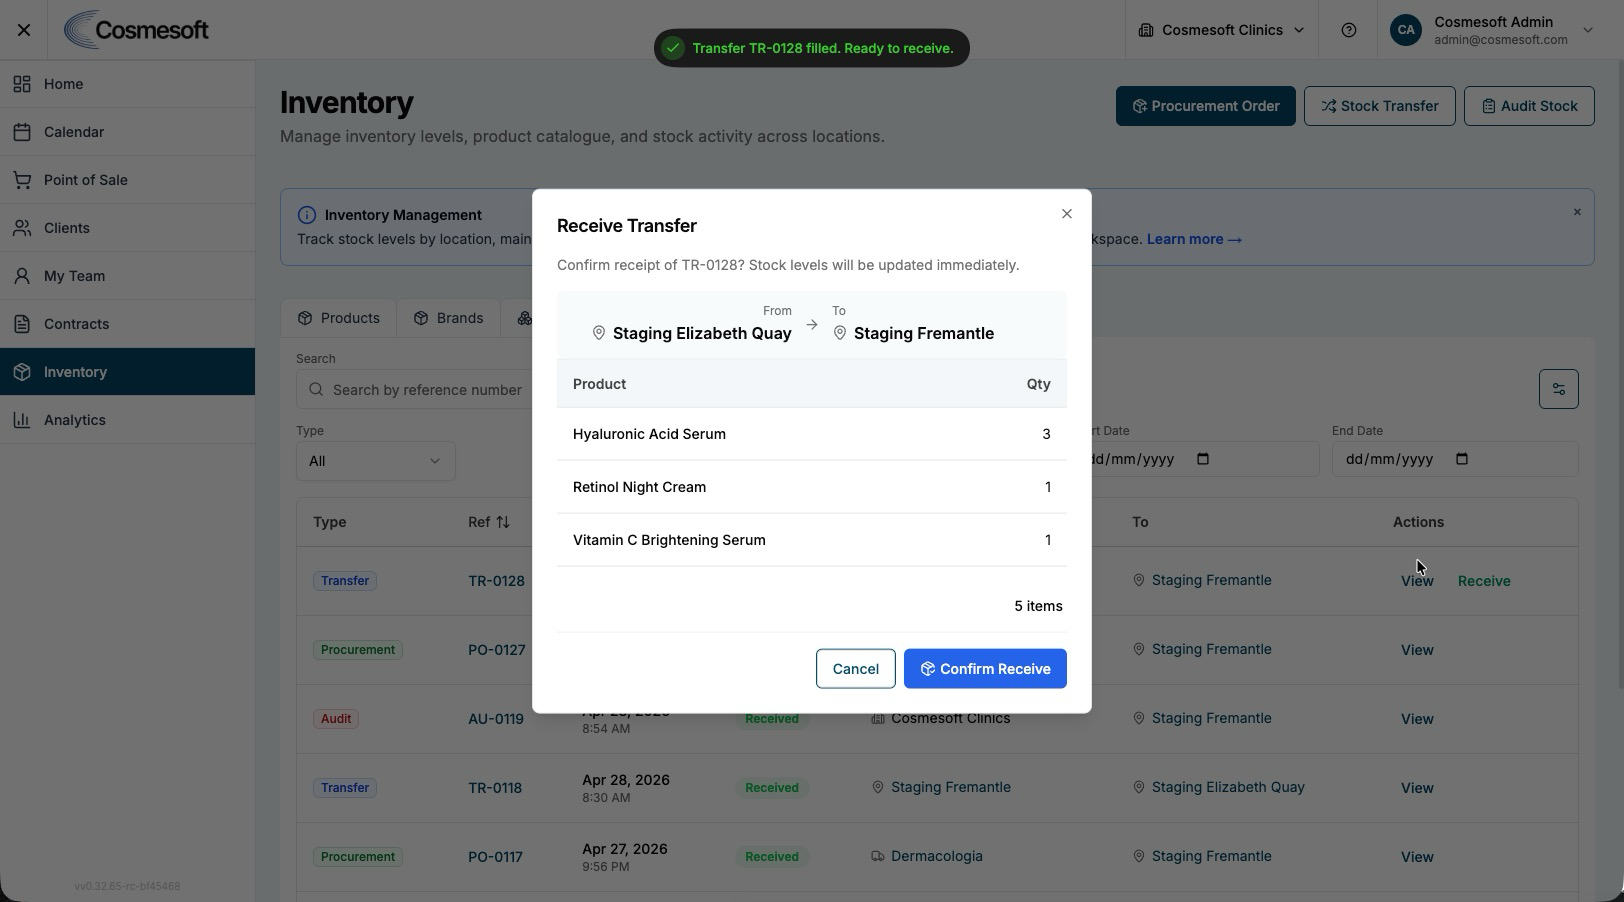
- Now click Receive
- Click Confirm Receive.
Note: Stock is deducted from the source and added to the destination once the Confirm Fill is finalised.
Step 5 — Perform a physical stock audit (Stocktake)
- Go to Sidebar > Inventory > Audit Stock.
- Select the Location you are auditing.
- The system will display the current Expected levels for all products.
- Enter the Actual Quantity found on your shelves.
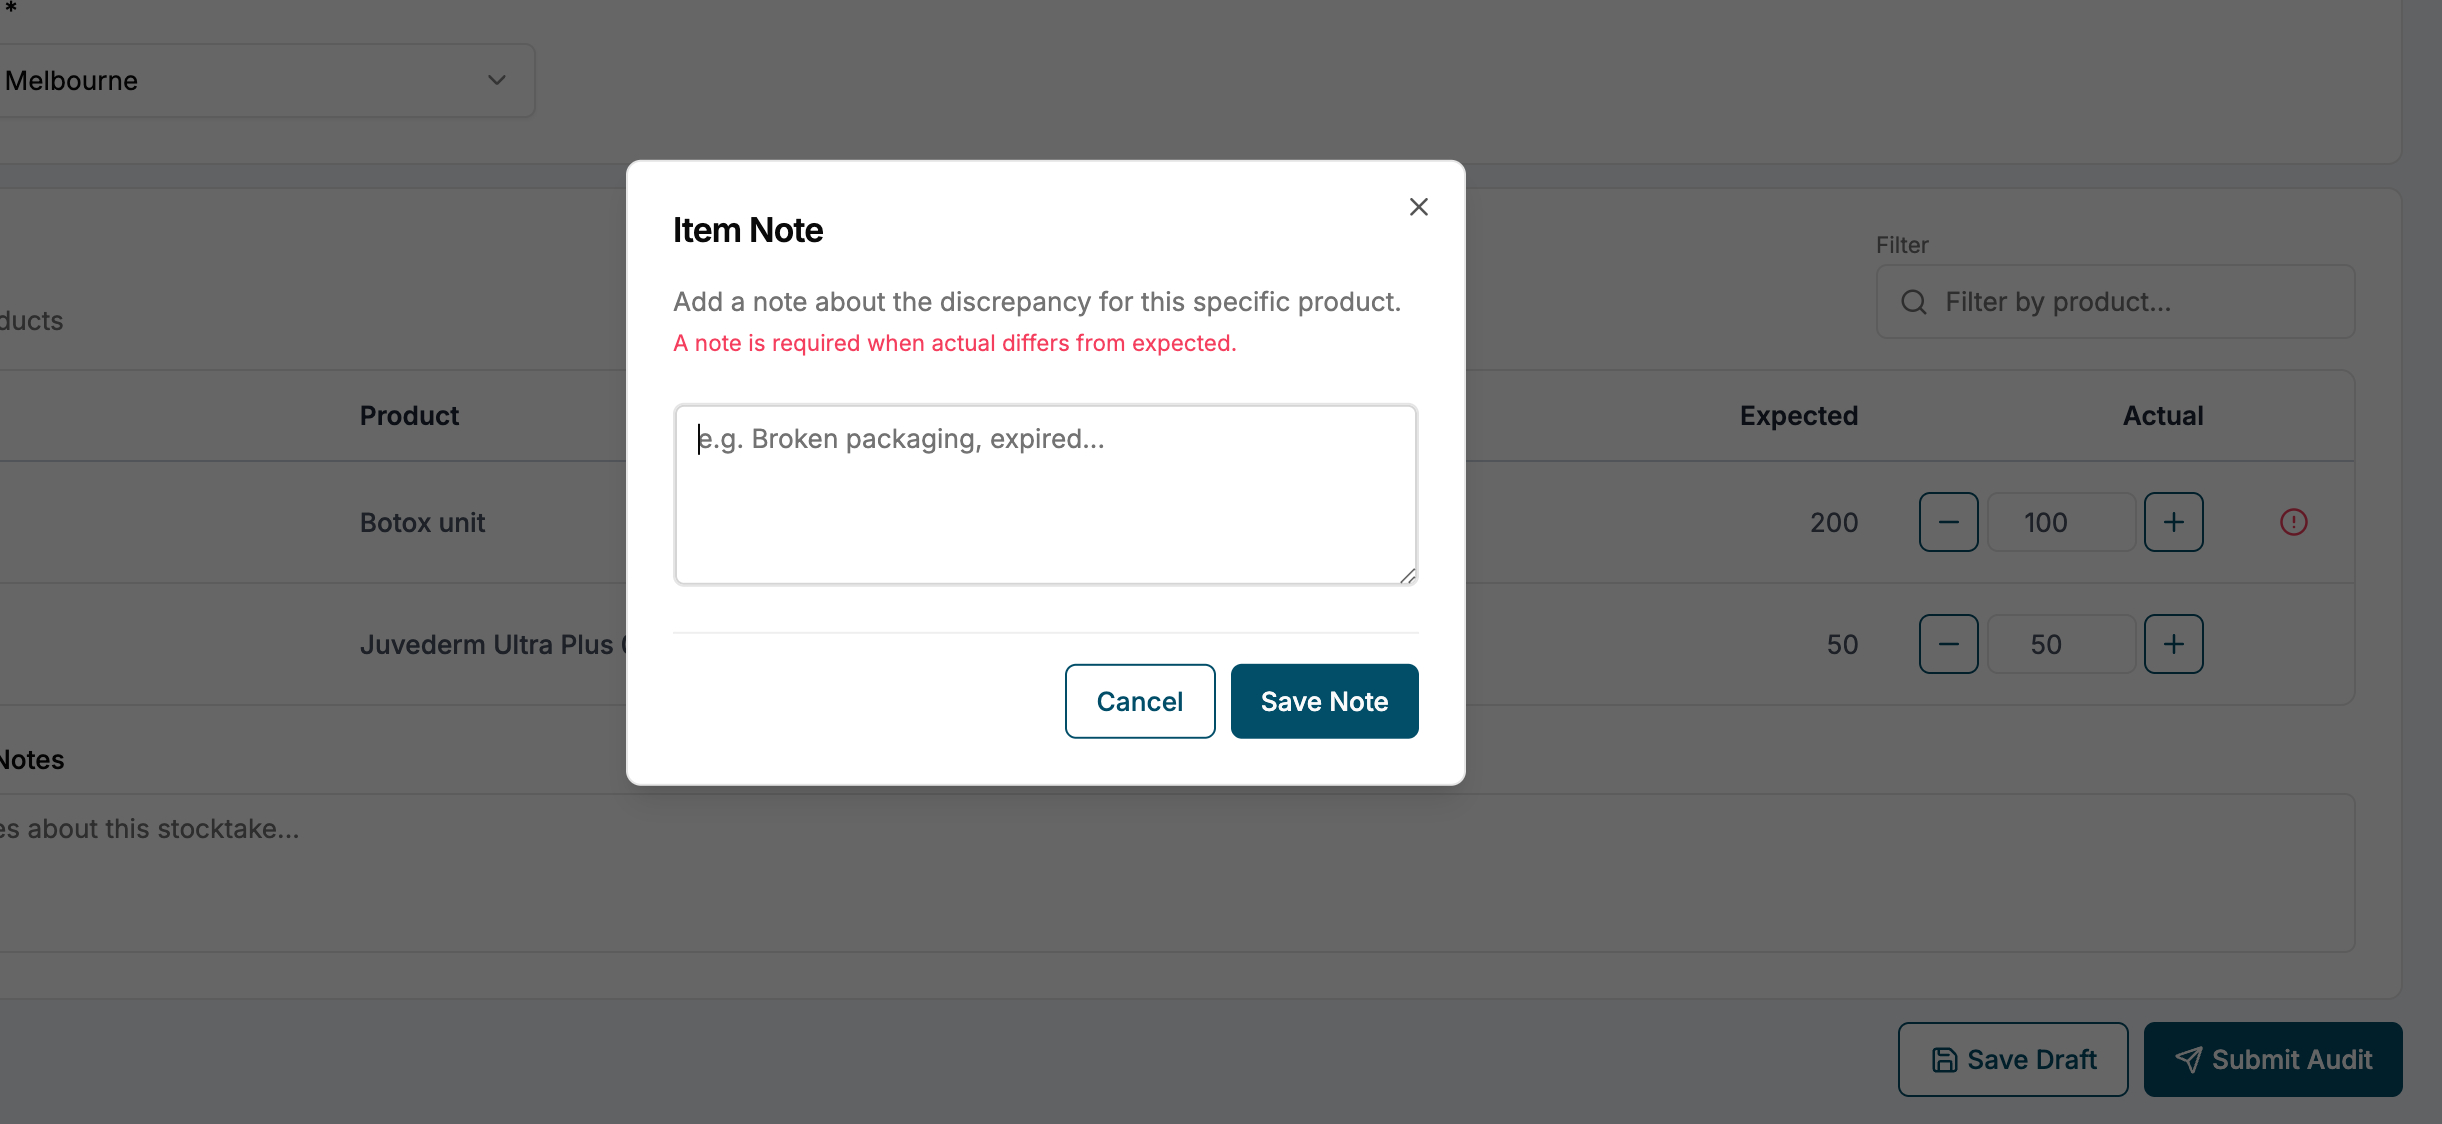
- If the Actual Amounts do not match the Expected Amounts, add an Item Note for each product with a discrepancy. Access this by hovering over the space beside the Actual column and selecting the dialogue icon. You can also add further notes in the Internal Audit Notes at the bottom.
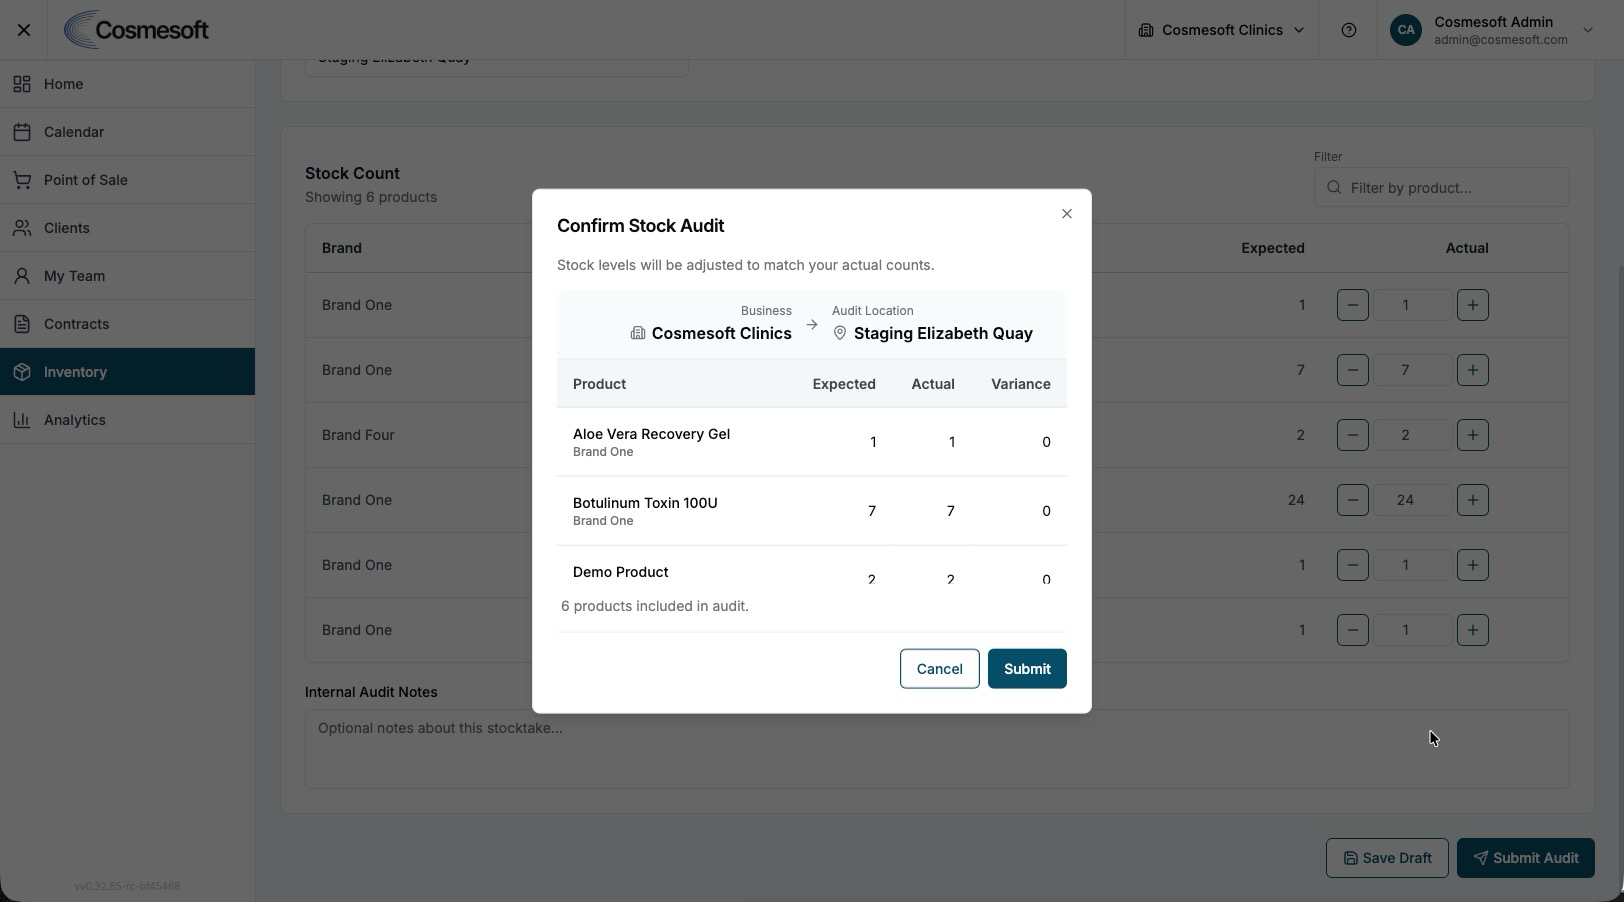
- Click Submit Audit to update your digital records to match the physical count.
What to do next
- Learn how to manage individual stock levels.
Last updated: 9/5/26, 1:02 AM