
How to perform a clinical consultation
How to perform a clinical consultation
Use this guide to record treatment notes, complete compliance work and prepare a consultation for sign-off.
Where to start
For a scheduled appointment:
- Open Calendar.
- Select the client's appointment.
- Select Start Consult.
For an out-of-band treatment, use Quick Consult. Quick Consult can use any available non-internal clinic service and is not limited to the practitioner's assigned service list.
Before you begin
Make sure:
- You have access to the client and consultation.
- You have selected the correct location.
- You know which treatment or service you are recording.
Step 1 — Record the treatment
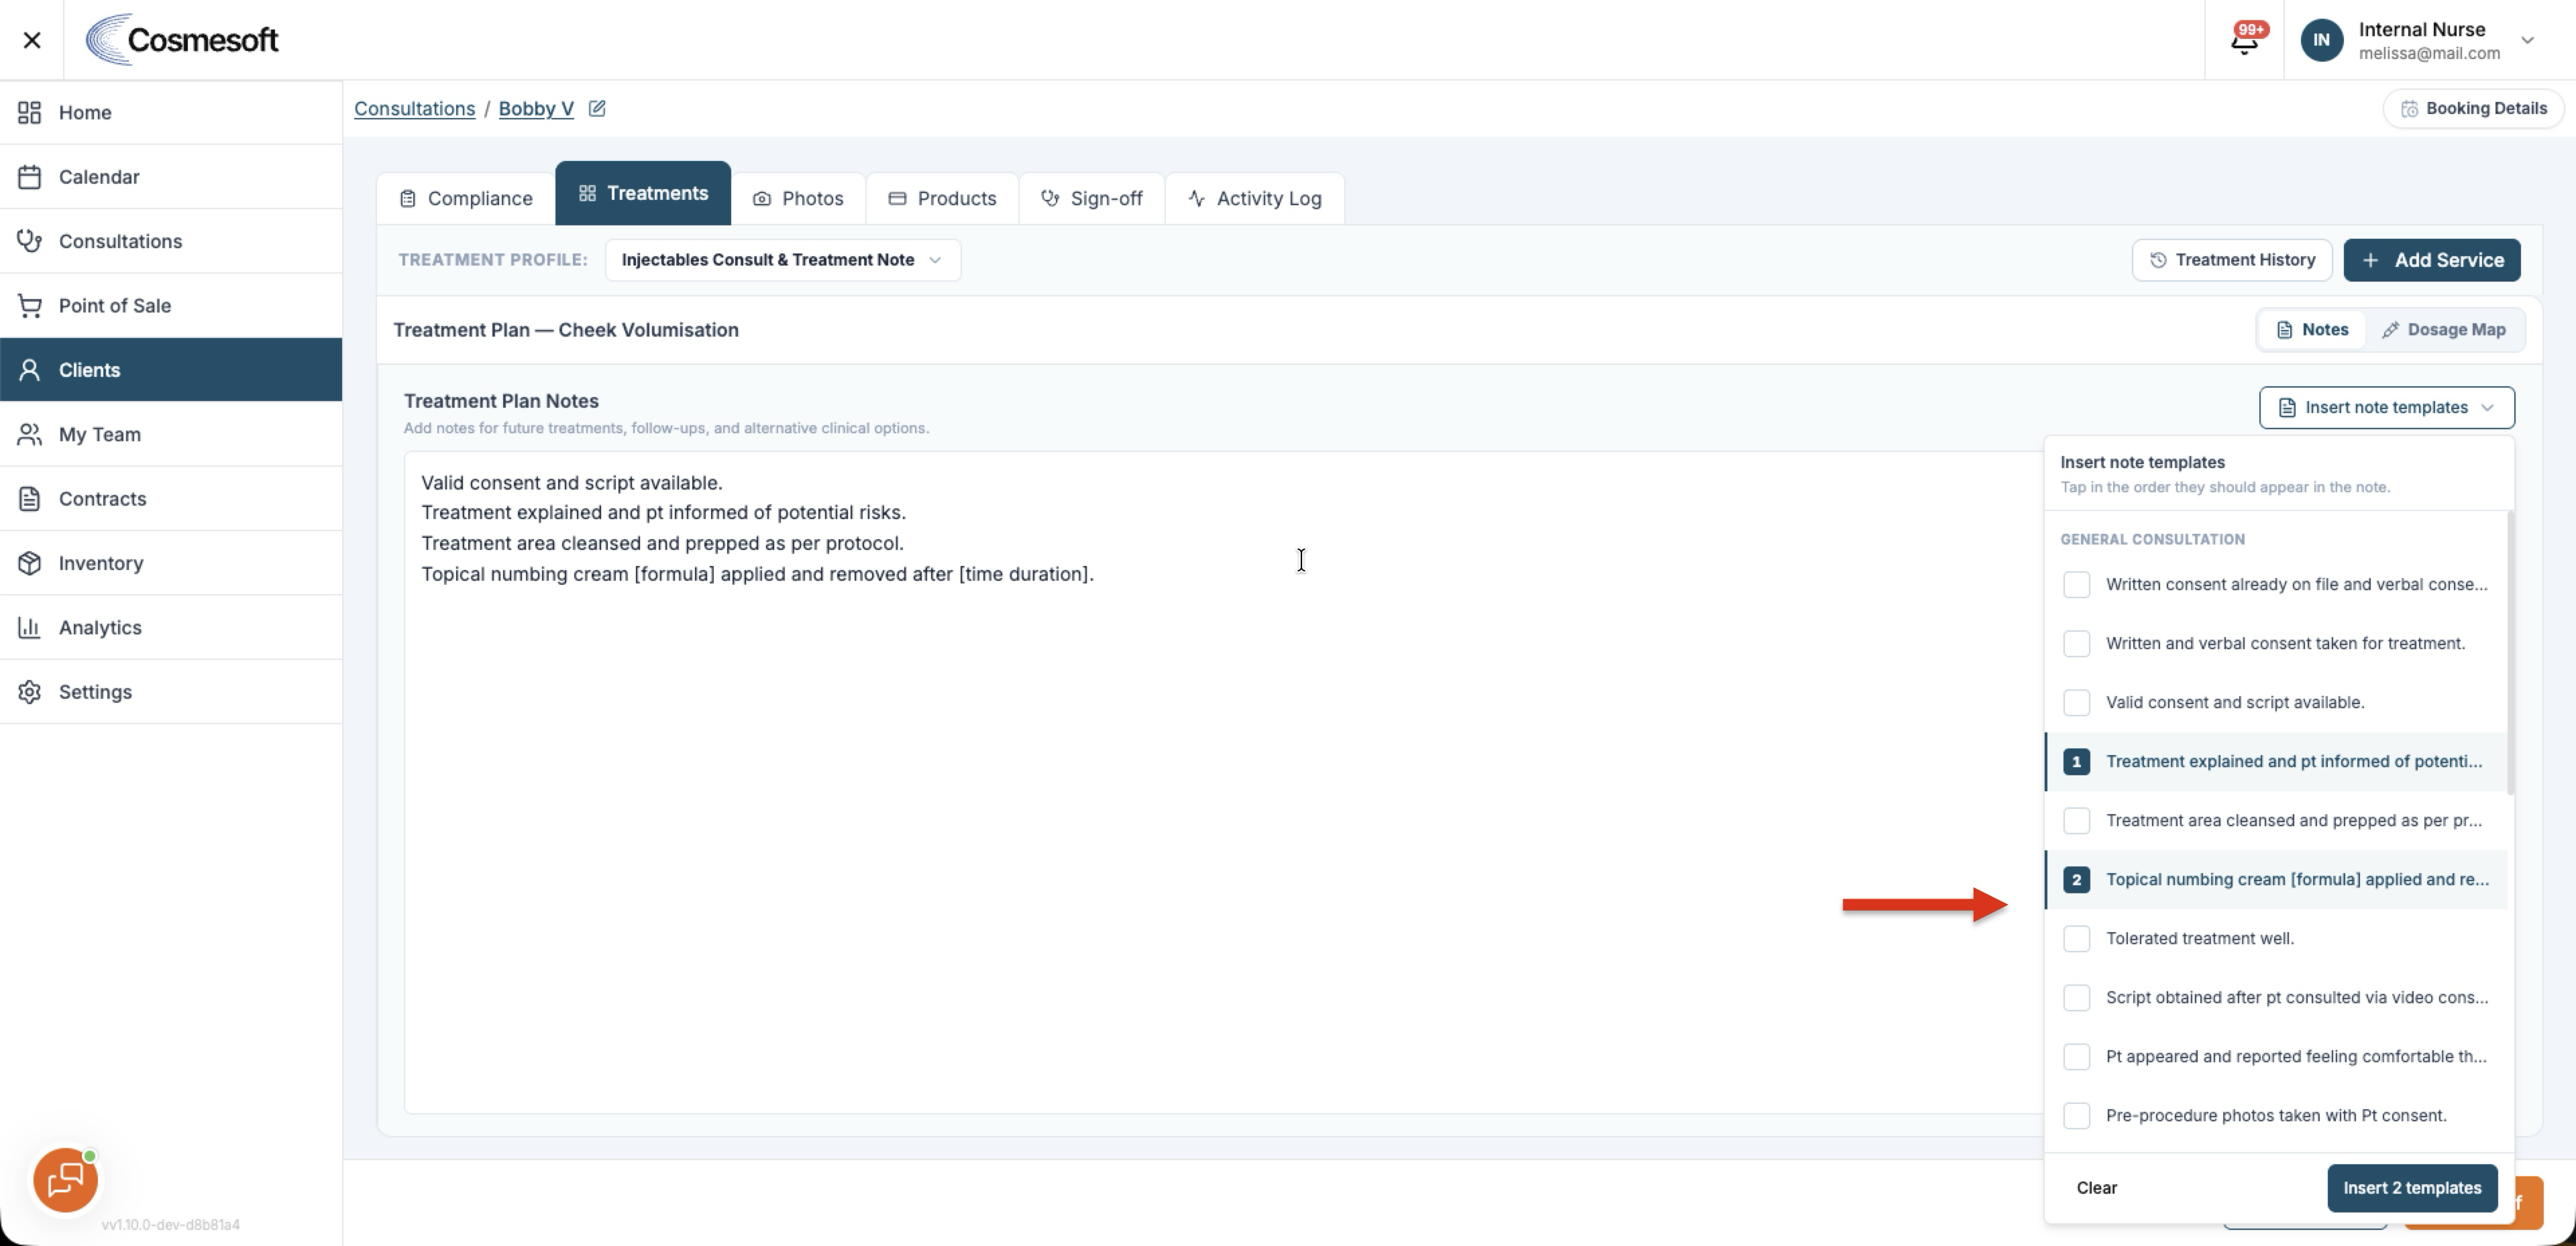
Open Treatments and select the treatment or service you are working on.
Record the clinical note and required treatment details.
For Injectables:
- The configured Injection Notes Template may provide starting prompts.
- You can insert several saved note templates together.
- Templates are inserted in the order you select them.
- Product selectors show In stock, Out of stock or Not stocked.
- A product can still be recorded clinically when it is not stocked at that location.
See How to configure an Injection Notes Template.
Step 2 — Complete the dosage map
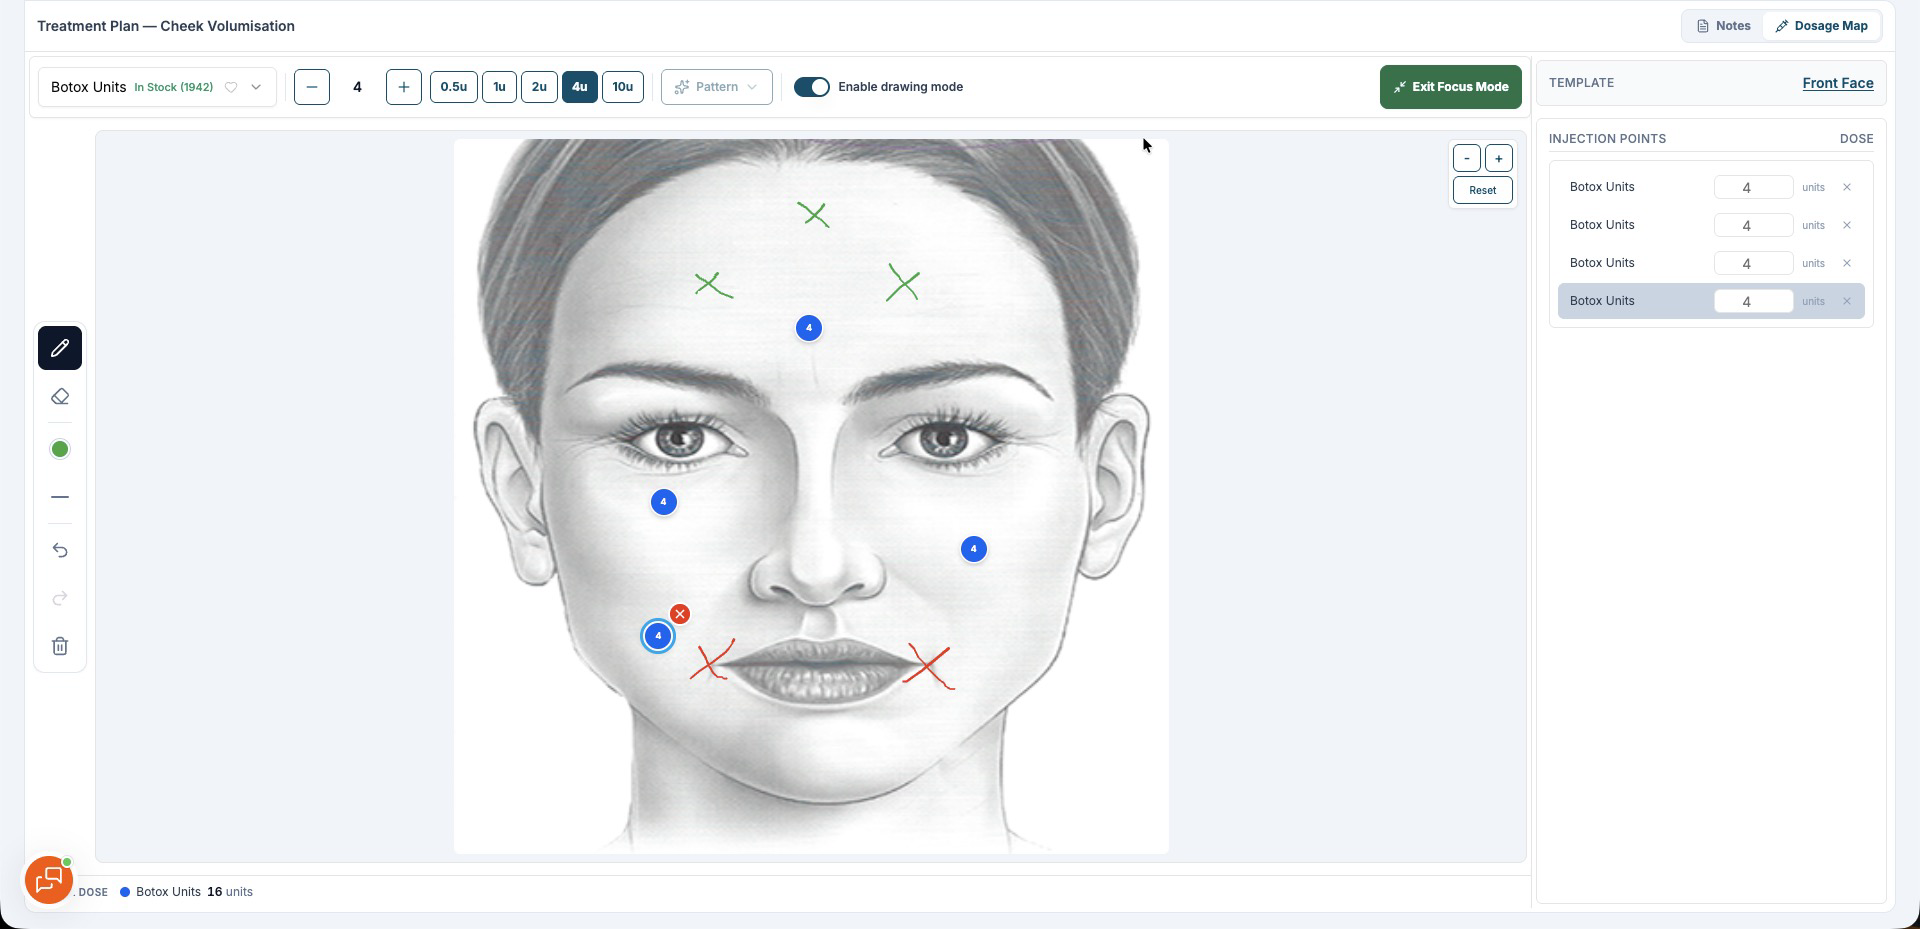
When charting Injectables:
- Select the product.
- Add dose points to the dosage map.
- Check the running Total dose for each product.
- Turn on drawing mode when you need to annotate the map.
- Use the pen, eraser, colour and undo controls as required.
- Turn drawing mode off before adding more dose points.
- Use Focus Mode when you need a larger charting area.
The product toolbar remains available while you work lower on the face.
Step 3 — Review Compliance
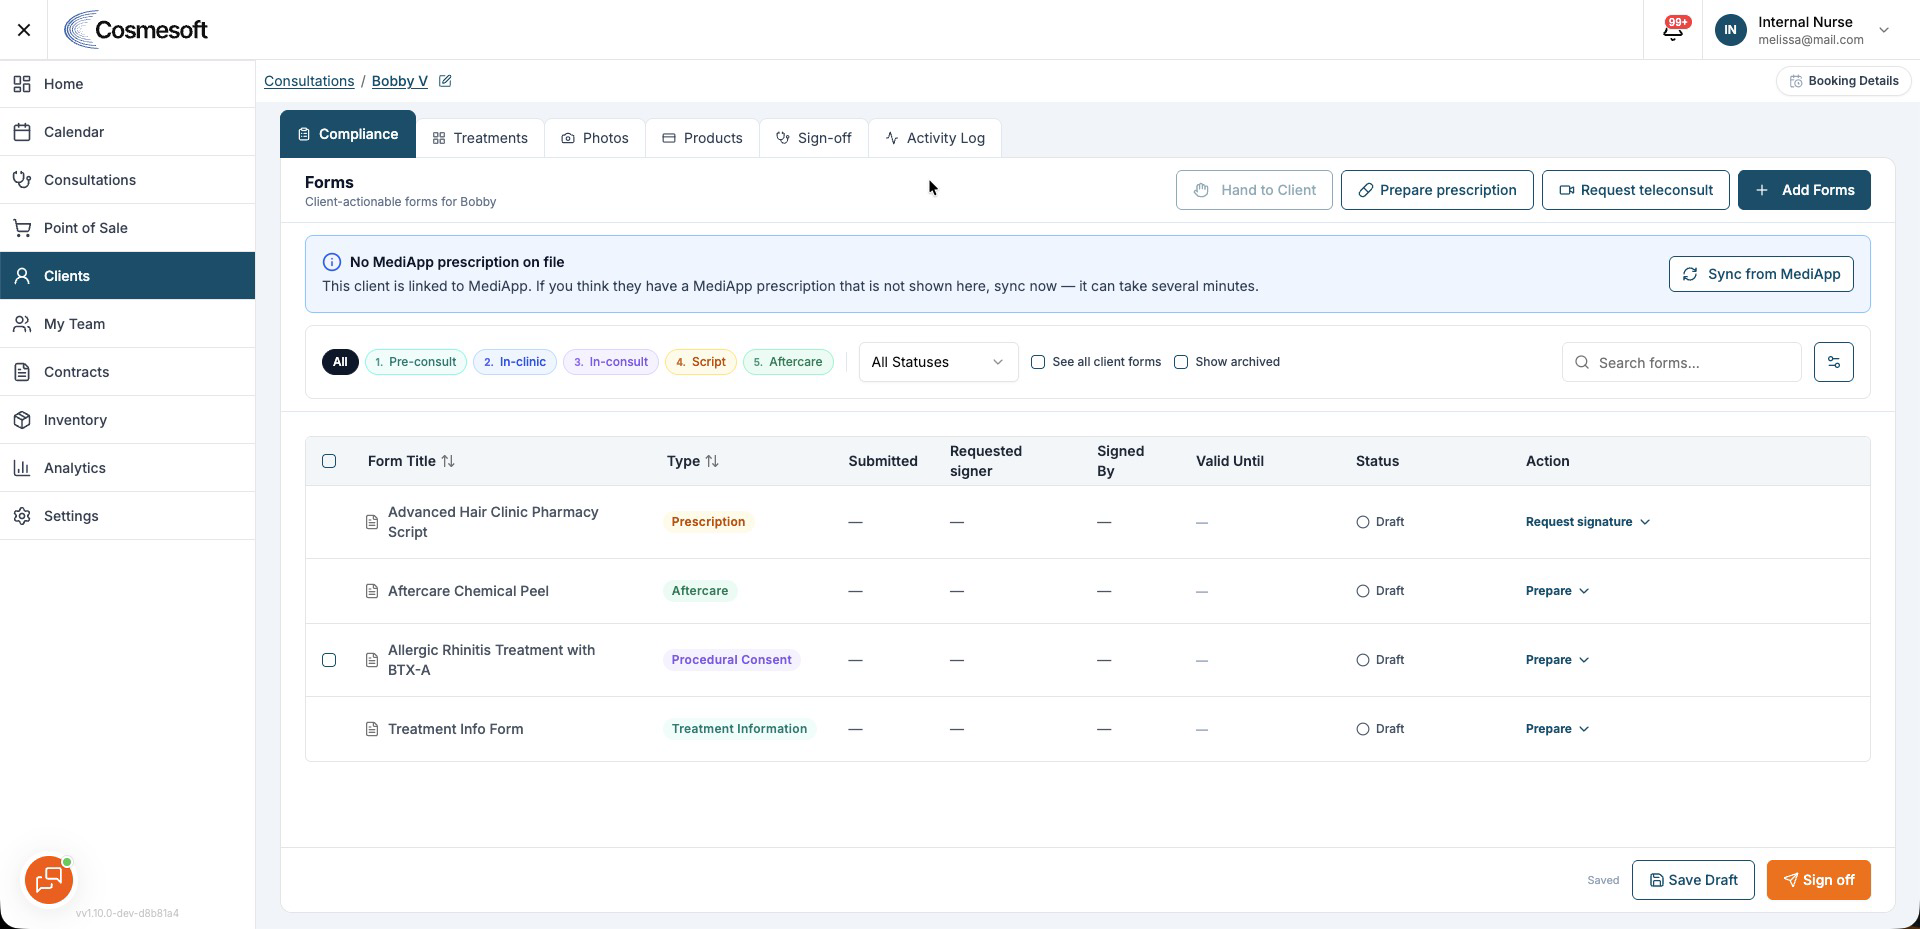
Open Compliance to review forms and prescriptions linked to the consultation.
From here you can:
- Review completed and outstanding forms.
- Add another form when required.
- View archived paperwork.
- Prepare or request a prescription.
- Check prescription status.
If the client is linked to MediApp and an expected prescription is not showing, use Sync from MediApp from the prescription banner.
See How to request and review a prescription.
Step 4 — Complete review or prescribing work when required
If the treatment needs clinical review or prescribing:
- Select the required supervisor or prescriber.
- Send the request.
- Continue your part of the consultation while the request is being reviewed.
Prescription requests sent to a prescriber appear in Scripts to Sign for users with Can prescribe enabled.
Step 5 — Review Sign-off
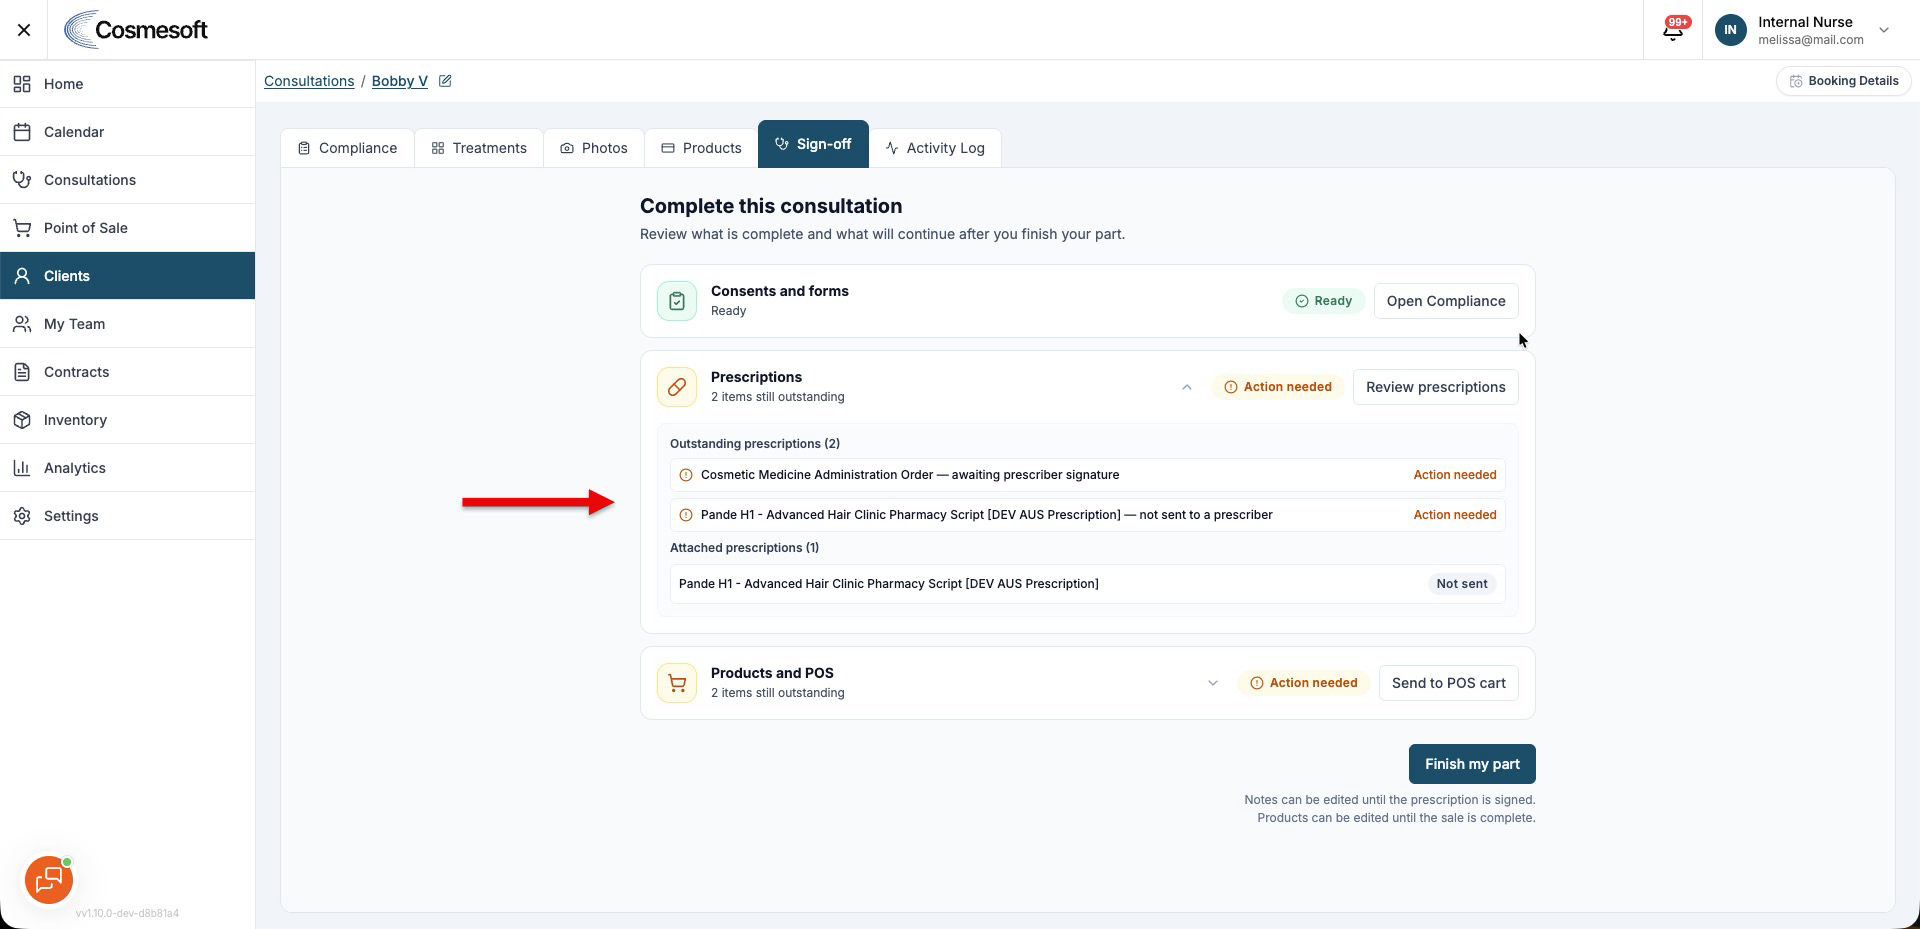
Open Sign-off before completing the consultation.
Sign-off summarises anything that still needs attention.
Complete the required items, or select Finish my part when your work is complete and another authorised person still needs to act.
Step 6 — Complete the consultation
Review the treatment note, products, dosage map, forms, prescription status and sign-off state.
Finalise the consultation when the required work is complete.
Treatment and billing information can then continue to POS.
If you need to correct a completed consultation
Do not create a duplicate consultation just to correct the record.
Use Reopen for amendment on the finalised consultation.
Cosmesoft records the amendment and warns you if the related cart has already reached POS or the sale has been paid.