
How to manage products
How to manage and search products
Use this guide to add new items to your clinic’s inventory, maintain accurate product details, and use filters to quickly locate stock.
For a high-level explanation of how products are structured, see About Products
Where to find Products
- Navigate to Inventory in the main sidebar.
- Click the Products tab.
From here, you can view your full business-wide catalogue and perform bulk actions.
Before you begin
Make sure:
- You have Admin or Manager access to edit the business catalogue.
- You have your Supplier and Brands setup. See below for instructions.
- You have the product's SKU if you plan to record this information.
Step 1 — Setup your supplier list
- Navigate to the top right Navigation Menu > Settings > Suppliers.
- The list displays existing supplier information, which you can filter by searching the name or toggling the columns.
- To add suppliers, select +Add Supplier.
- Enter the supplier’s information and select Save Supplier.
Step 2 — Setup your Brands list
- Navigate to Inventory in the main sidebar.
- Click the Brands tab.
- The list shows existing brand information, which you can search by name.
- Select Edit to update a brand’s name or linked supplier.
- To add brands, select +Add Brand.
- Enter the brand name and connected supplier, then select Save Brand.
Step 3 — Add new products
After setting up suppliers and brands, you will have the correct information to set up products.
- Navigate to Inventory in the main sidebar.
- Click the Products tab.
- Before adding a new product, check if it already exists to avoid duplicates. Use the search bar, brand/supplier filters, and column selector to quickly find, sort, and customise the product information shown.
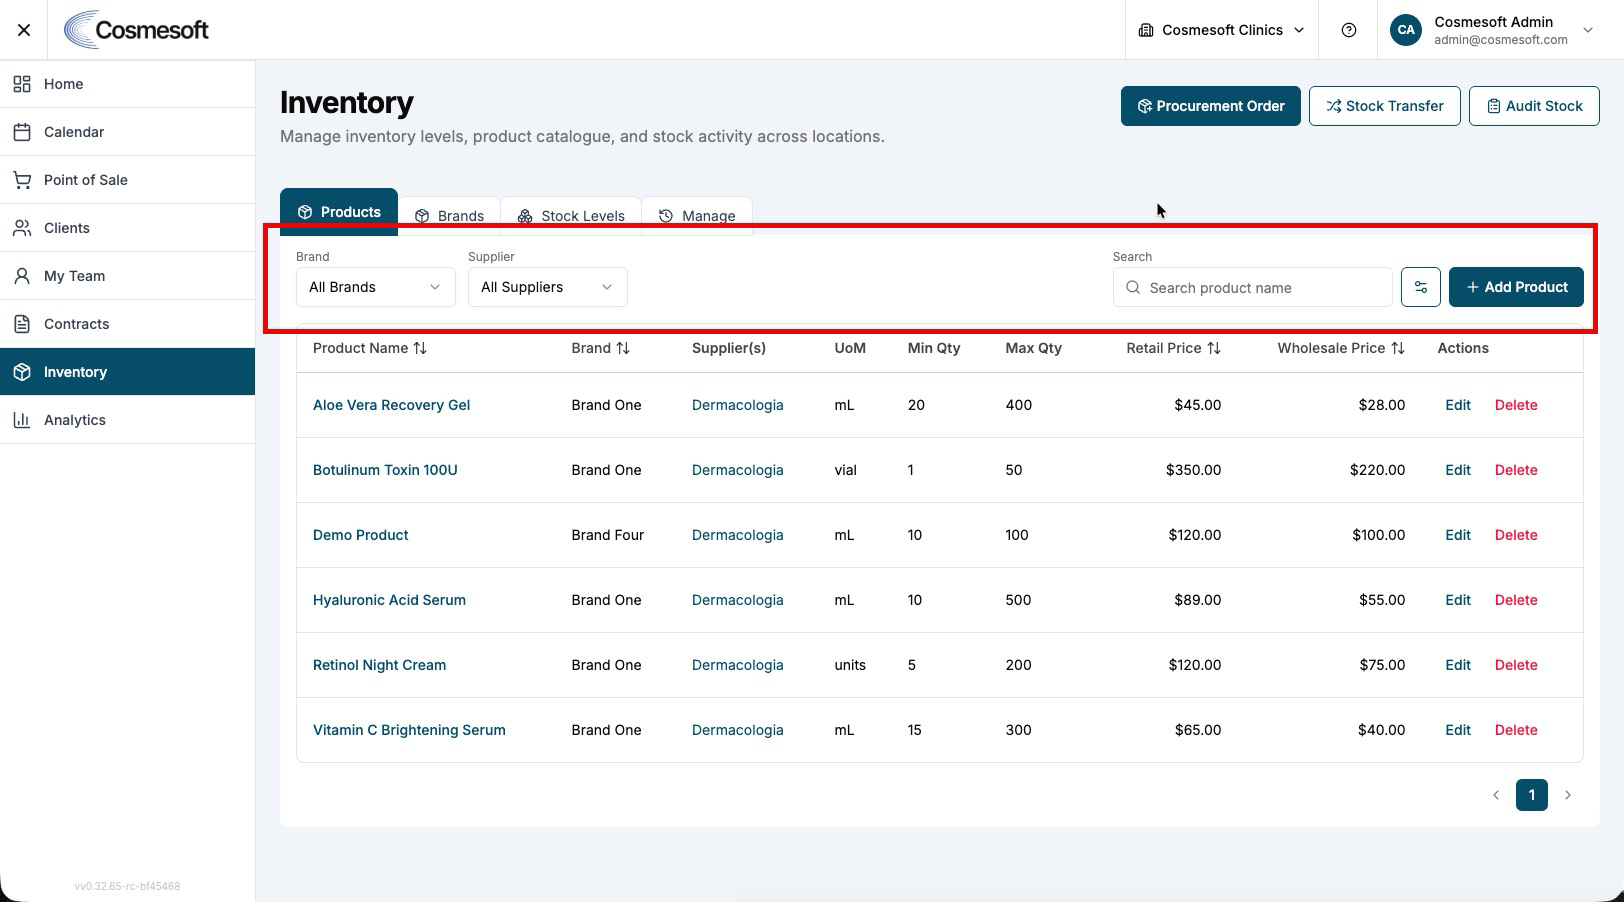
- Click + Add Product in the top-right corner.
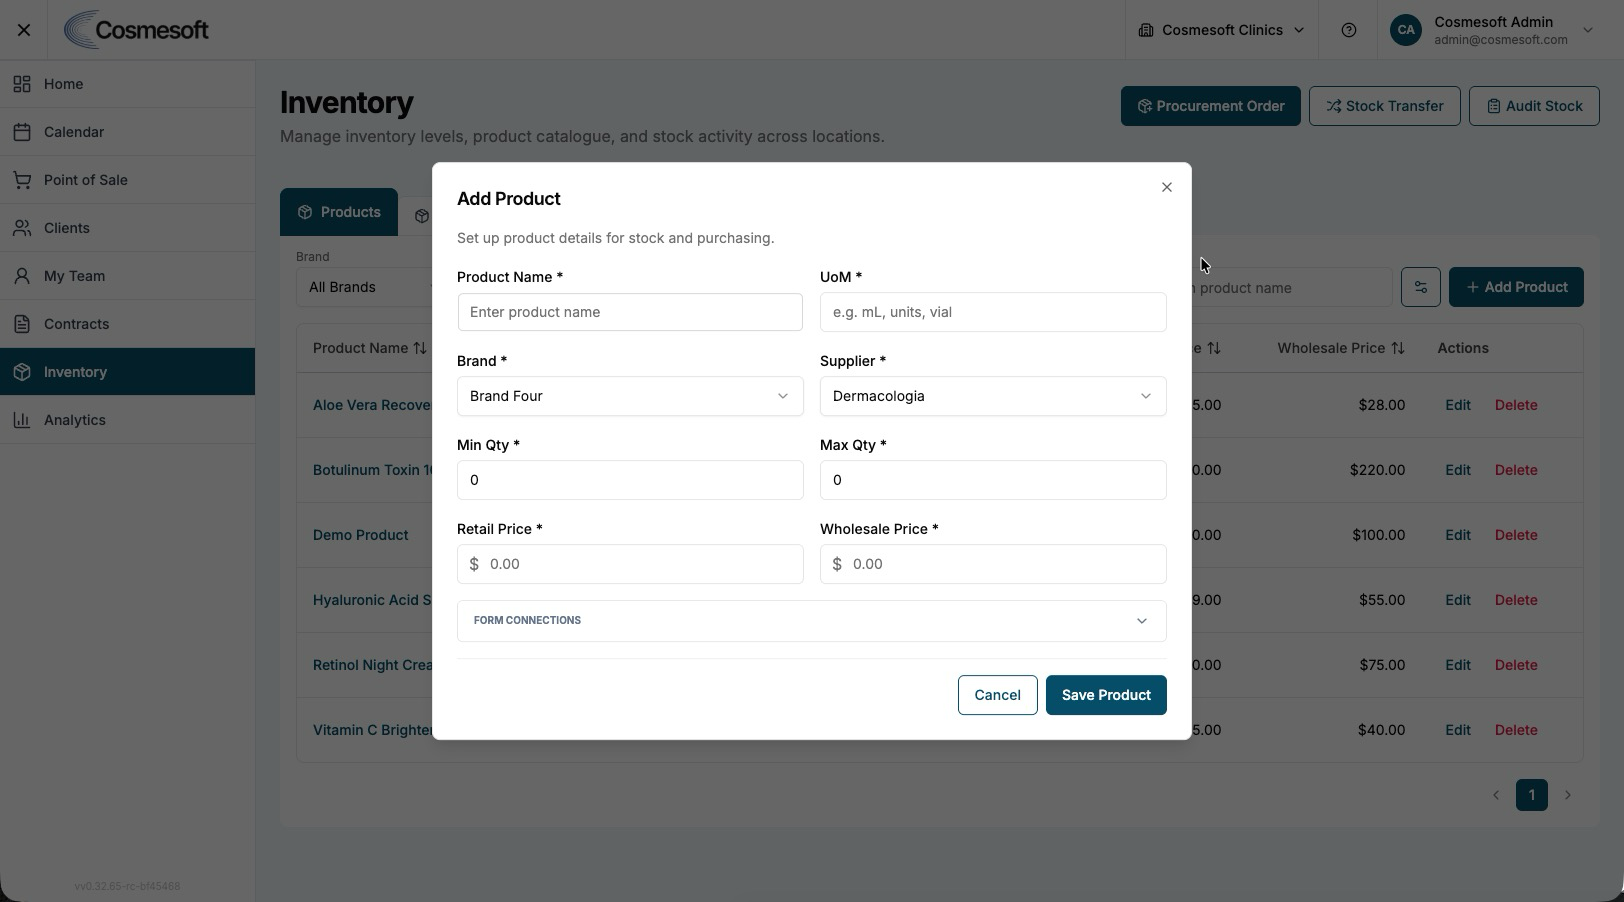
- Fill in the General Details:
- Product Name — How the item appears in search results and client receipts.
- UoM (Unit of Measurement) — How the product is measured, e.g. ml, units.
- Brand — Link the product to its parent brand. See Step 2 if not done yet.
- Supplier — Link the product to its supplier. See Step 1 if not done yet.
- Minimum and Maximum Quantities— Set supply quantities to receive alerts when the product is outside your ideal range.
- Retail and Wholesale Prices— Set wholesale and retail prices for the product.
- GST Configuration— Set the product price as standard GST, GST free, or GST included.
- Form Connections - Set form connections to automatically send relevant forms when the product sells.
- Click Save Product.
Step 4 — Edit or Update existing items
- Locate the product in the list of Products and click Edit.
- Update any fields that have changed (e.g., updating a description or changing the supplier).
- Click Save.
Note: To remove an item that you no longer stock, use the Delete option. Be aware that deleting a product is permanent and will remove it from all future POS selection lists.
What to do next
- Review your live Stock Levels to update your physical quantities.
- Set up automated procurement orders for your suppliers.
Last updated: 9/5/26, 12:56 AM