
How to manage Shared Access for a Clinical Collaborator
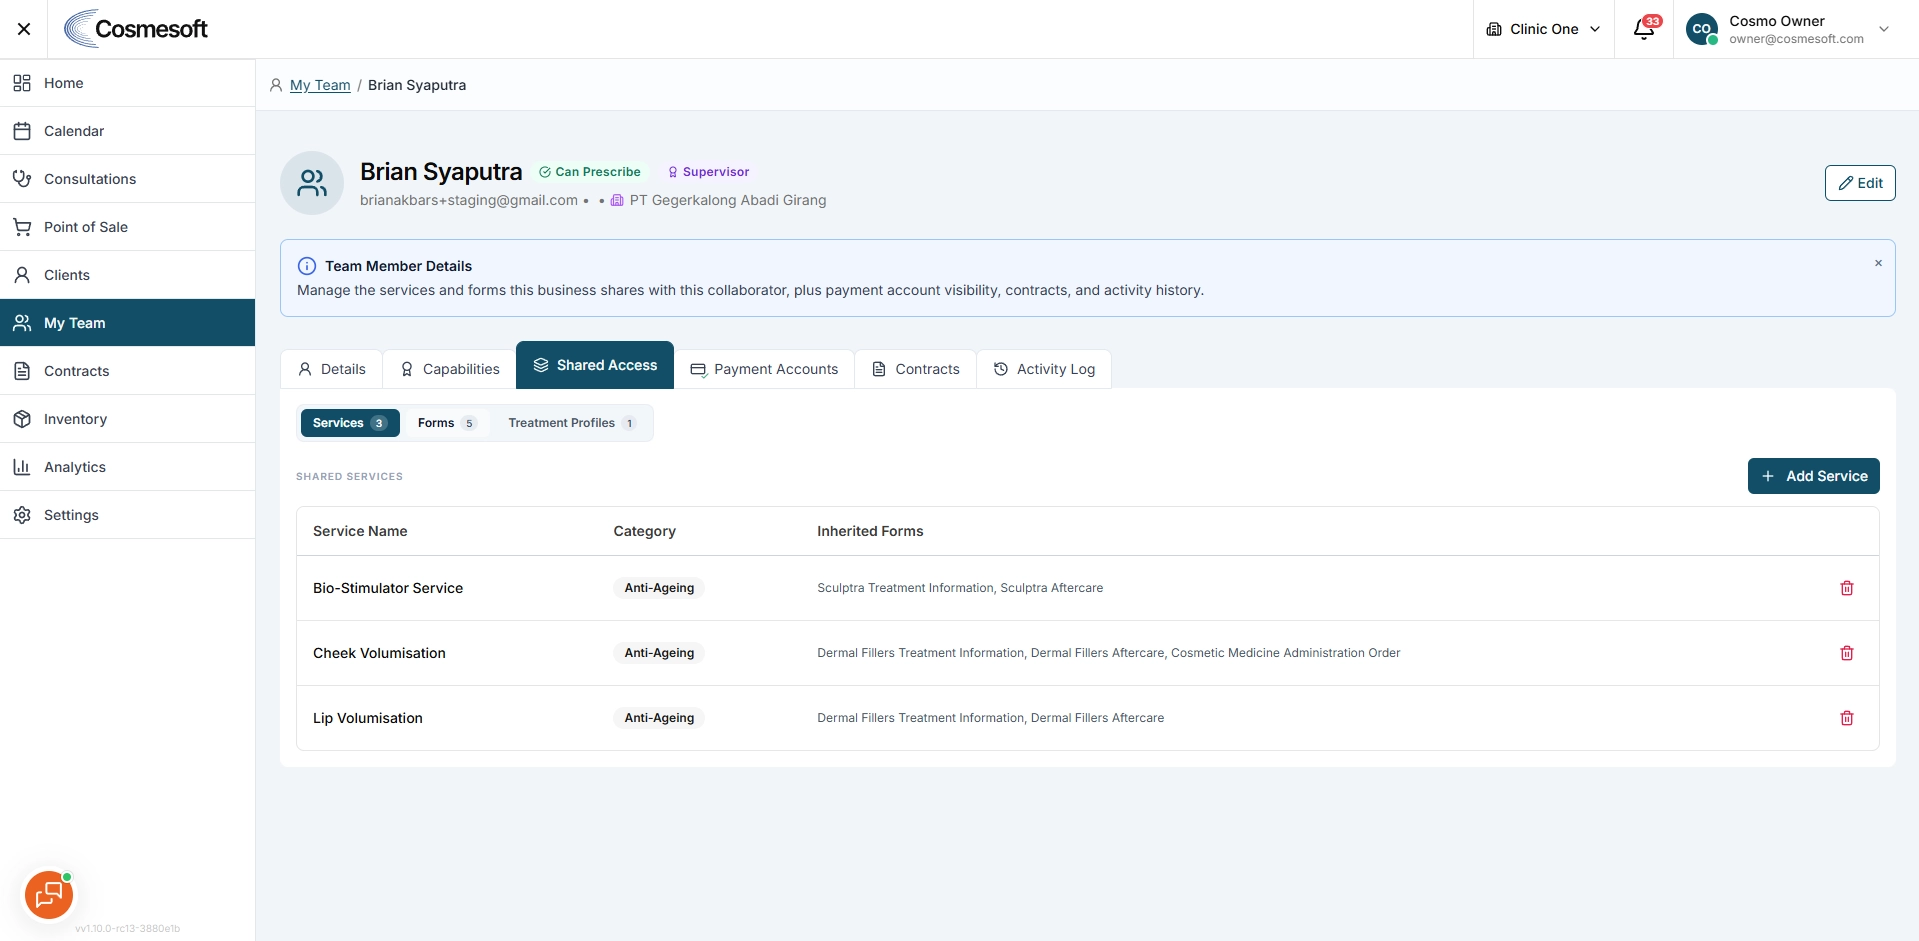
Use Shared Access to control which services, forms and treatment profiles a Clinical Collaborator can use for your clinic.
Where to find Shared Access
Open My Team, select the Clinical Collaborator, then select Shared Access.
Before you begin
- Confirm that you selected the correct team member.
- Check that the person is linked as a Clinical Collaborator.
- Prepare the services, forms and treatment profiles they need.
Step 1 – Choose the access type
Select one of these tabs:
- Services
- Forms
- Treatment Profiles
The number beside each tab shows how many items are currently shared.
Step 2 – Share services
Open Services and select Add Service.
Choose the services the collaborator can provide for your clinic, then save the selection.
Step 3 – Share forms
Open Forms and select Add Form.
Choose the additional forms the collaborator needs, then confirm the selection.
Some forms may already be available through a shared service or treatment profile.
Step 4 – Share treatment profiles
Open Treatment Profiles and select Add Treatment Profile.
Choose the required profiles, then save the selection.
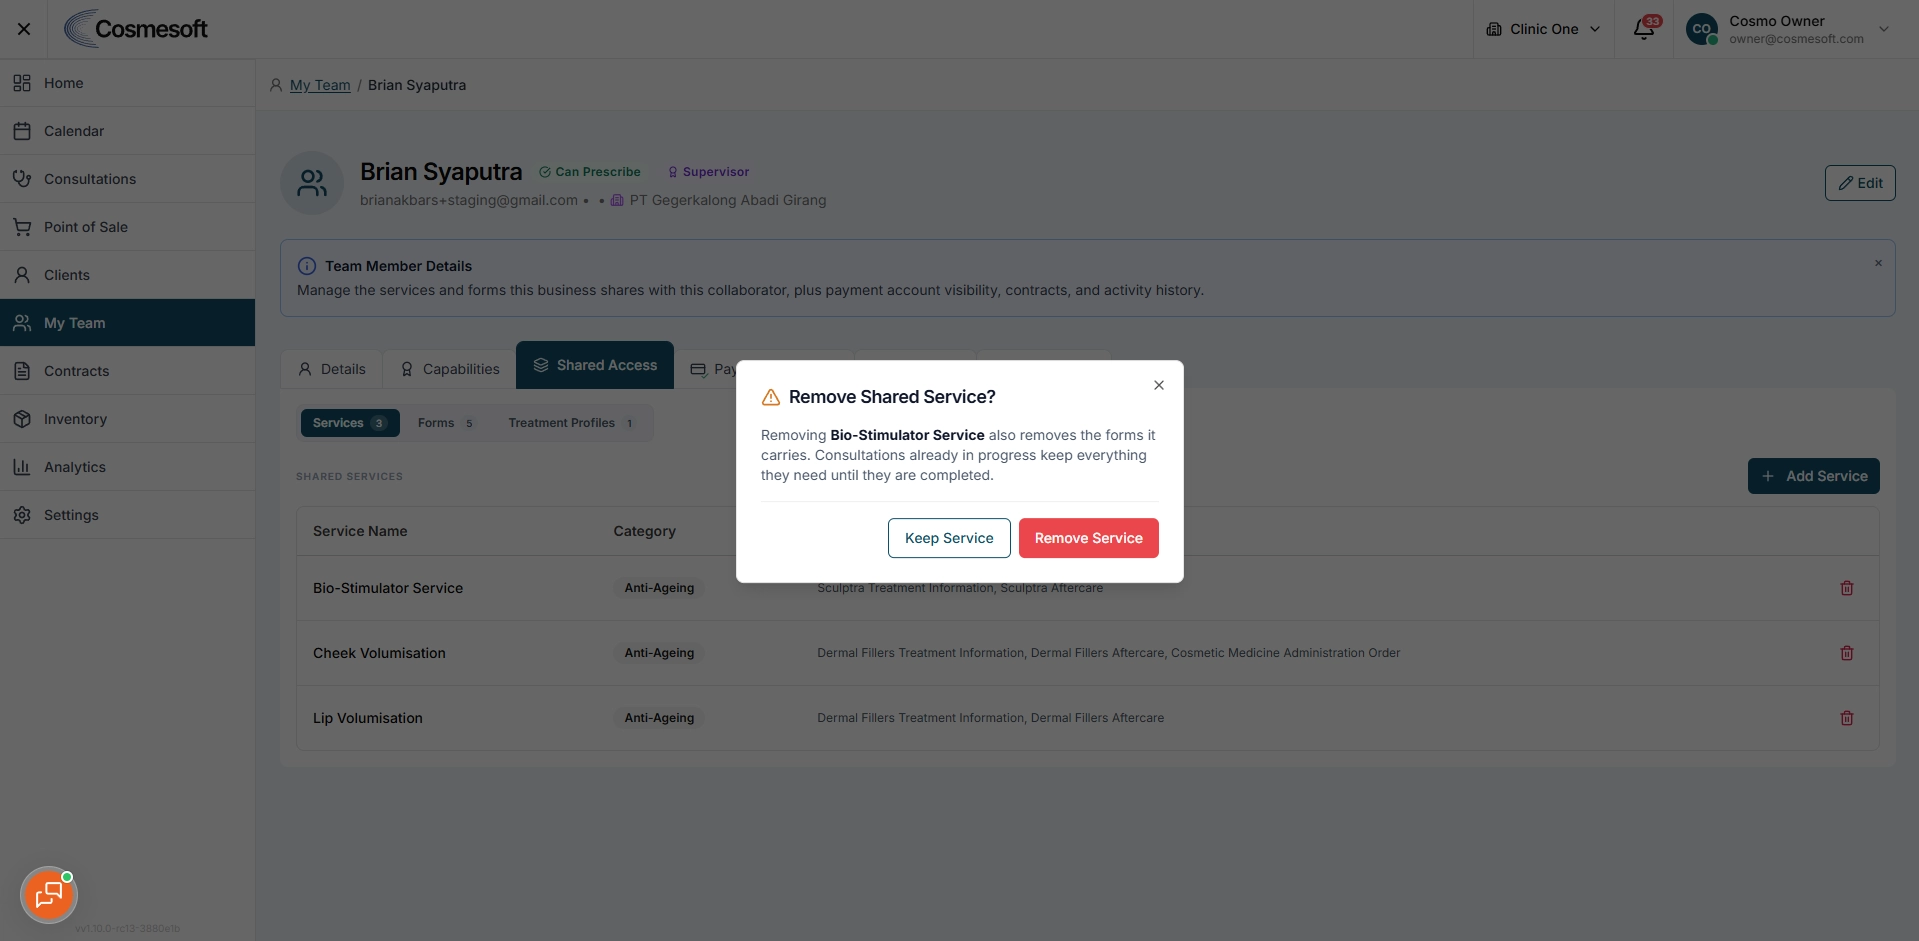
Step 5 – Remove access when required
Select the remove action beside a shared item.
Review the confirmation before removing it. Removing access stops future use of the item. It does not remove completed historical work.
What to do next
Ask the collaborator to reopen their consultation workspace and confirm that the expected services, forms and treatment profiles are available.