
How to manage client forms
Use this guide to add, customise, and automate the digital forms your clients complete.
For a high-level explanation of how forms work, see About Client Forms.
Where to find Client Forms
- Open the profile menu in the top-right corner.
- Click Settings.
- On the Settings page, click the Client Forms card.
Before you begin
Make sure:
- You have Admin or Manager access to modify settings.
- You have a list of services or products you want to link to specific forms.
- You have your clinic’s legal consent language ready.
Step 1 — Add a new form template
- From the Client Forms list, click + Add Form.
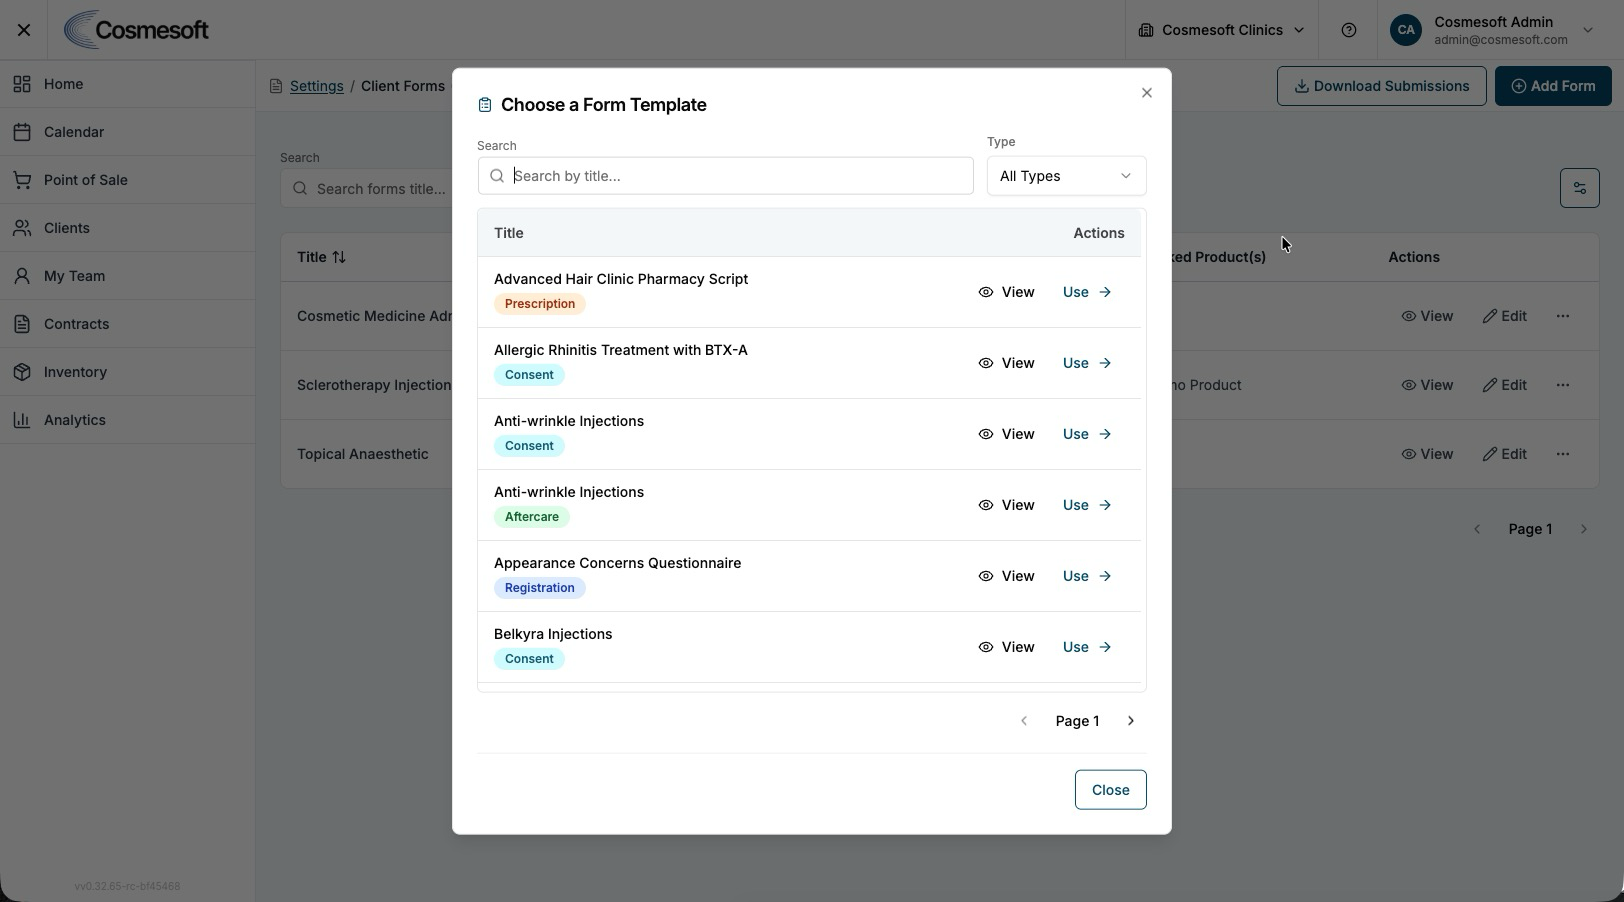
- Browse the template library and find a form that matches your needs (eg. "Initial Consultation").
- Select View to display a copy of the form.
- Click Use to create a copy of the form for your business.
Step 2 — Customise form fields
- Find your form in the list and click the Edit button to show editable fields.
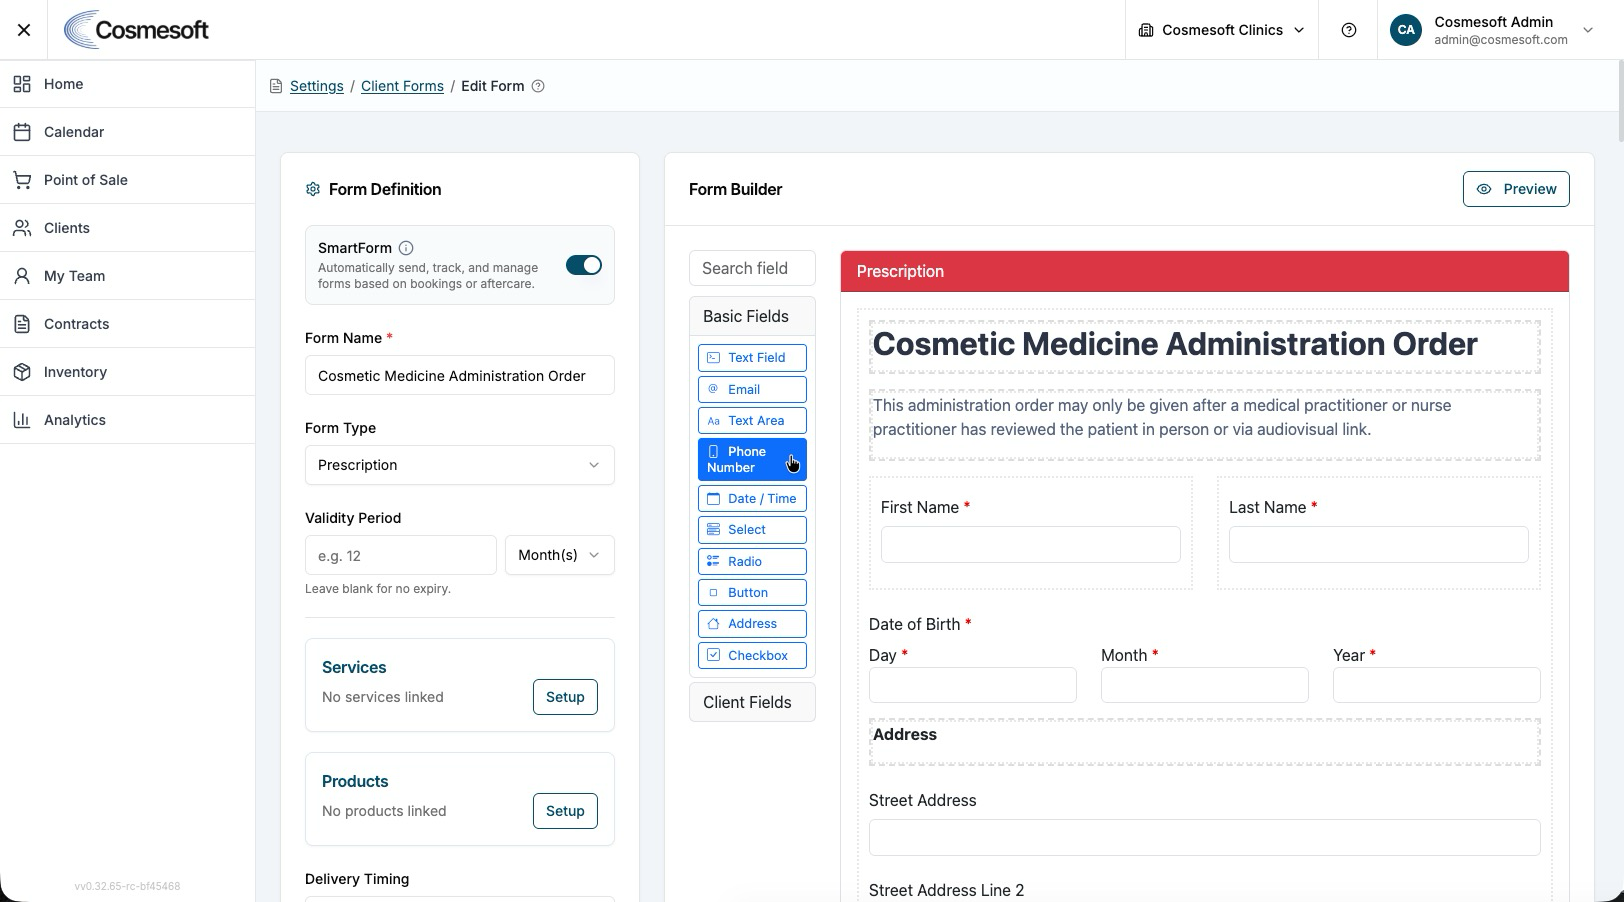
- The Form Name, Form Type (e.g., Consent, Aftercare) and Validity Period appear on the left in the Form Definition. Edit them directly as needed.
- Select existing text fields individually to access options: Edit (modify text), Move, Copy and Delete. Use these to update the title, information and descriptions.
- Add fields by dragging components (e.g., Signature, Checkbox) into the form builder.
- Rearrange fields by dragging and dropping them into a new order.
- Click Save Form.
Step 3 — Enable SmartForm automation
Trigger forms automatically based on what the client has booked.
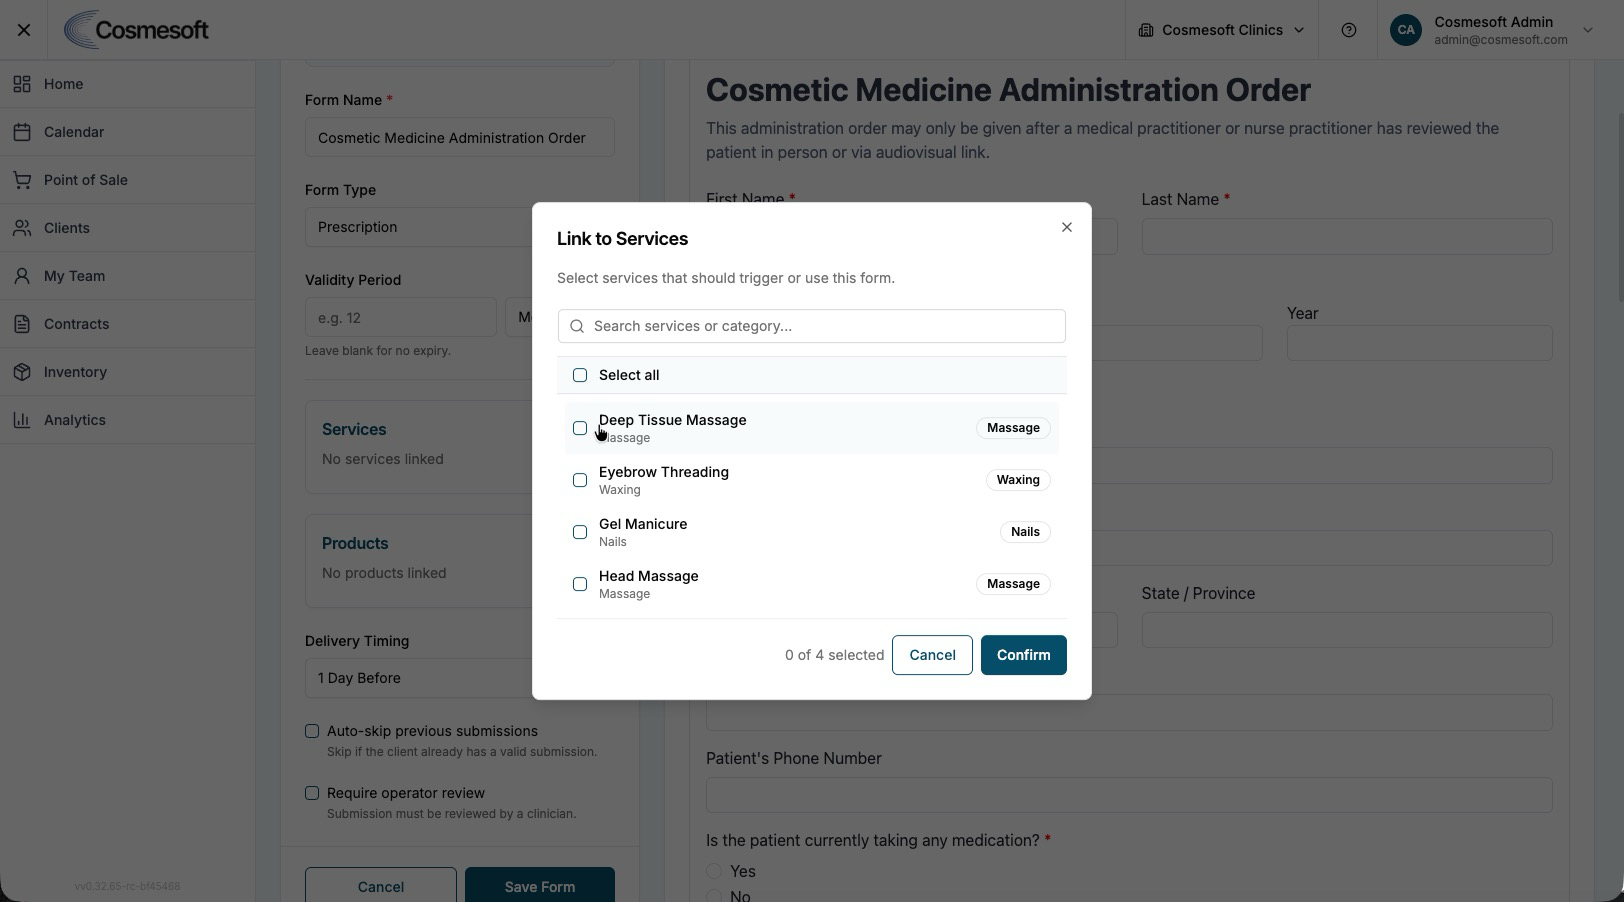
- In the Form Definition editor toggle ON the SmartForm button.
- Below the existing fields, more options will now expand.
- Click Setup in the Services section. Select any Service to link the displayed form and click Confirm. You can attach the form to multiple Services, but the timing delivery will be the same for all.
- Repeat the process with Products if needed.
- Set the Delivery Timing (e.g., "1 Day Before Visit").
- Select whether you want to apply Auto-skip previous submissions and Require operator review options.
- Click Save Form.
Step 4 — Edit or Delete Forms
- Once created, a form will appear in the forms list. The columns categorise the form name, type, linked services, linked products and Actions.
- Select Edit under Actions to modify the form.
- Select Delete to remove a form.
Step 5 — Download completed submissions
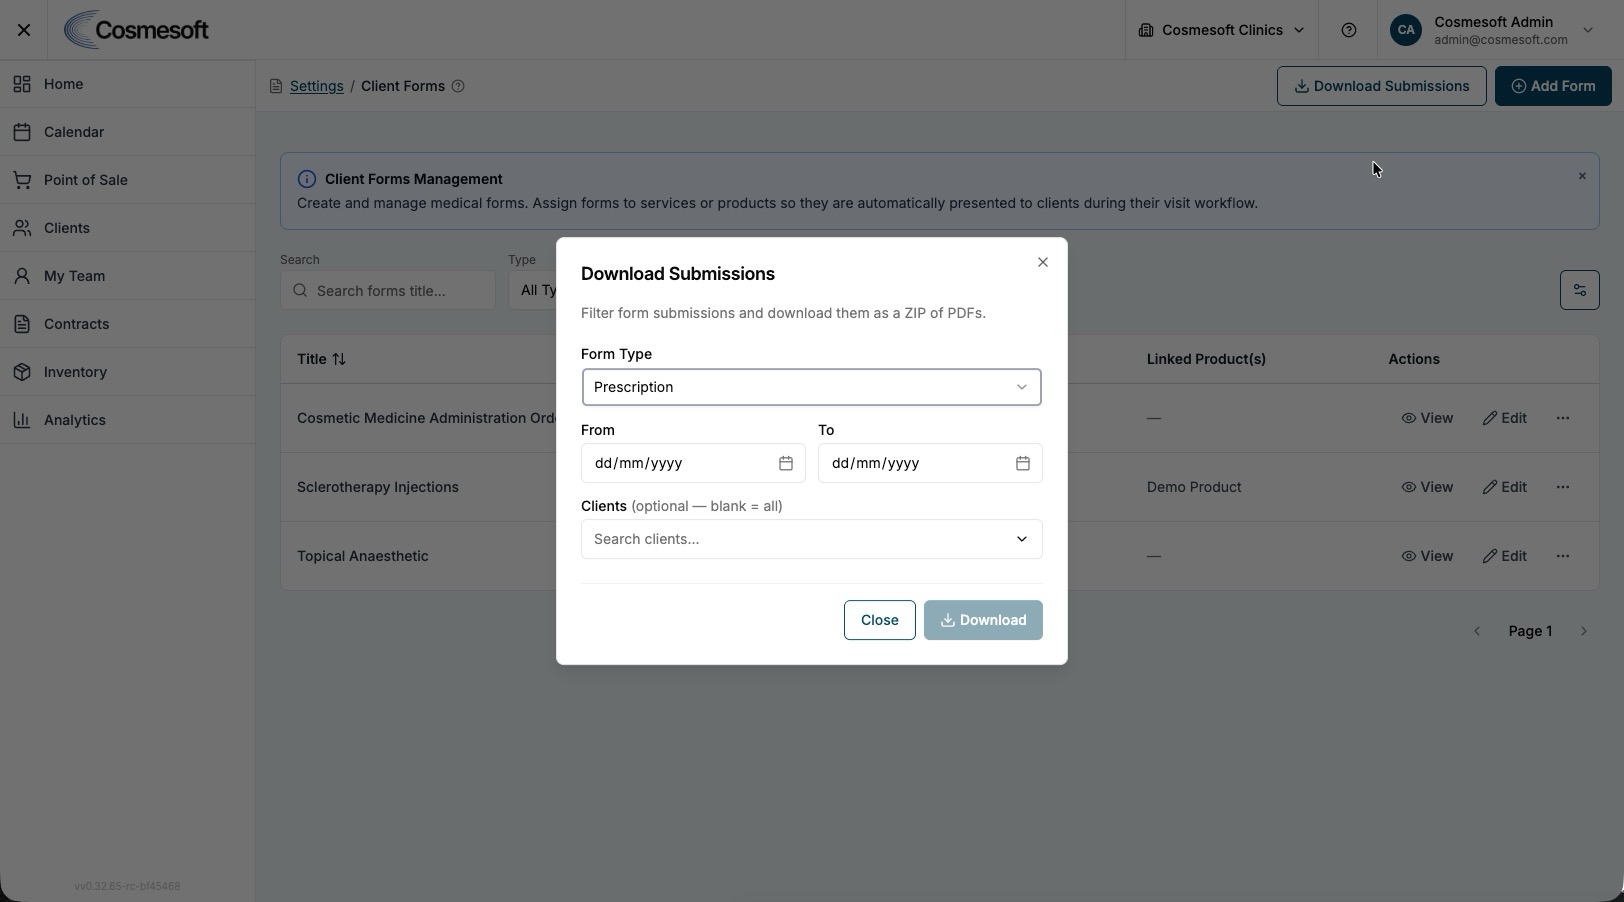
- In the main Client Forms list, click Download Submissions.
- Apply filters to select the date range or specific form types and/or specific clients.
- Click Download to export a ZIP file containing the individual PDF records.
What to do next
- Learn how to use forms in a consultation.
- Verify your SMS and Email notification settings.
Last updated: 9/5/26, 1:45 AM