
How to manage a business group
Use this guide to connect independent businesses, share team members, and configure group-wide settings for your network.
For a high-level explanation of how business groups work, see About Business Group Management.
Before you begin
Make sure:
- You have Owner or Admin access to the parent organisation.
- You have the email address of the business owner/s you wish to invite.
Step 1 — Invite a new business
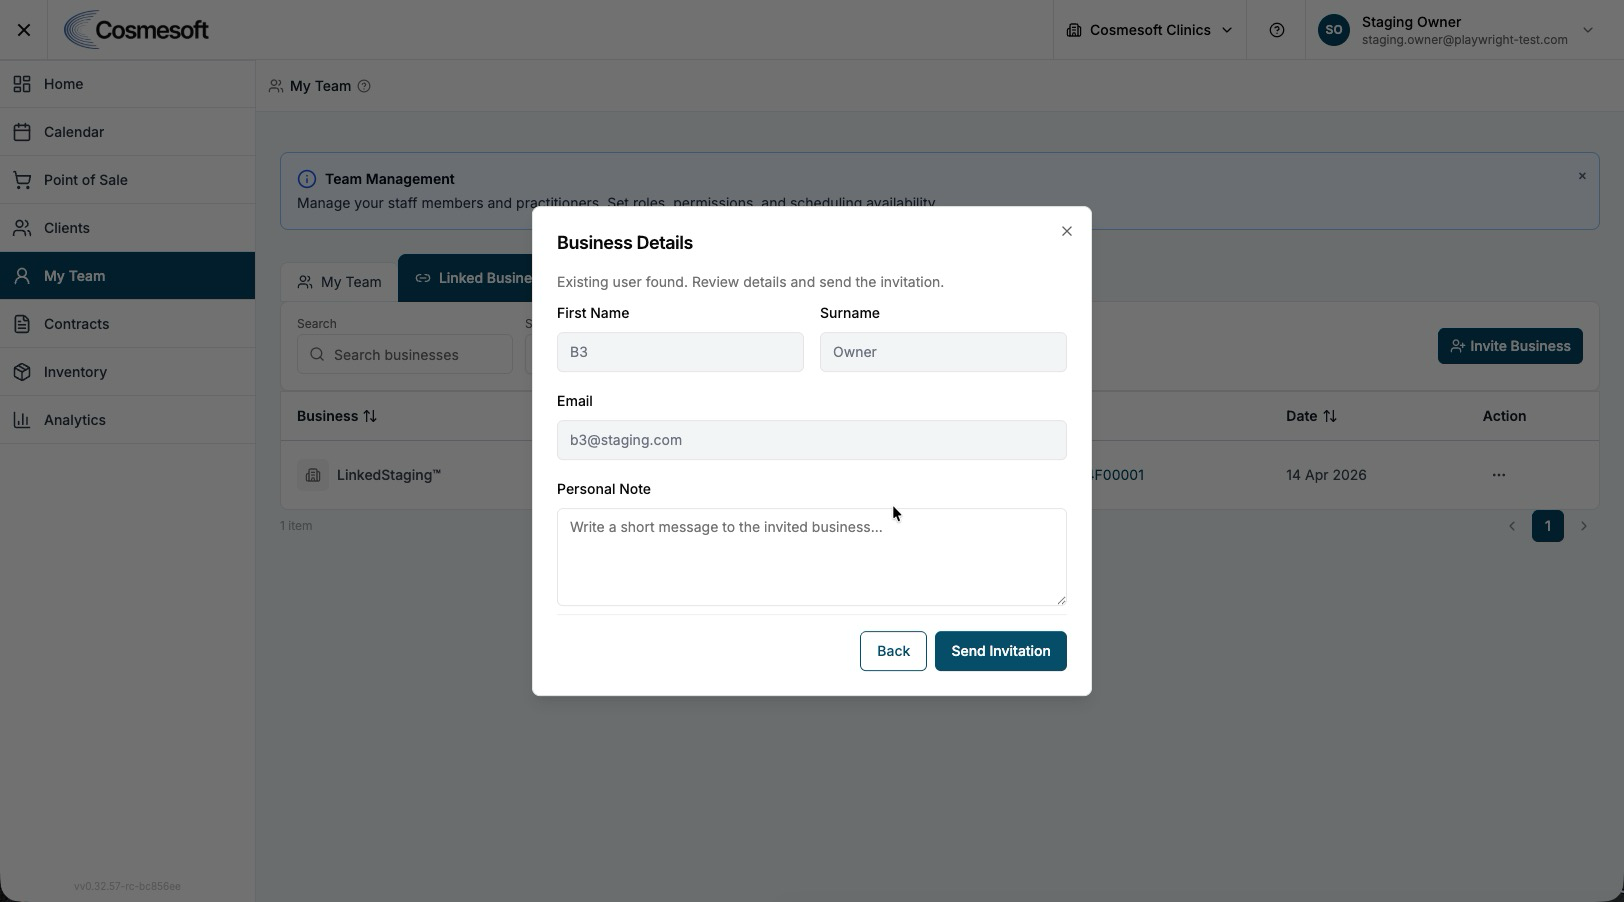
To link a new clinic to your group, you must first send them a formal invitation.
Also not that the business must already exist in Cosmesoft to be invited into your group.
- Navigate to Sidebar → My Team.
- Select the Linked Business tab.
- Click Invite Business.
- Enter the Name and Email Address and the business owner (as well as an optional personal note).
- Click Send Invitation.
- Note: The owner will receive a registration link via email to complete their setup and link their account.
Step 2 — Manage linked businesses
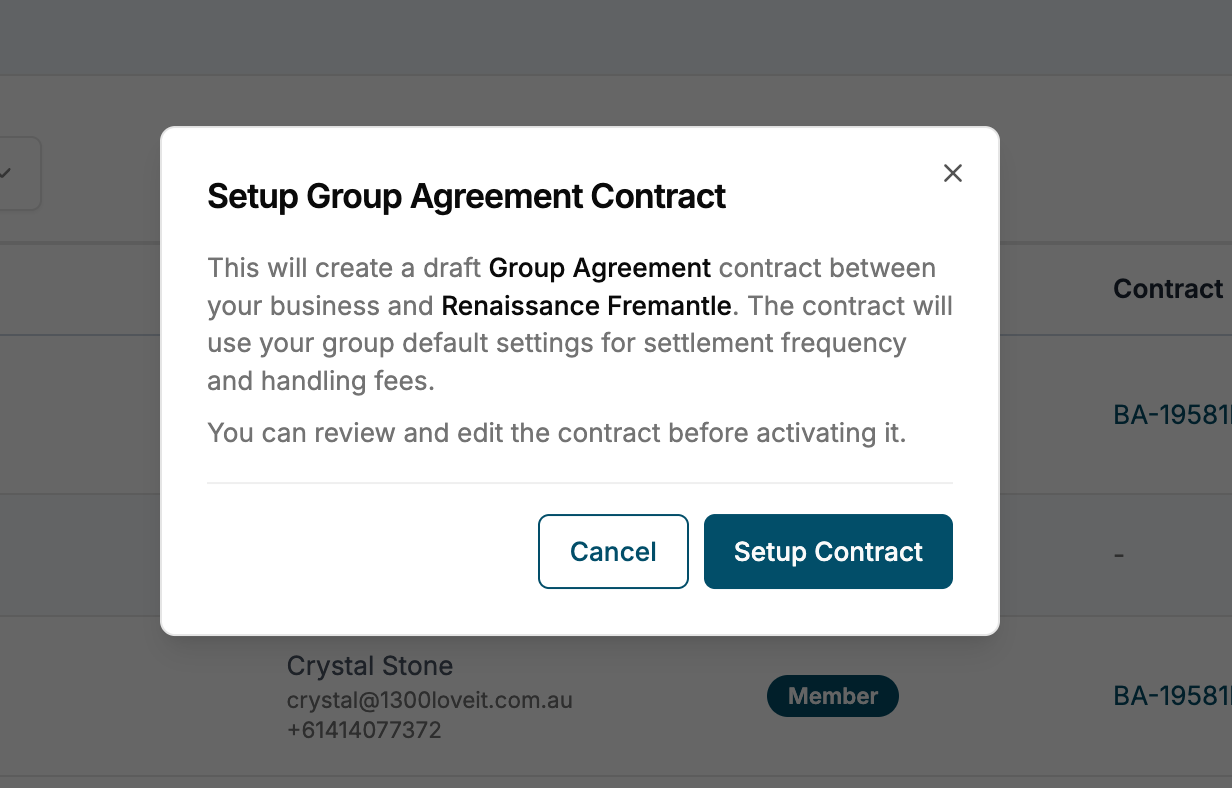
Once a business accepts the invitation, their clinic will appear in your Group Businesses list and their Team Members will appear in your My Team list.
- Go to the Linked Business tab to view your active network.
- From here, you can set up a contract between your businesses or view active Contracts or agreements between your organisations, in the Contracts column.
- Select the three dots under Actions to Remove the business from your group.
Step 3 — Manage staff across locations
- Go to Sidebar → My Team and review any team members shared across your organisation. Filter by Organisation to locate a Team Member.
- Select the three-dot menu under Actions and choose View Member.
- Under the Locations tab, assign them to any location within your business group by selecting + Add.
- With adequate permissions, manage shared team members' permissions, services, and roster at your business locations. You cannot edit permissions at other organisations. If your roster conflicts with another organisation’s, contact the business owner.
- Also listed in the Team Member’s account:
- Payment Accounts: e.g., contractor commission % or scripting fees for your nurses
- Contracts: view and issue contracts between your organisations and the team member
- Activity Log: view a trail of activities between your organisation and the team member.
Step 4 — Manage shared clinical consultations from outside prescribers
- Go to Sidebar → My Team → Invite.
- Enter the new prescriber's email address.
- Enter their details and select user type as Invite External Member. Set access level to Practitioner. Choose Capabilities as Can Prescribe and provide a mandatory Prescriber Number.
- Set the role to Provide Supervision.
- After joining, assign them to consultations via the Supervisor dropdown on the clinical screen.
- Supervisors gain secure access to shared client clinical history and prescription data for those sessions.
Last updated: 9/5/26, 1:41 AM