
How to manage services and categories
How to manage services and categories
Use this guide to set up your service categories and manage the treatments offered by your practice.
For a high-level explanation of how services work, see About Services.
Where to find Services
- Click Settings on the Main Menu
- On the Settings page, click the Services card.
Services are managed within three primary tabs: Services, Service Categories and Service Profiles.
Before you begin
Make sure:
- You have Manager or Admin access to manage services.
- You have thought about how your services should be grouped (categories) to keep your list organised.
- You know the duration and retail prices for each new service.
Step 1 — View and Edit Existing Service Categories
Categories help group similar services together for the booking site and internal reports.
- Click the Service Categories tab.
- A list of existing Service Categories shows:
- whether the service is for internal use (eg. admin tasks not bookable for clients including on the online booking platform)
- requires supervision (eg. injectable treatments requiring a doctor's consult)
- provides supervision (eg. doctor’s consults
- the number of services in the category. - Modify these Service Categories by selecting Edit under Actions. You can also delete existing Service Categories from Actions.
Step 2 — Add New Service Categories
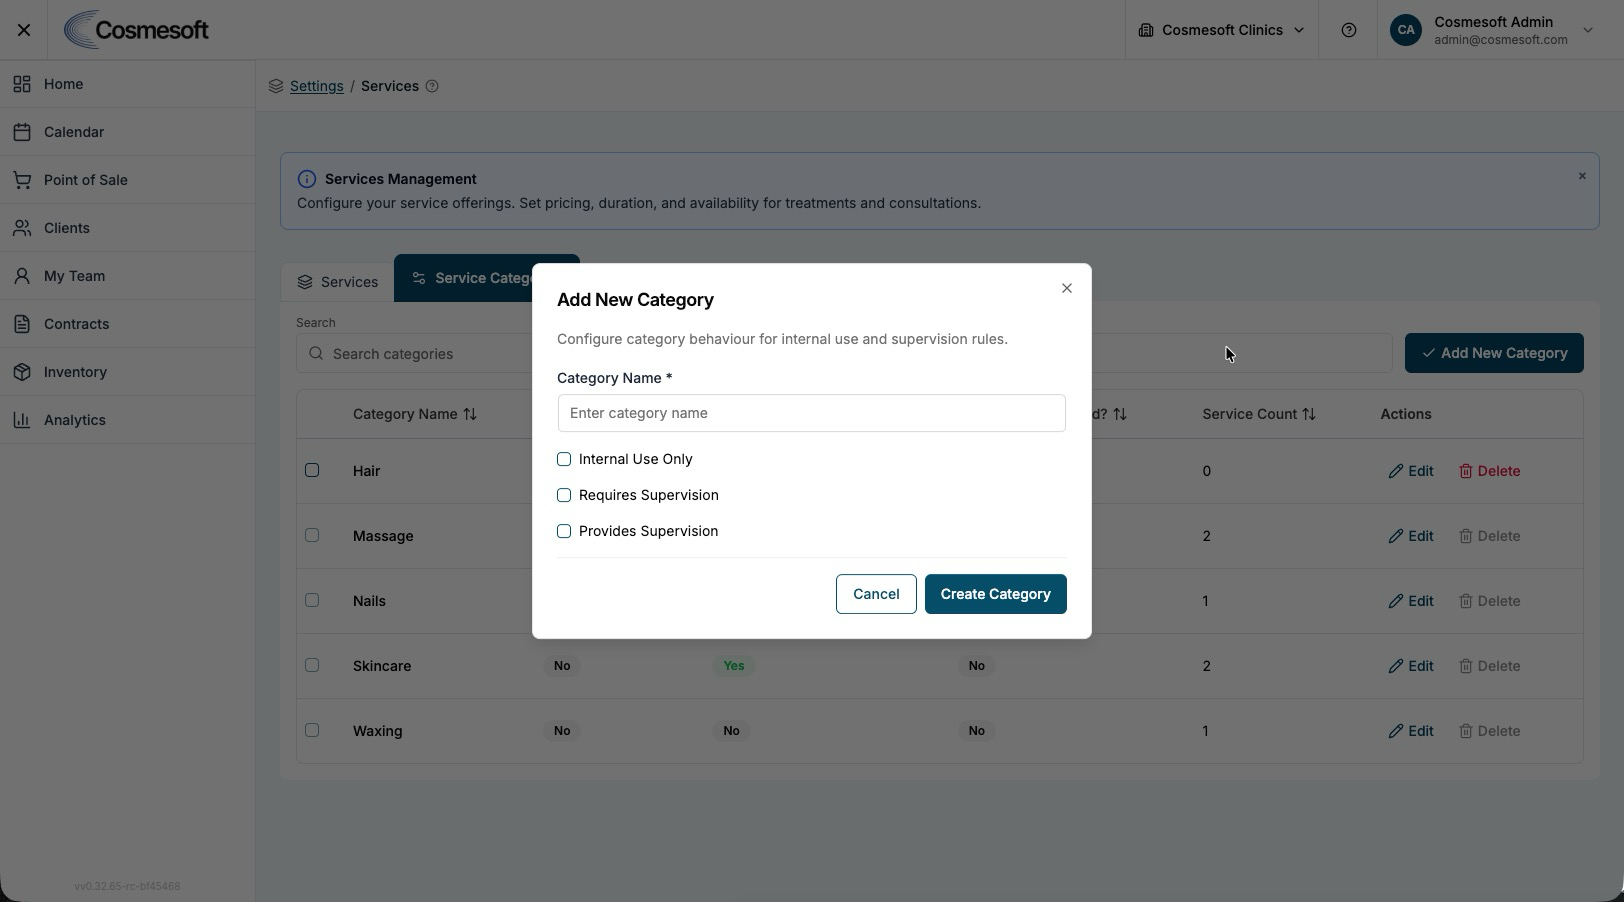
- Click the Service Categories tab.
- Click Add New Category.
- Enter the Category Name (e.g., "Medi-Aesthetics" or "Facials").
- (Optional) Toggle if the service is for Internal Use Only, Requires Supervision or Provides Supervision, as explained in the step above.
- Click Create Category.
Note: If you turn on Provides Supervision for a category, Cosmesoft automatically locks Internal Use Only on and disables online booking for that category. These fields become read-only while Provides Supervision is enabled.
Step 3 — View and Edit Existing Services
Now that the service categories have been setup, services can be managed.
- Click the Services tab.
- A list of existing Services shows:
- the category
- internal use status (e.g., admin tasks not bookable by clients or on the online booking platform)
- service duration
- calendar colour
- price
- deposit requirement
- Edit or Delete actions. - Modify these Services by selecting Edit under Actions. You can edit any features explained in the Add New Service section below or delete existing Service Categories from Actions.
- Please note that a service cannot be deleted if it is currently linked to an active booking or included in a treatment package.
Step 4 — Add a new service
- Click the Services tab and click Add New Service (top right).
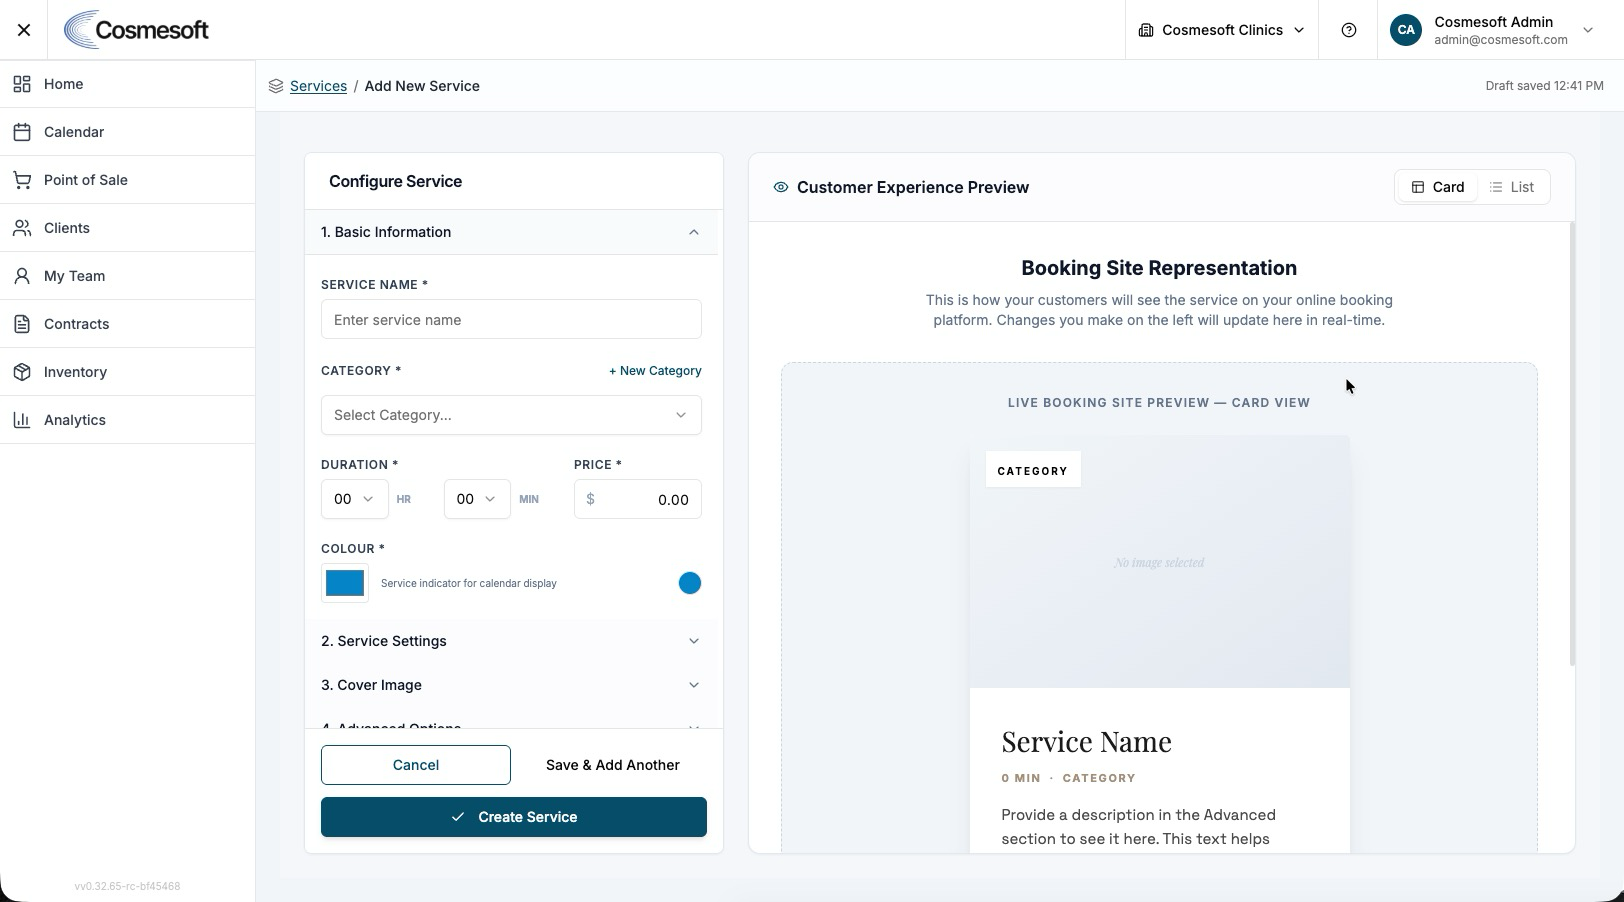
- a) In 1. Basic Information section, enter:
- Service Name — The name displayed when booking appointments by staff and what clients will see on the booking site and receipts.
- Category — Select the primary category for this service. Categories organise services for clients navigating online booking.
- Additional Categories — Add any extra categories where this service should also appear. A service can belong to more than one category, which helps organise services for clients browsing and booking online.
- Duration — How long the core treatment takes.
- Price — The retail price for the service.
- Colour — Choose how this service appears on the calendar for easy identification.
b) In 2. Service Settings toggle on or off:
- Allow Billing — The service may be billable or free, e.g, a complimentary consult would not require billing.
- Allow Online Booking — Some services may have certain criteria that require a consult before booking and thus are not bookable online.
- Deposit Required — You may set a general location deposit but remove it for some services, e.g., complimentary consults.
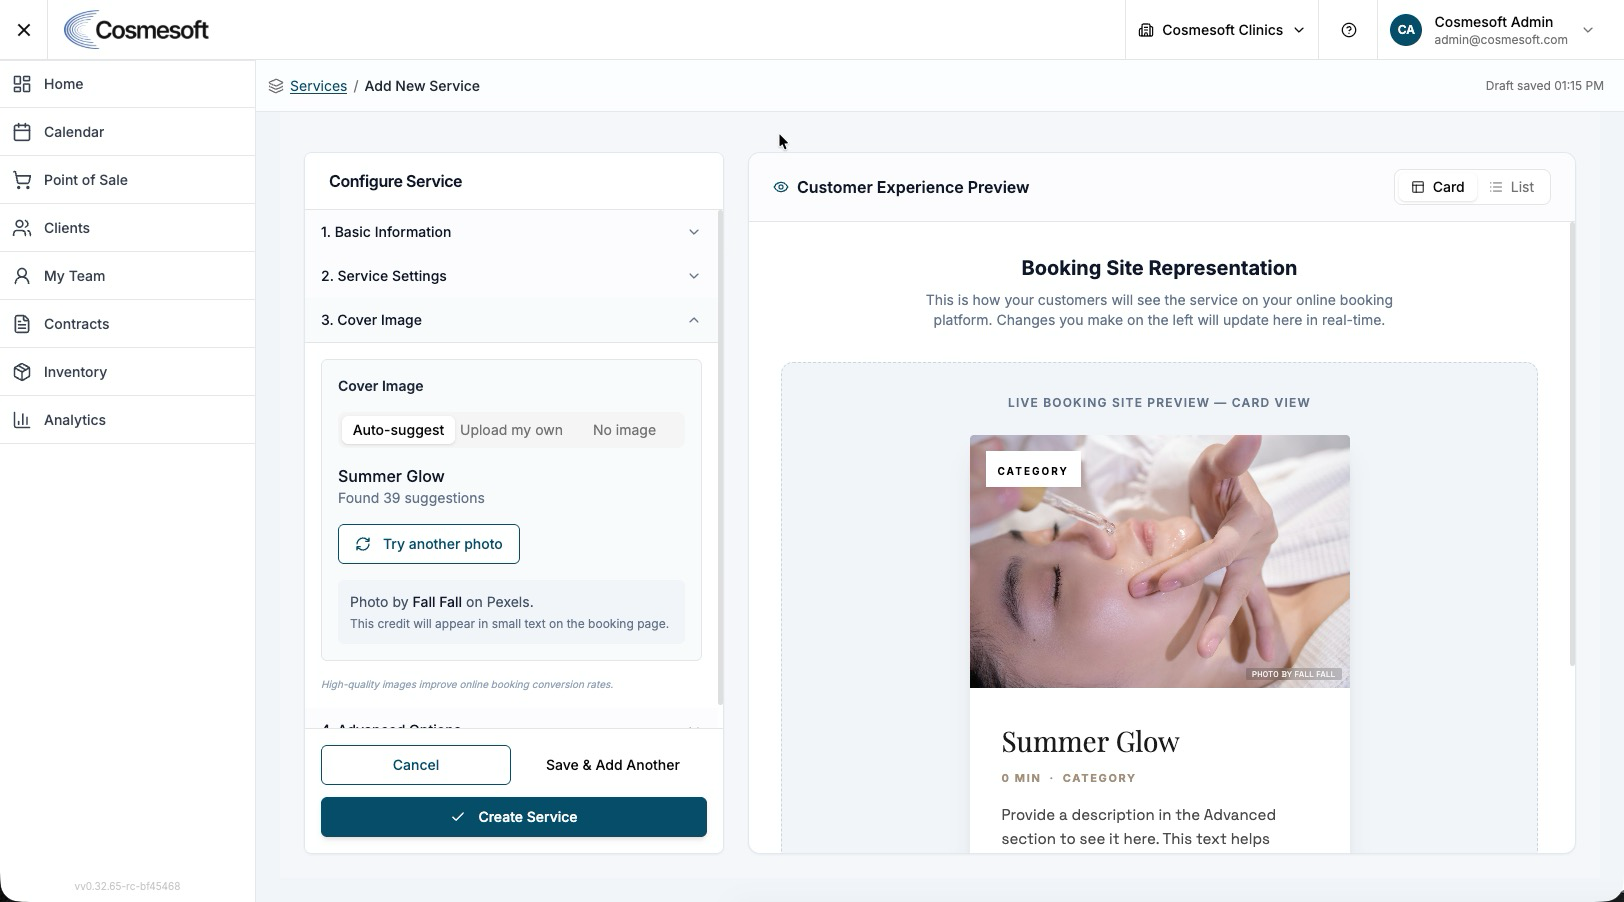
c) In 3. Cover Image you can customise your online booking platform's appearance:
- Select the Service Image — View an AI-generated cover image, upload your own, or choose no image. The preview appears immediately on the right. This can be viewed in a card display or a more compact list option.
d) In 4. Advanced Options section, enter:
- Pre/Post Treatment and Gap Times — Pre-Treatment adds time before the service (e.g., extra consult time for new clients). Post-Treatment adds time after the service (e.g., 10 minutes for practitioners to process sales and rebook clients). Gap Times create intervals between bookings (e.g., time for numbing cream application, another appointment, then client treatment).
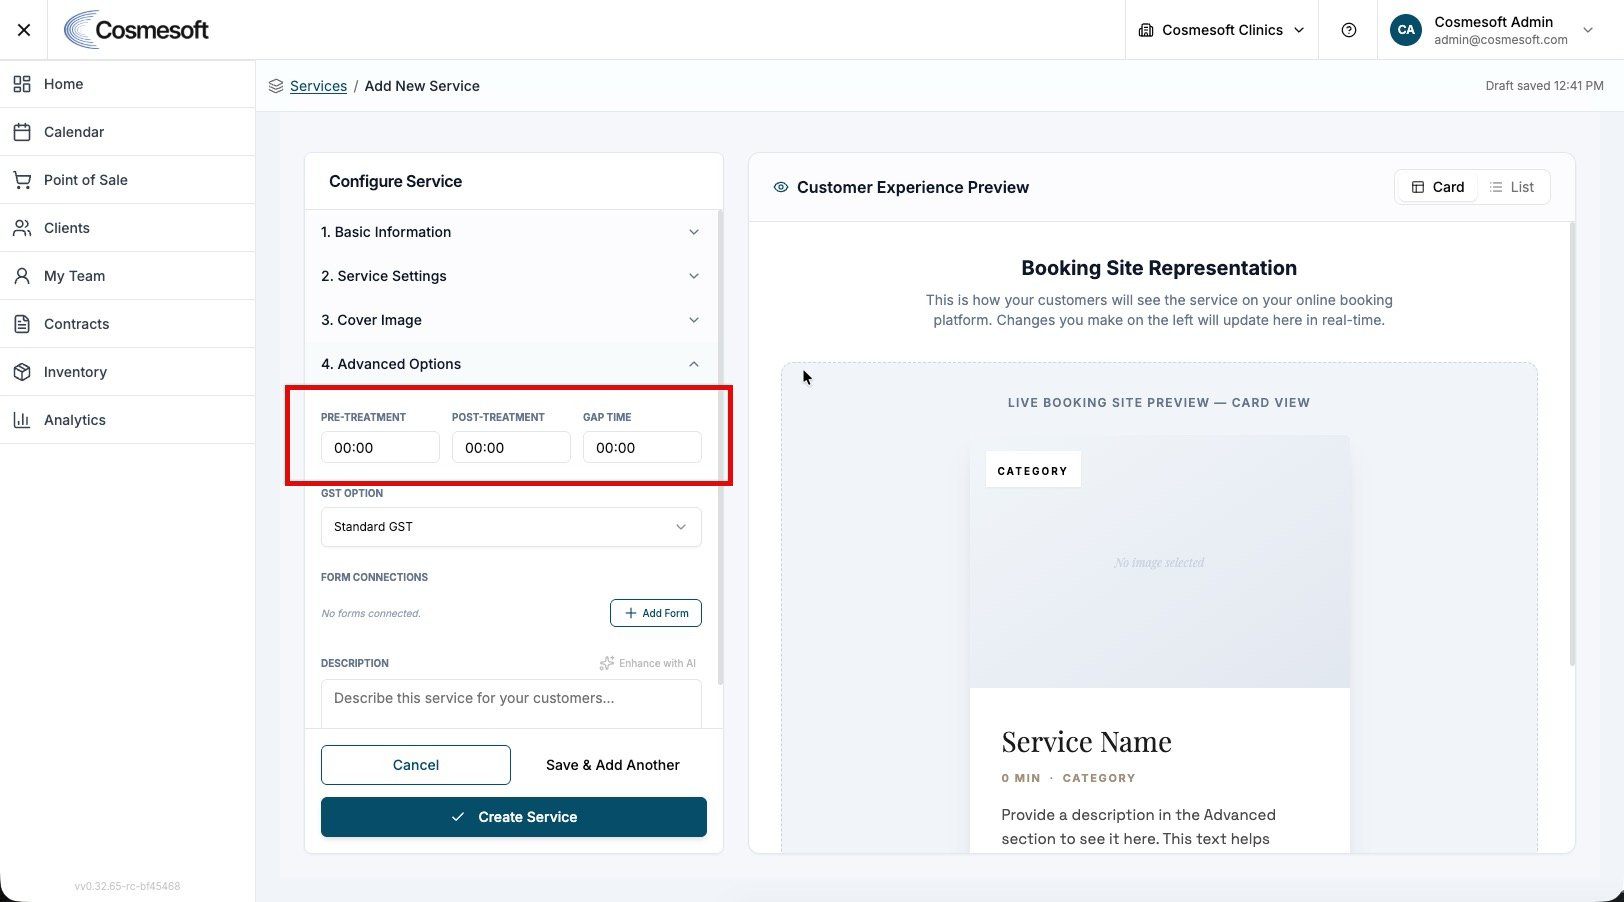
- GST Options - Select whether the service requires standard GST, is GST free, or includes GST in the fee.
- Select Form Connections - When booking this service, you can automatically trigger the system to send required forms, such as consents and aftercare. Select a form and its timing. Choose manual for reminders only. Repeat for all required forms and let Cosmesoft handle the process.
- Description - Enter a description for your online booking. Use AI features for assistance, but be mindful to comply with advertising laws for prescription services.
- Click Create Service.
Step 5 — Manage Service Profiles
Service Profiles let you group related services into reusable profiles so they can be managed and assigned together instead of selecting each service one by one.
- Click the Service Profiles tab.
- Review the list of existing profiles, including the profile name and the services included in each profile.
- To create a new profile, click Add New Service Profile.
- Enter a clear Profile Name that describes the group of services, such as a practitioner scope, treatment type, or onboarding template.
- Select the Services that should be included in the profile.
- If available for your workflow, configure any form linkage or template options that should apply when this profile is used.
- Click Create Service Profile or Save.
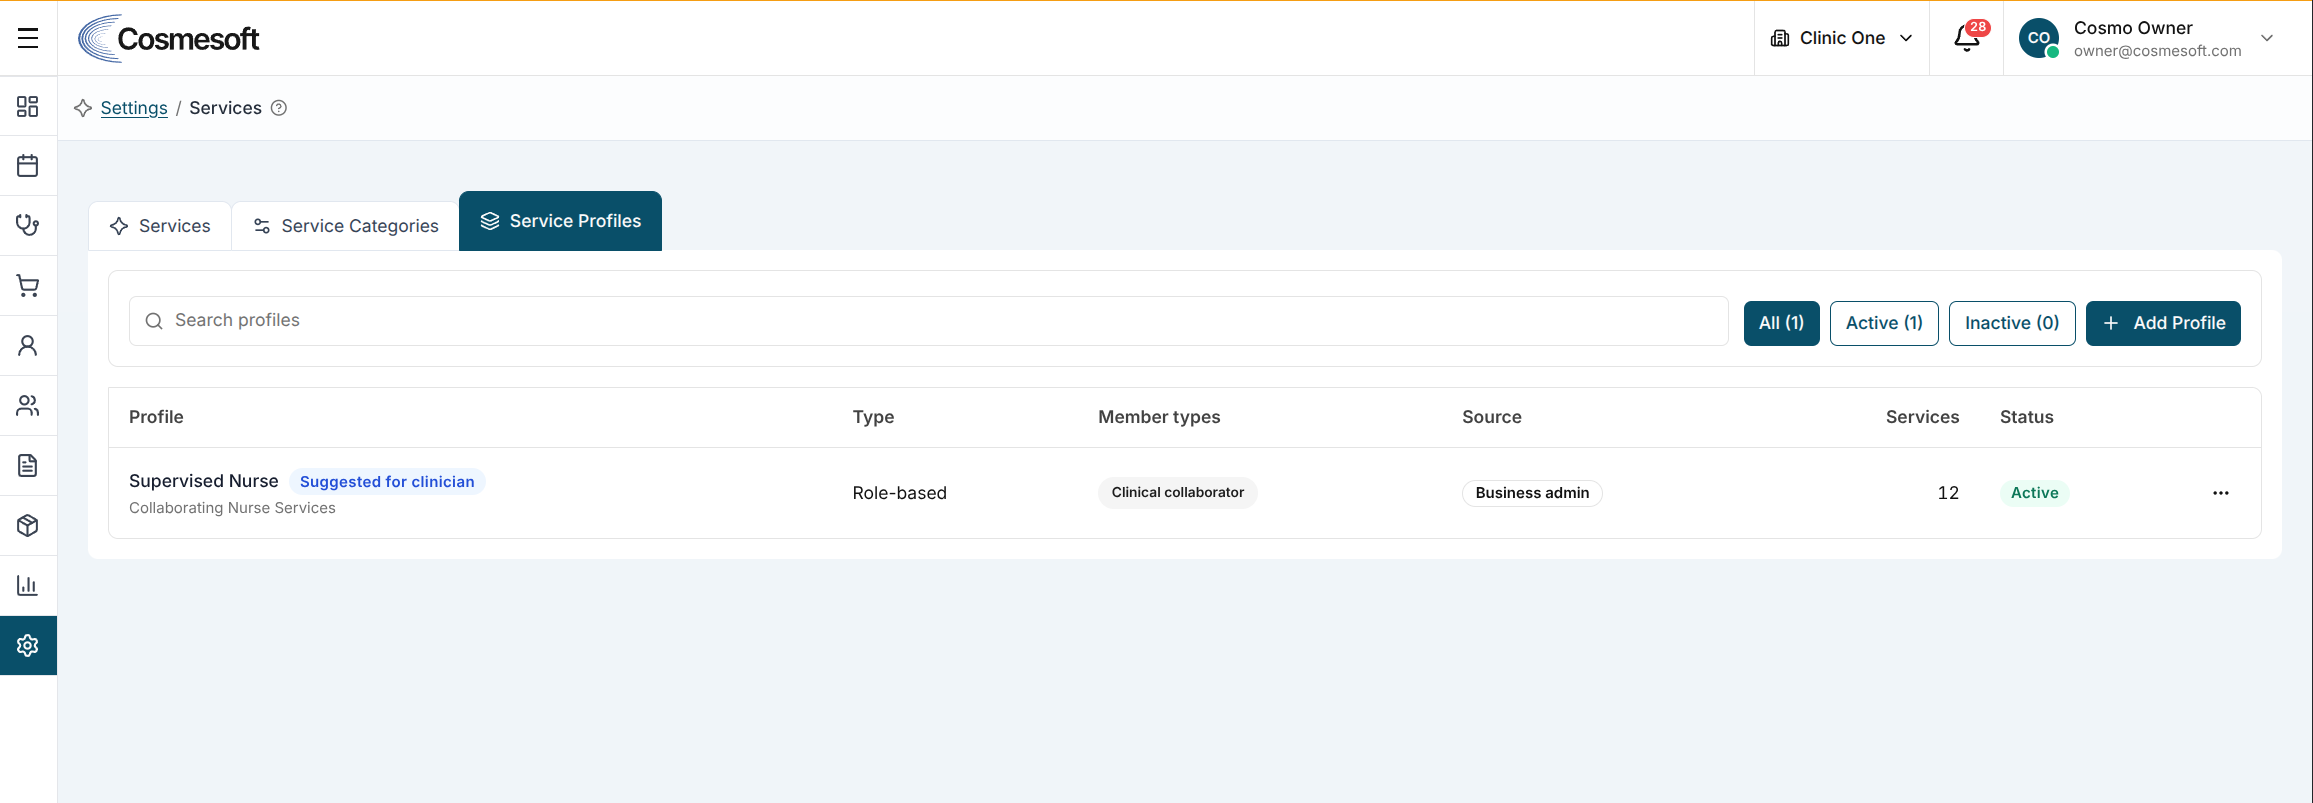
You can edit an existing Service Profile from the Actions menu to update its name, included services, or related settings.
What to do next
- Set up Staff Availability for these services.