
Product Setup
How to Set Up Products
Cosmesoft’s product setup system simplifies the management, sales, and reporting of products used both in treatments and for retail. Products are configured at the Business Level, allowing all locations to access and manage them through their Stock Management systems without the need for additional setup at each location.
This guide will walk you through the process of setting up products, including customising pricing, quantities, and other details to meet your business needs.
You May Not Need To Add Products:
- Default product data is loaded when your business is created to get your started. However, if you need assistance loading a large product inventory please contact support.
- If you are a Group Member, your will have acess to the group products and will not need to add them manually. Any product Ordered from the Group Warehouse will be added to your inventory.
Permissions Overview
Product setup requires the following permissions:
- View/Add/Edit/Delete Suppliers (Products are linked to a Supplier and Brand)
- View/Add/Edit/Delete Products
Access Levels:
- Managers & Admins: Default access to set up products.
- Operators (Clinical Staff): Access to use products in treatment notes at their assigned location.
Setup Suppliers, Brands and Products
To set up a product, you’ll need to assign both a Supplier and a Brand, then add Products.
Set Up Suppliers
- From the left-hand menu, select Admin, then Suppliers.
- Click Add Supplier.
- Fill in the required supplier details (you can update this in more detail later).
- Click Save Changes.
Set Up Brands
- From the left-hand menu, select Admin, then Products.
- Click Add Supplier (if the supplier isn’t created yet, follow the steps above).
- Click Add Brand.
- Enter the Brand name and select the Supplier from the dropdown menu.
- Click Save Changes.
Set Up Products
- From the left-hand menu, select Admin, then Products.
- Click Add Product on the right-hand side.
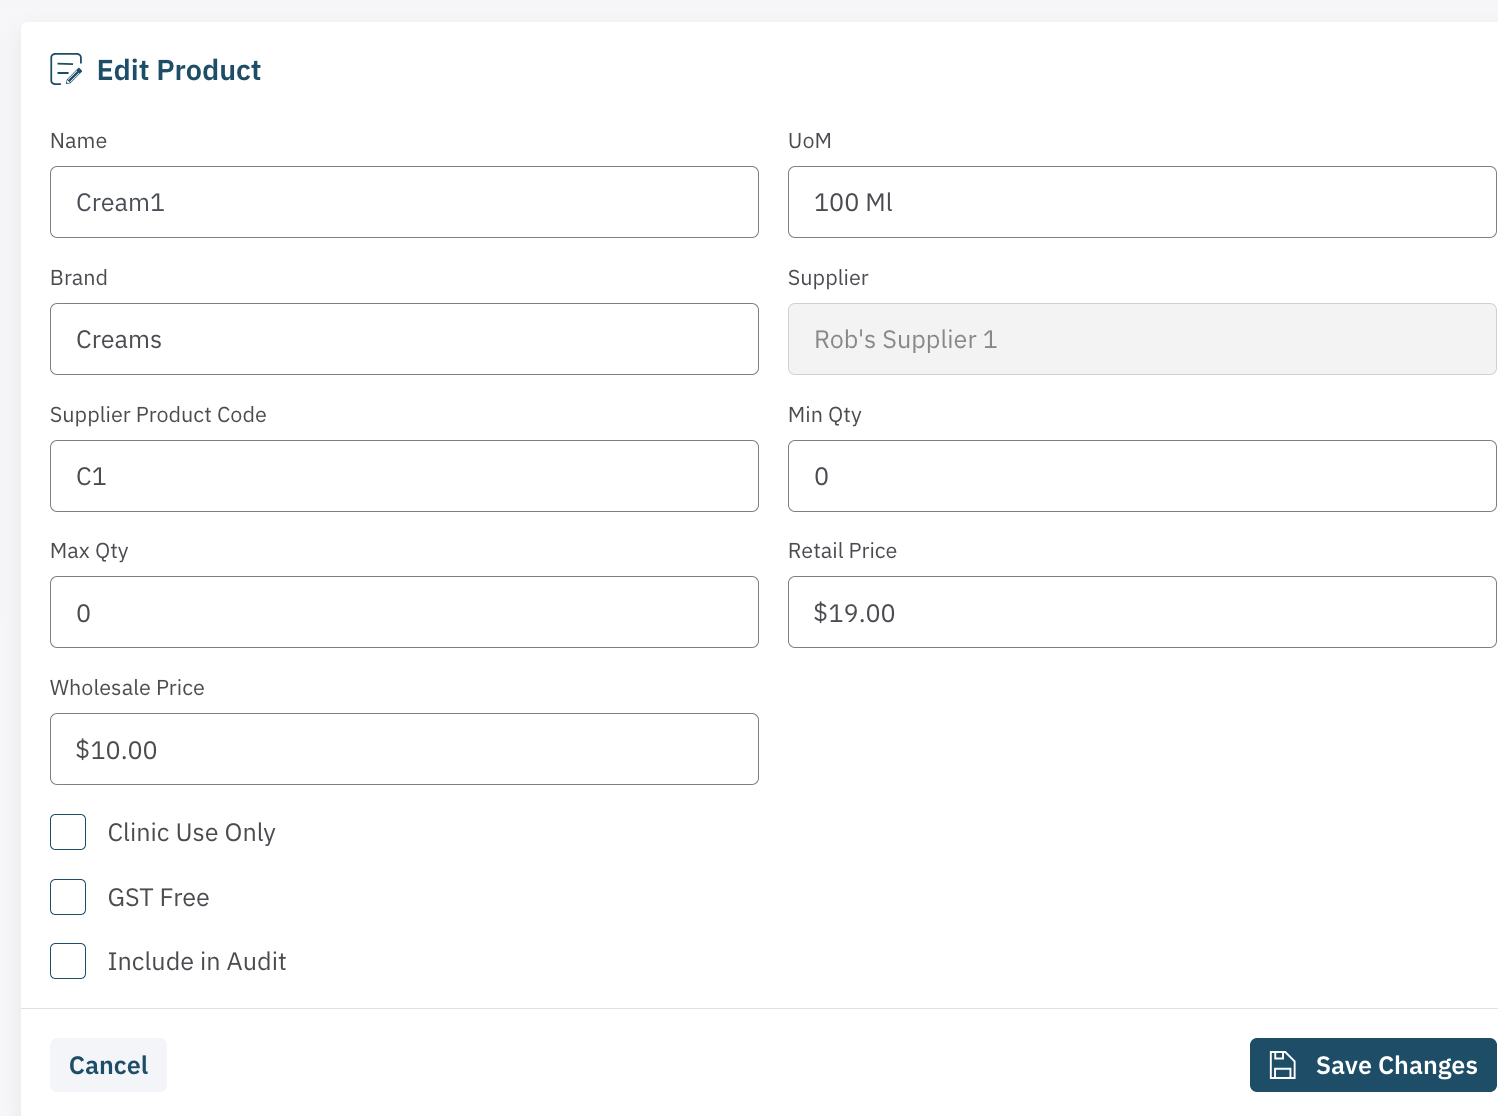
- Fill in the product details, paying special attention to the following fields:
- Product Name: Enter the full name of the product (e.g., Botox unit, Juvederm 0.1ml, Renaissance Hydrating Moisturiser 100ml).
- Unit of Measure (UoM): Paying attention to the UoM is essential for accurate stock and sales tracking.
- For injectables such as Botox, we recommend listing the product as 1 unit instead of 1 vial (which contains 100 units). This way, you can calculate the cost per unit more accurately by dividing the total cost of the vial by the number of units (e.g., $500 for 100 units means $5 per unit).
- When using dermal fillers, the unit of measurement (UoM) is typically set at 0.1ml for a 1ml syringe. For example, if a 1ml syringe costs $500, then $50 would be the cost per 0.1ml..
- Min/Max Quantities: Set these values to manage stock levels and trigger alerts when products are low.
- Pricing: Retail and Wholesale prices are set as the default. Locations can set their own pricing from their inventory. See Manage Product Pricing for details.
- Clinic Use Only: Check this option for products used in treatments but not sold to clients (e.g., backbar products). These items won’t appear on invoices but will be deducted from clinic stock levels.
- Include in Audit: Decide whether the product should be included in the automatic stock audits across all locations under the business umbrella. For compliance, always include S4 products in the audit.
Once all details are filled in, click Save Changes.
How to Edit or Delete Products
- From the left-hand menu, select Admin, then Products.
- Find the product you want to edit or delete.
- To Edit: Click the Edit icon. Make the necessary changes and click Save Changes.
- To Delete: Click the Delete icon. Confirm the deletion by selecting Yes in the popup.
By following these steps, you can easily set up and manage products across your business, ensuring consistency in stock management and pricing.
<— PREVIOUS ARTICLE | NEXT ARTICLE—>