
Manage Your Cash Register Balance
Manage Cash Register Balance
The POS (Point of Sale) system provices the tools to manage your daily financials. This guide describes how to balance your cash register.
Accessing the POS System
The POS system is easily accessible through the calculator icon located in the left-hand menu of your dashboard. Clicking this icon will open up the POS interface, select Manage.
In the top-right corner, you’ll also see a Location drop-down to ensure you’re working with the correct clinic location if within a multi-site business.
Manage Tab
The Manage feature is used for tracking and managing daily sales and reconciling the cash register.
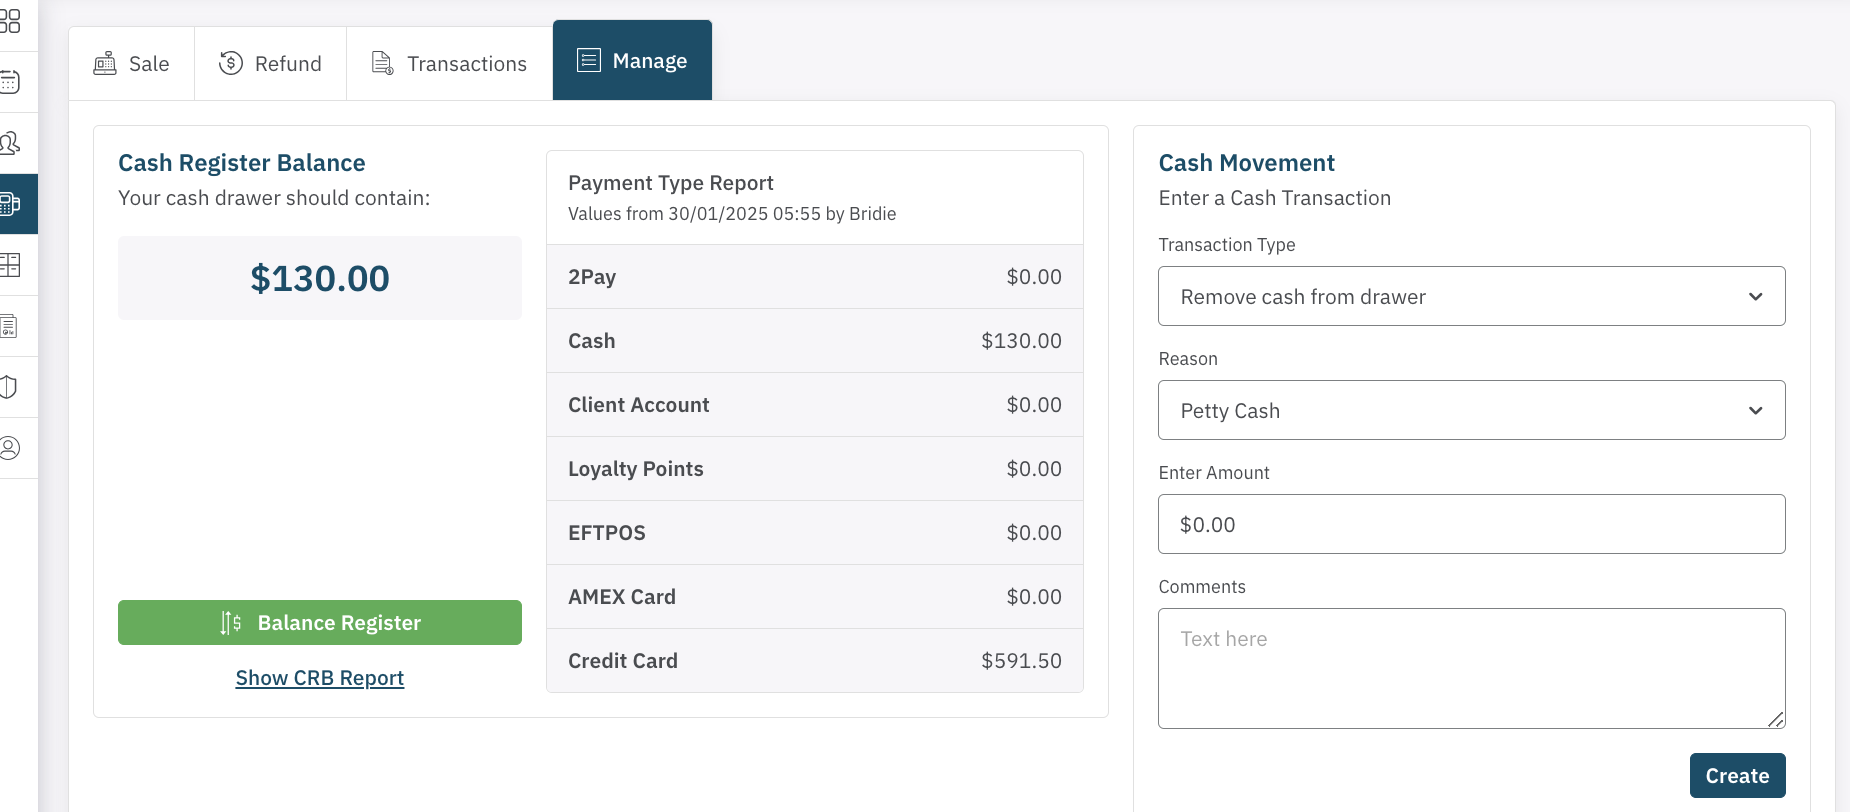
1. Daily Sales Summary
The Sales Summary section shows a breakdown of the day's total sales by payment method, including:
- 2Pay
- Cash
- Client account
- Loyalty Points
The Cash Register Balance is also displayed here to ensure that all funds are accounted for.
2. Balancing the Register
At the end of the trading day (or whatever period it is since you last completed a cash register balance), Admin/Managers should select Balance Register to reconcile the day’s transactions. The system will display a breakdown of sales by payment method:
- Transaction Count: Number of transactions per payment method.
- Transaction Amount: Total amount processed per payment method.
- Cash Out/Refunds: Any cash withdrawals or refunds made during the day.
- Expected Totals: The calculated totals for each payment method based on your sales data.
You will then need to enter the Actual Totals for each payment method by clicking the pen and paper icon next to the payment method.
If there are any discrepancies in the cash balance, leave a note in the Comments column explaining the difference.
Click Next to proceed.
3. Closing the Session
Once the register has been balanced and the totals entered, the system will prompt you to enter any cash to carry over to the next session and the amount of cash to deposit.
Click Close Session to finalise and close the register. A confirmation pop-up will appear, asking if you're sure about closing the session. Once confirmed, the register balance will reset to $0.
4. Cash Register Balance (CRB) Report
The CRB Report provides a detailed view of cash movements during the day. To access it, click Show CRB Report below the Balance Register button. This report allows you to investigate any discrepancies.
5. Recording Cash Movement
If any discrepancies occur, you can record cash movements by selecting one of the following options:
- Remove Cash from Drawer
- Add Cash to Drawer
- Correct Too Much Cash in Drawer
- Correct Too Little Cash in Drawer
Select a reason for the movement (e.g., Petty Cash, Banking, Float, or Other), enter the amount, and provide any relevant comments.
Click Create, then confirm the movement in the pop-up that appears.
The register is now balanced. Nive work!
<— PREVIOUS ARTICLE | NEXT ARTICLE—>