
Online Booking Setup
How to Setup to Receive Online Bookings
Setting up an online booking system for your Cosmesoft business location is a great way to streamline the booking process for both you and your clients.
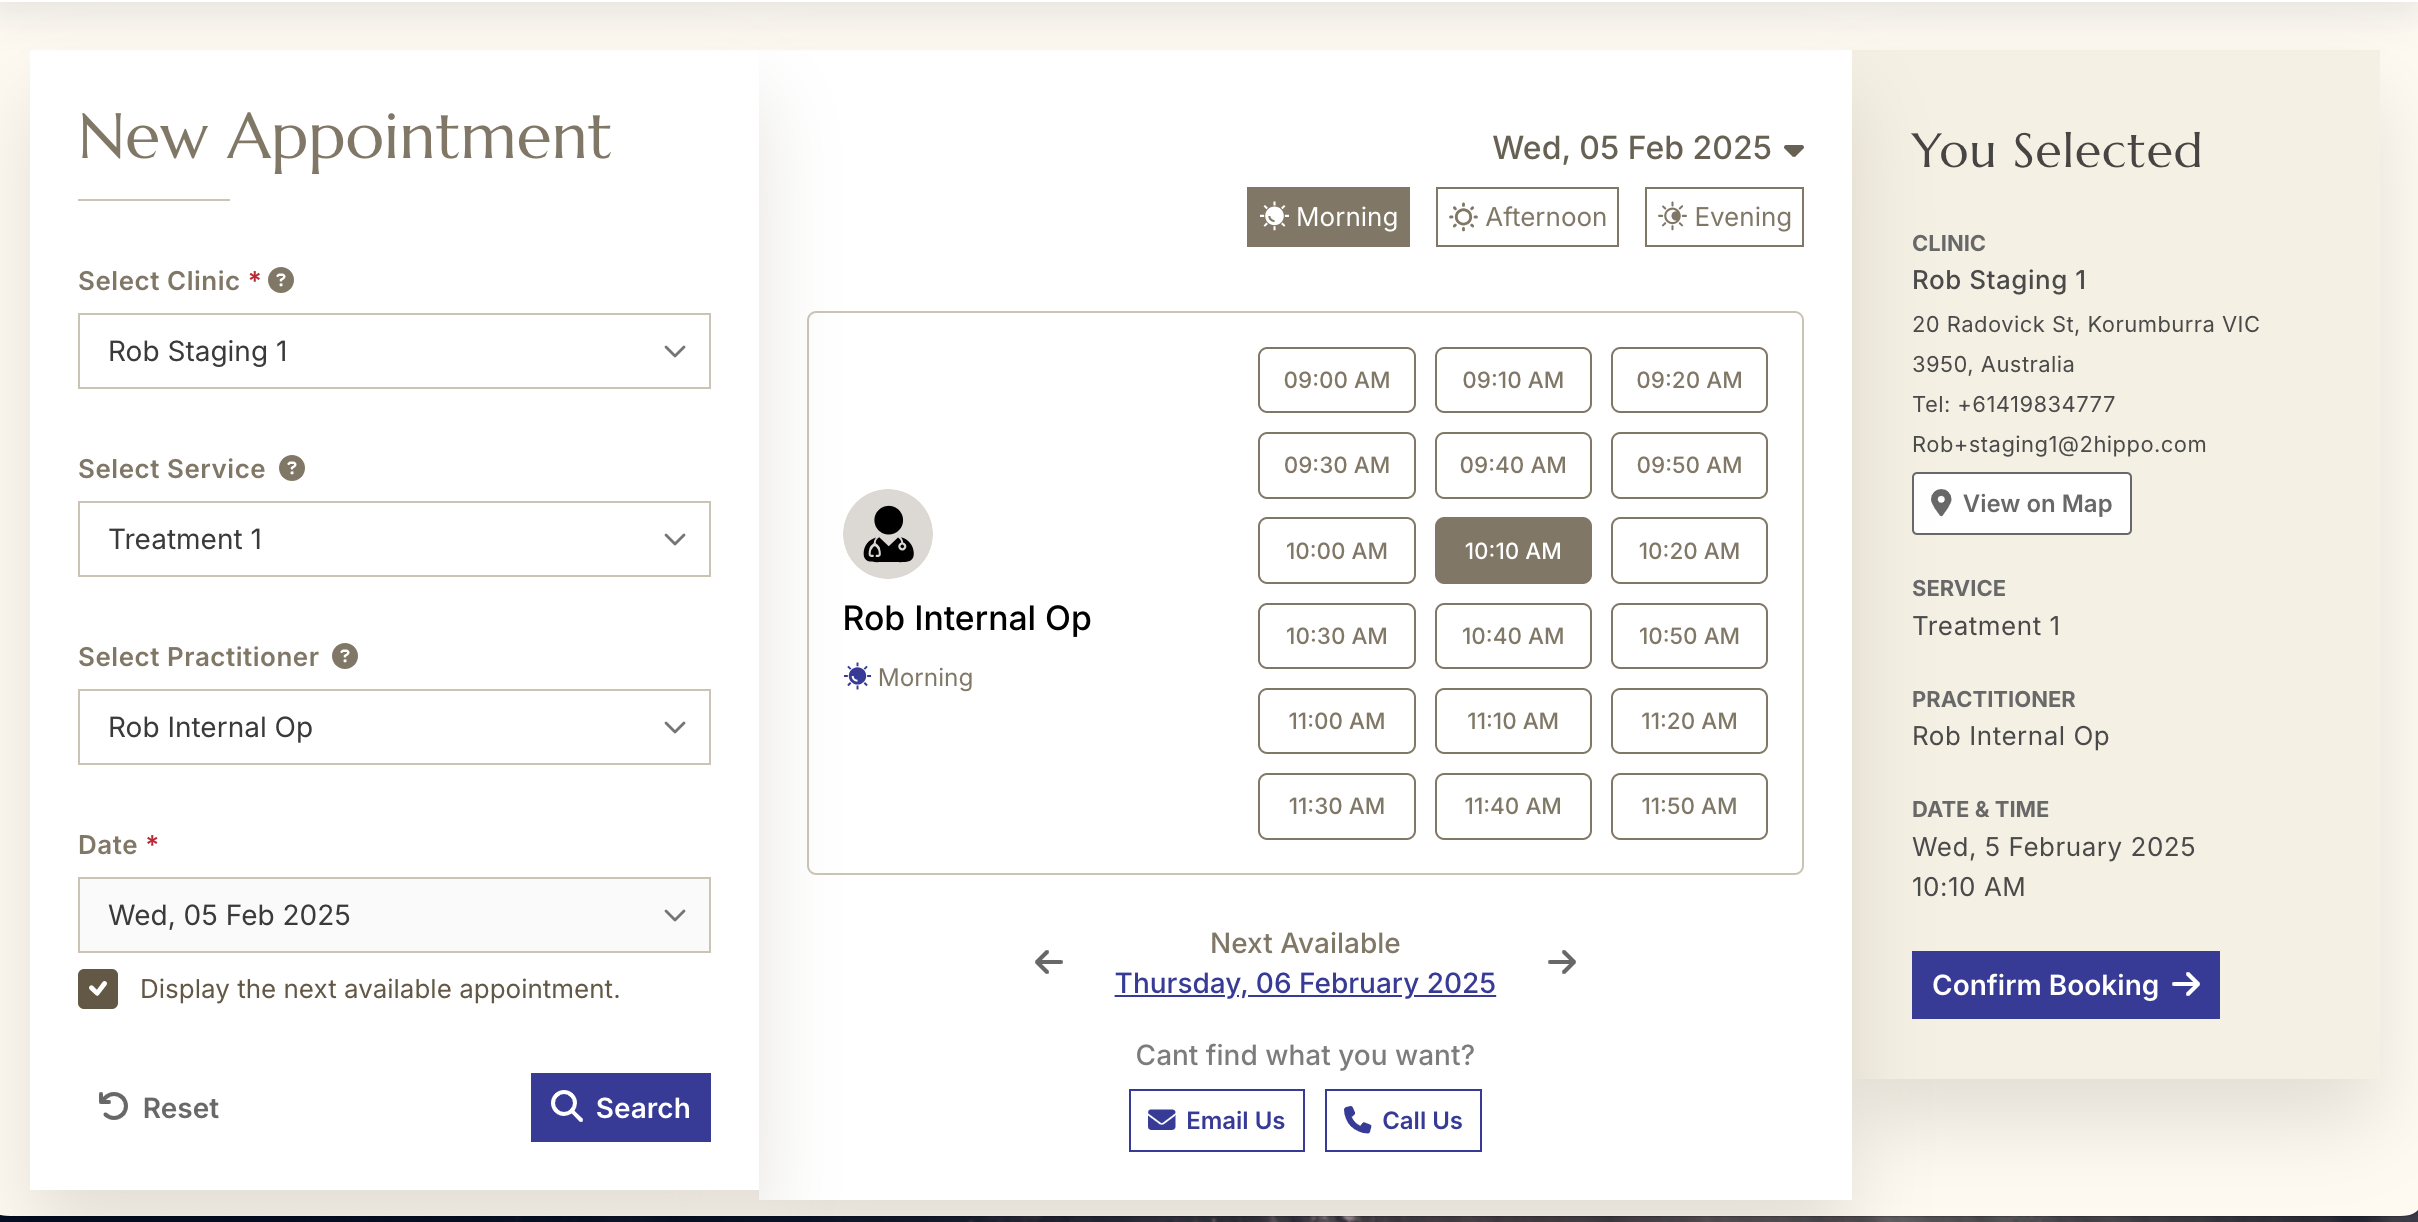
Once configured, your online booking site allows clients to schedule appointments, view available time slots, and pay deposits, through an easy to use and seamless experience.
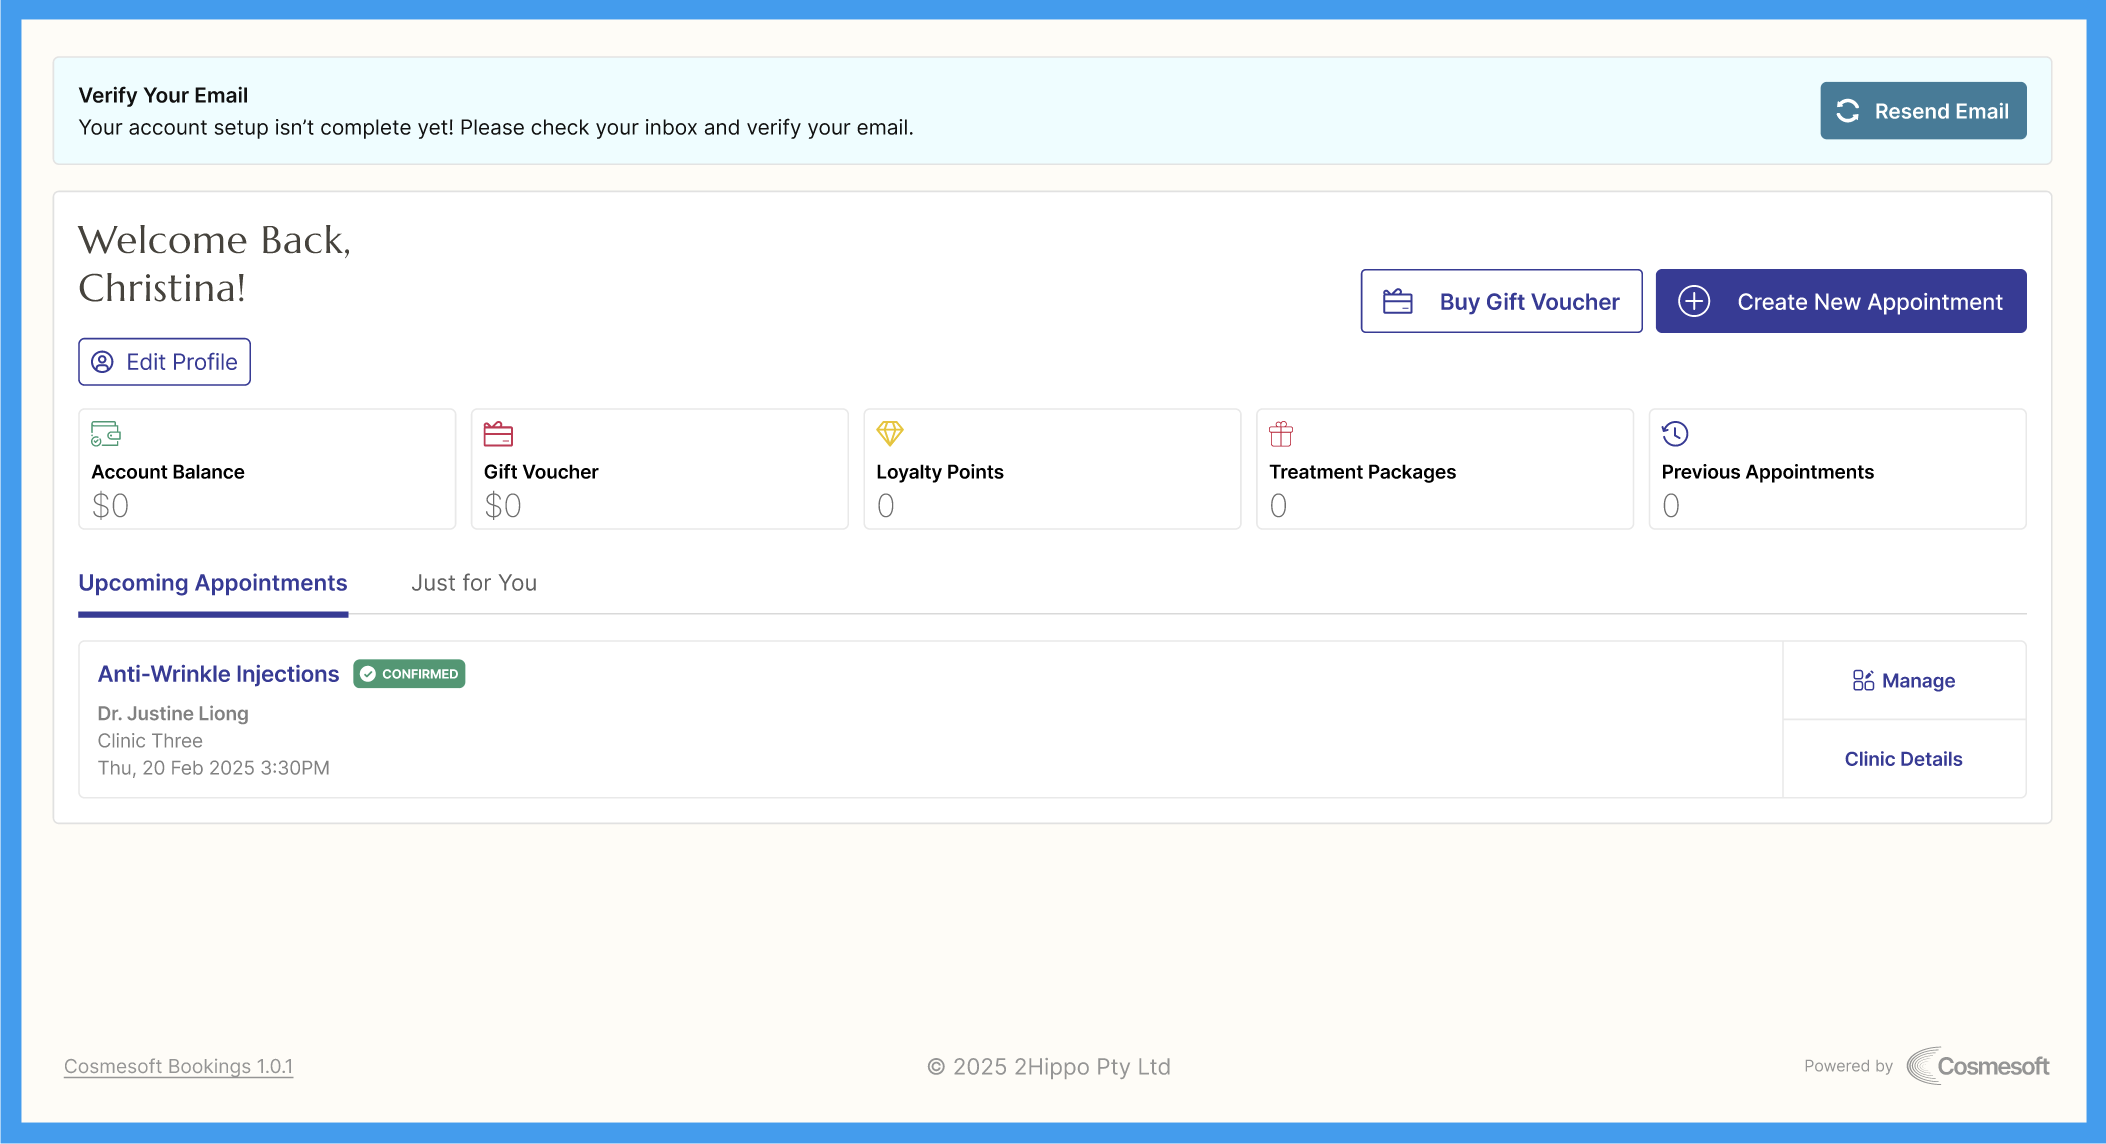
Coming Soon: New Client Portal will also allow clients to check their account balance, make payments, buy gift vouchers and access consent and aftercare forms.
Before launching your online booking portal, there are a few important configurations to complete. This guide highlights each step to ensure everything is set up properly.
[All the steps below are included in your onboarding checklist.]
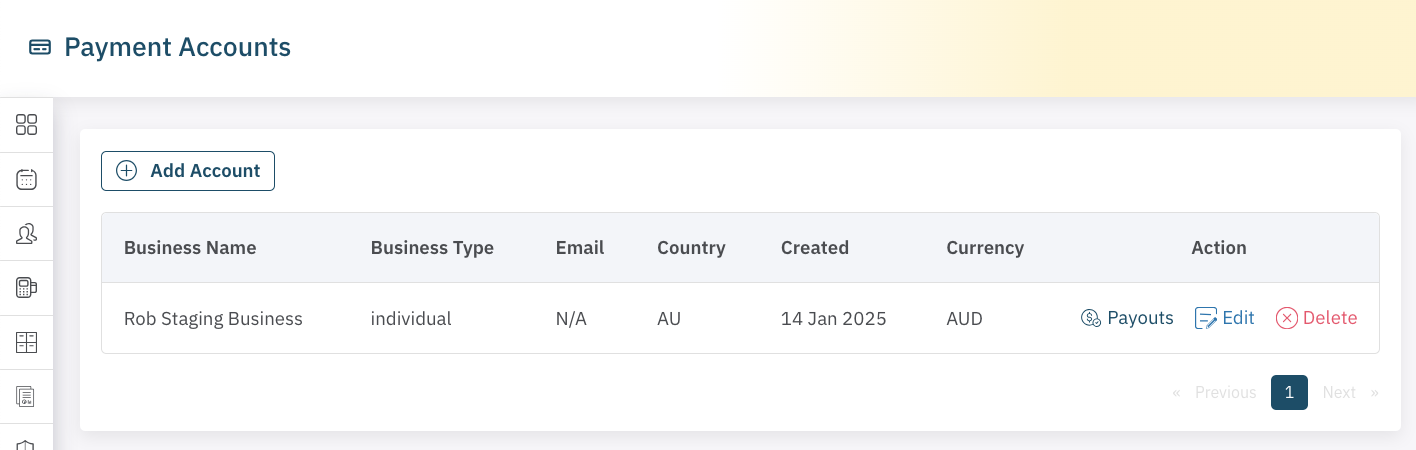
Step 1: Set Up a Payment Acount
If you plan to accept deposits for online bookings, you'll need to add a Payment Account so clients can pay online using a credit caerd, debit card or digital wallet (Apple Pay or Google Pay). A Payment Account also enables the use ot 2Hipp 2Pay for in clinic card purchases.
- In the Main menu, go to Account | Payment Account.
- Select Add a Payment Account
- Follow the prompts to complete and verify your payment account.
Cosmesoft partners with Stripe® to ensure financial transactions are securly managed. Stripe requires you verify your identity so please ensure all steps have been completed.
Your Cosmesoft subscription plan defines what fees are charged to process payments. The fees charged by Stripe are competitive with the payment processors. To find out more review your current subscription or contact support.
Step 2: Configure Your Business Profile for Online Booking
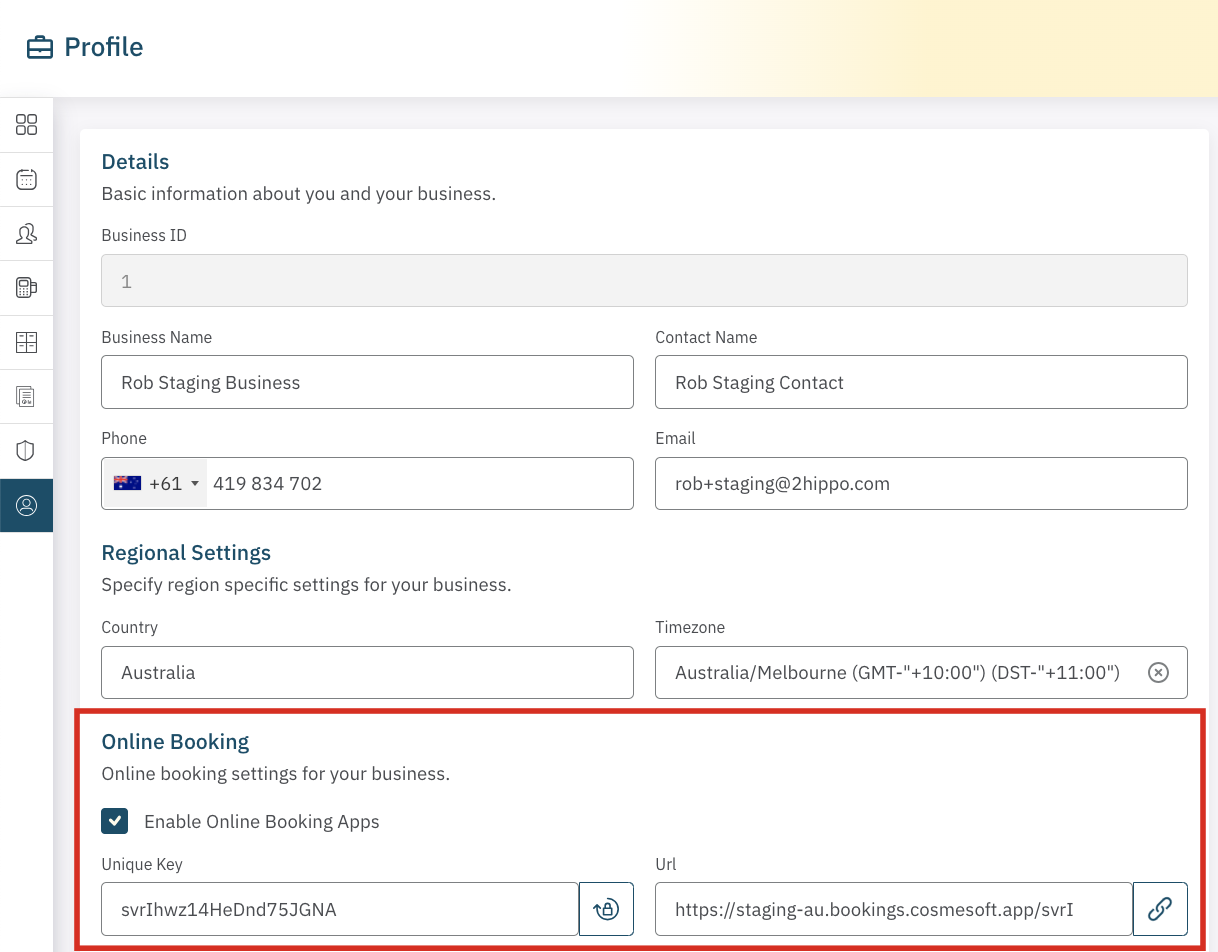
To enable online booking for your location, you’ll first need to set Online Booking in your Business Profile.
Navigate to Account | Profile:
In the Main menu, Go to the Account section and select Profile.
Enable Online Booking:
In the Online Booking section, tick the box next to Enable Online Booking Apps to activate the feature.
Generate a Unique Key and a URL:
Click the lock icon to generate a unique key. The URL next to this provides direct access to your business online booking site, which you can use to embed the booking portal in your website and online promotional materials.
Save Changes:
Once you’ve enabled online booking and generated your link, save your changes.
Step 3: Configure Location Settings for Online Booking
Next, make sure the Location Settings ensure that your clients can book appointments online.
Navigate to Admin | Location Settings:
In the Main Menu, go to the Admin section and select Location Settings.
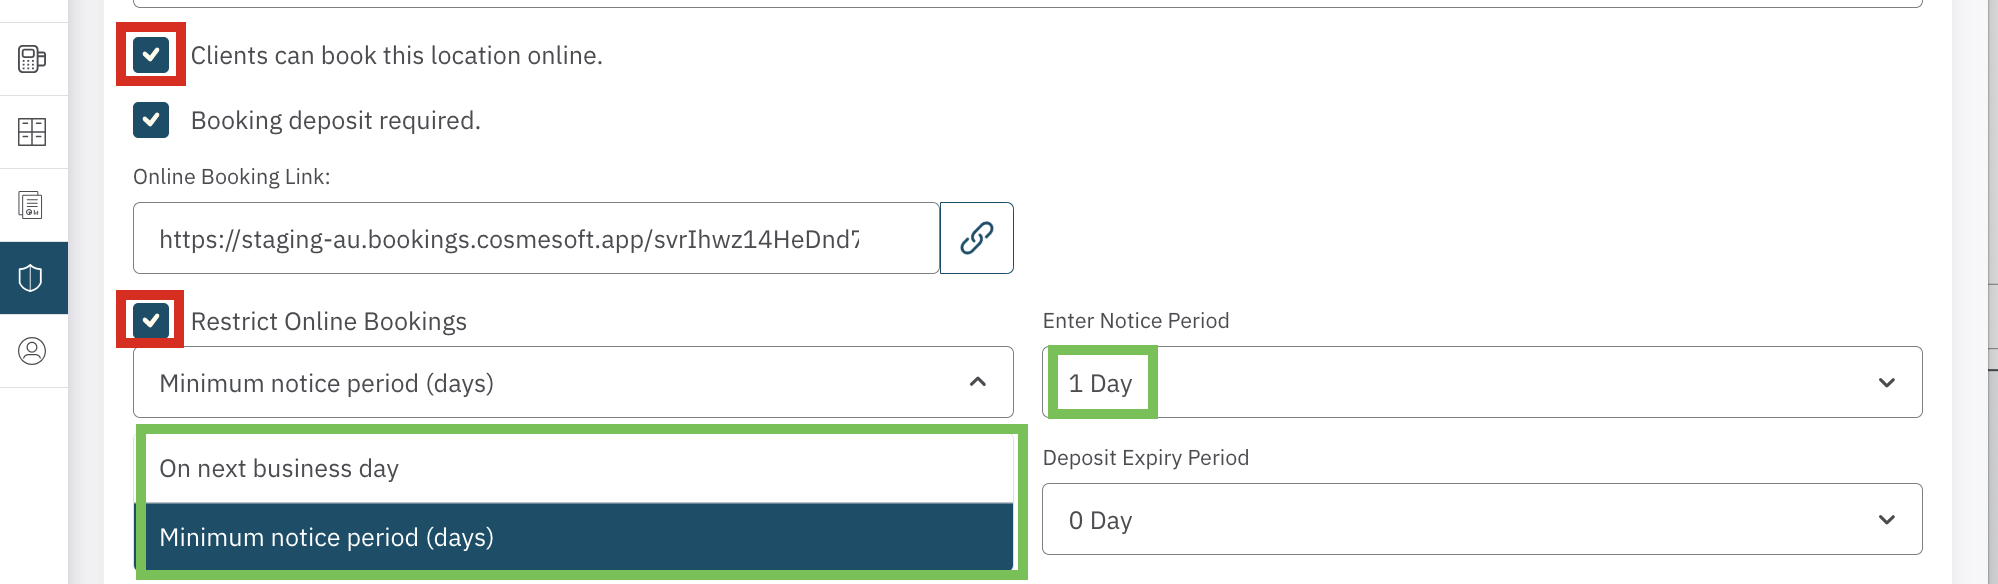
Enable Online Booking for This Location:
In the Online Booking section, select the box next to Clients Can Book this Location Online. This will allow clients to see and schedule appointments for this specific location. For businesses with multiple locations, you have the option to exclude certain locations by de-selecting this choice.
Minimum Advance Notice Period
Check Location Hours:
Ensure that the Location Hours are correctly configured and reflect what you want clients to see when booking appointments online. These business hours reflect on the online booking site. Copy the Online Bookings link and check out what your client's see.
Set Up Booking Deposit:
Booking Deposits
To require clients to pay a deposit when booking online, make sure to check the Booking Deposit Required option.
- Set the Deposit Amount
- Set the Deposit Expiry Period.
This is a great way to secure appointments and prevent last-minute cancellations. There is no option to differentiate between deposts for on-line and in-person bookings, therefore a decision for deposits needs to be made for the location's bookings.
Additional settings are required for implementation, so please make sure to read the guide on Booking Deposits.
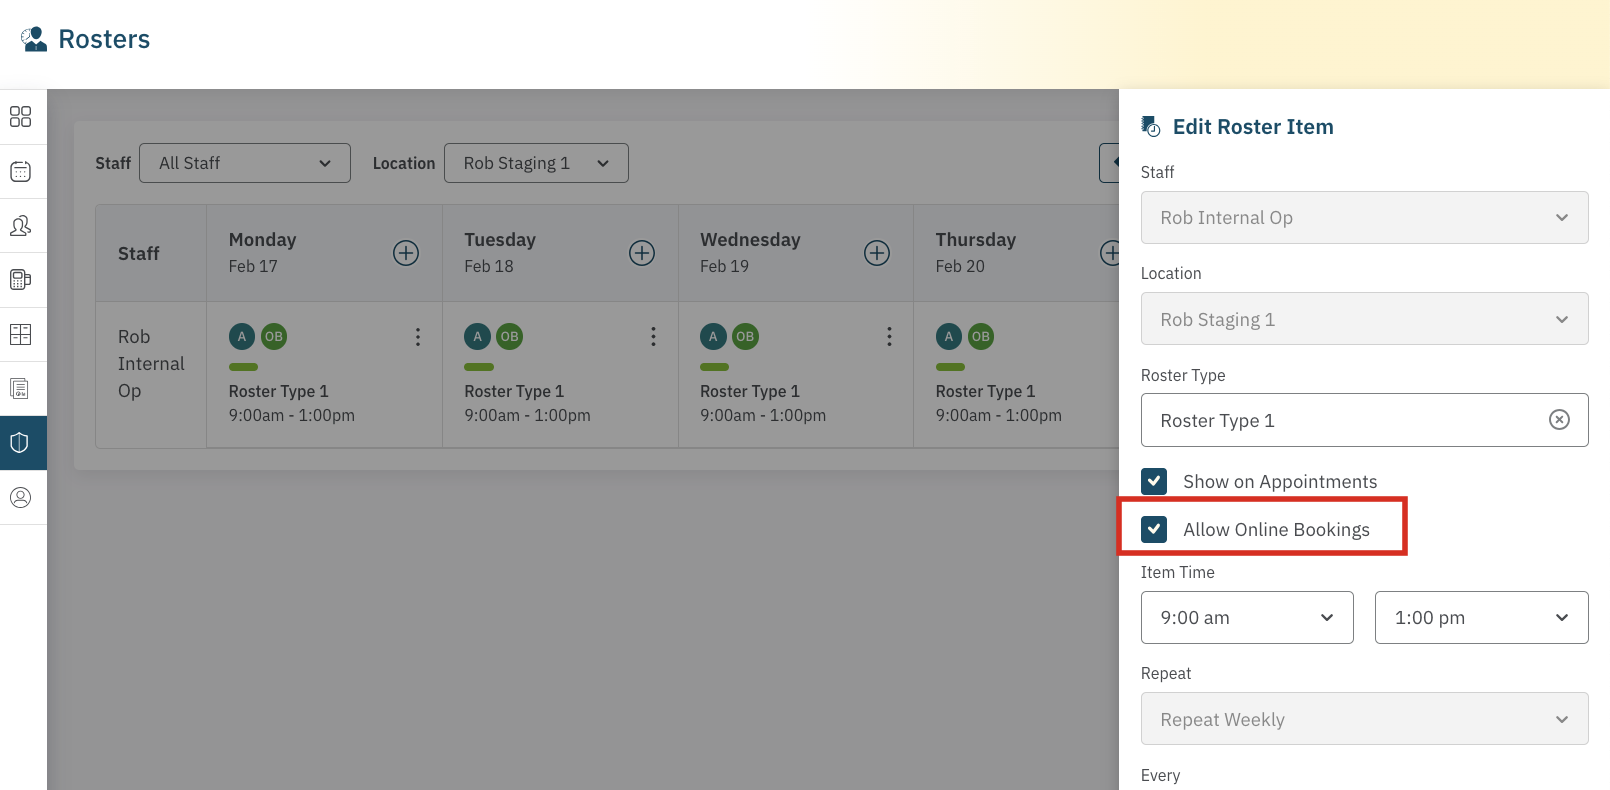
Step 4: Configure Roster Settings for Online Booking
Your Roster settings control which operators (staff members) accept online bookings. This step ensures that only participating staff members show up when clients are booking appointments.
Make Operators Available Online:
When you’re setting up an operator's roster, ensure the following:
- Tick the box for Show on Appointments to ensure they appear as available for bookings.
- Tick the box for Allow Online Bookings to enable clients to book with them online.
Review the guide on how to setup and Manage Rosters.
Save Your Changes:
Once you’ve updated the roster and selected the operators for online booking, save your changes.
Additional settings are required for implementation, so please make sure to read the guide on Booking Deposits.
Step 5: Test Your Online Booking System
Once all the settings are configured, it's time to test the system to ensure everything is working correctly:
Check Availability:
Visit your online booking URL. Verify that the correct location, services, and operators are available for booking.
Test the Deposit Process:
Try booking an appointment as a client to confirm that the deposit requirement is functioning as expected. Ensure the system prompts for a deposit if you’ve enabled that option.
Test the Roster and Hours:
Verify that your location hours and operator availability appear correctly on the booking page, and check that only the correct operators are available based on your roster settings.
Step 6: Launch and Promote Your Online Booking Site
Once everything is set up and tested, you're ready to launch your online booking system. Be sure to promote your new booking link on your website, in email campaigns, and through social media to let clients know they can easily schedule their appointments online.
The custom URL can be used to embed the booking portal in a frame on your website. Ask our support team if you need assistance.
Online Bookings Summary:
- Payment Account: Ensure your payment account is setup if you want to collect booking deposits.
- Business Profile: Enable online booking and generate a unique URL for easy access.
- Have your website devleoper embed the booking portal on your website
- Location Settings: Ensure clients can book this location online and set up any deposit requirements.
- Roster Settings: Make sure the correct operators are available for online booking by ticking the right boxes.
- Service Deposit Setup: Configure deposit requirements for specific services to secure bookings.
- Location Hours: Ensure your location hours reflect availability for online bookings.
By completing these steps, you can ensure that your Cosmesoft online booking portal becomes a powerful tool for both you and your clients. It makes scheduling appointments easier, helps prevent no-shows with deposits, and allows your business to operate more efficiently.