
Process a Sale
Collect Payment For Products and Services
Navigate the Cosmesoft POS system effortlessly and accurately to manage product sales and send receiots to clients.
Accessing the POS System
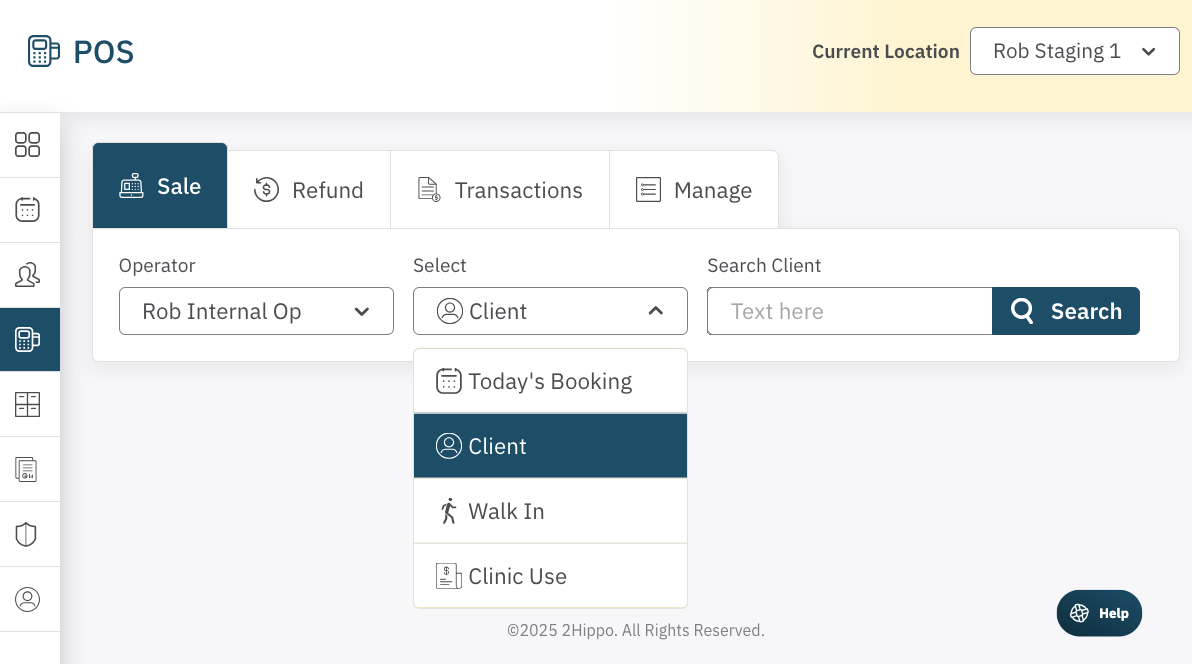
The POS system is accessed via the Main/POS menu (calculator icon) located in the left-hand menu of your dashboard. Clicking this icon will open up the POS interface, with SALE as the default.
Create and Checkout a Sale
The Sale tab is where you process transactions for clients, whether they are scheduled or walk-ins.
1. Select a Location
Ensure you select the correct clinic location from the Location drop-down in the top-right corner before proceeding with any sale. This is essential to ensure all sales are correctly logged under the right location.
2. Lookup or Add a Client
There are four options for selecting a client in the POS system:
Today's Booking: This option will show a list of clients who have appointments scheduled for the current day.
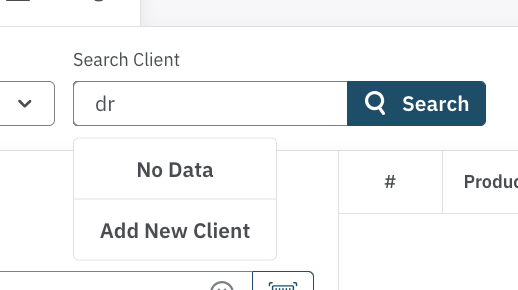
Client: You can search for any registered client by name, email, mobile, DOB or other address. Start typing -
- Tip: less is more when trying to locate a client. Names entered incorrectly, or with different hyphenation may not be found. Use less characters, or try mobile or email.
- Tip: When you type a list of matches shows. Art the bottom of the list you will see Add New Client.
Walk-In:If the client is not scheduled for an appointment but is buying products, choose this option. A walk-in is specifically for product purchases only, without any added treatment or appointment, and does not require compliance records.
- Tip: Always try to register your clients so they can take advantage of online booking, participate in your loyalty program, and receive promotions in the future.
Clinic Use: This option is for processing sales that are not linked to a specific client, such as when a product is used. This type of transaction helps manage inventory without tying it to a client.
3. Select the Operator
Once the client has been selected, the next important decision is choosing the operator (staff member) who will be responsible for delivering the service (or making the sale if it's a product-only sale). Selecting the right operator is crucial for accurately tracking commissions and ensuring thorough client follow-up.
4. Add Items to the Cart
Once you’ve selected the client and operator, you can now add the relevant items to the sale.
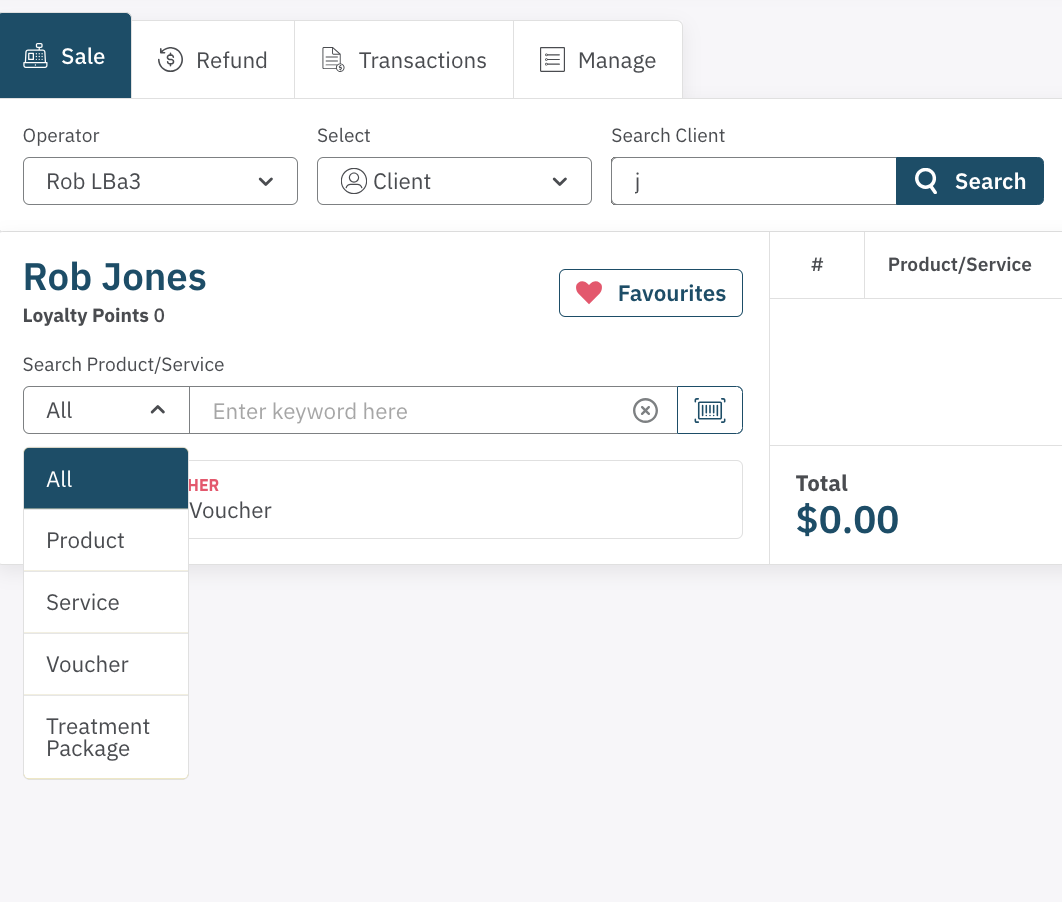
The Selection categories help to locates the item you are searching for.
- Product/Service Selection: You can choose retail products (e.g., skincare, supplements) or clinic services (e.g., Botox, facials, laser treatments).
- Voucher: If you want to purchase a gift voucher, you will find the template listed here.
- Treatement Package: Discounted bundeld promotions will be included in this categrory.
Products Consumed during Treatment
- If the client has an associated booking and a consultation has been completed, the products recorded in the Treatment Note will be added to the sale items.
- If there are no items linked to the treatment note, you will need to manually add the items by selecting them from the product list.
Please make sure to verify the quantity and price of each item to ensure accuracy. The price should be automatically populated, but it's always good to double-check, especially for discounted items.
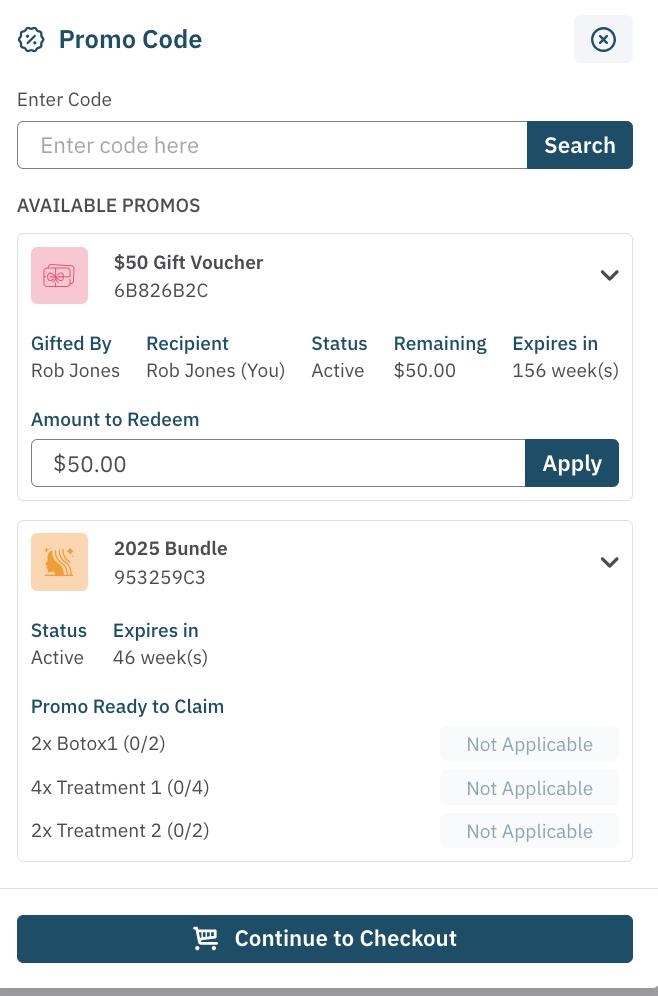
5. Apply Promotional Discounts
IIf there are any marketing promotions associated with the client, you can check and apply them by selecting the Promo Code button. The system will automatically apply the applicable discount if available. You can learn more in the Marketing Promotions Guide.
6. Checkout and Payment
Once everything is selected, it's time to proceed to Checkout:
- Payment Method: Choose the payment method used by the client. Available options typically include:
- 2Pay (default)
- Cash
- On Account
- Loyalty Points
- (other payment methods selected in Admin/Payment Methods)
Multiple Payment Methods: If the client is using more than one payment method (e.g., part cash and part card), click Add Another Payment Method to record each payment.
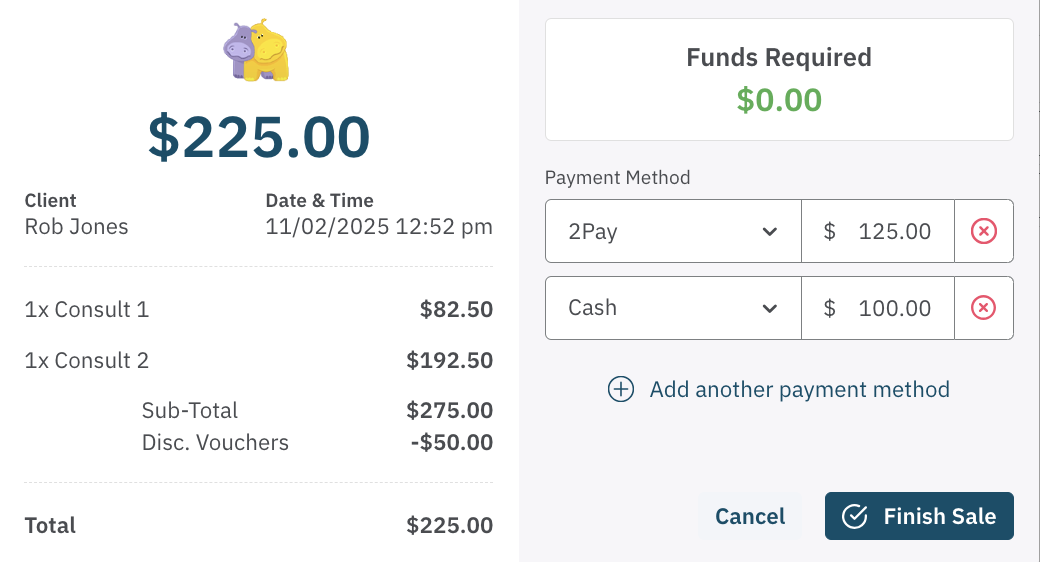
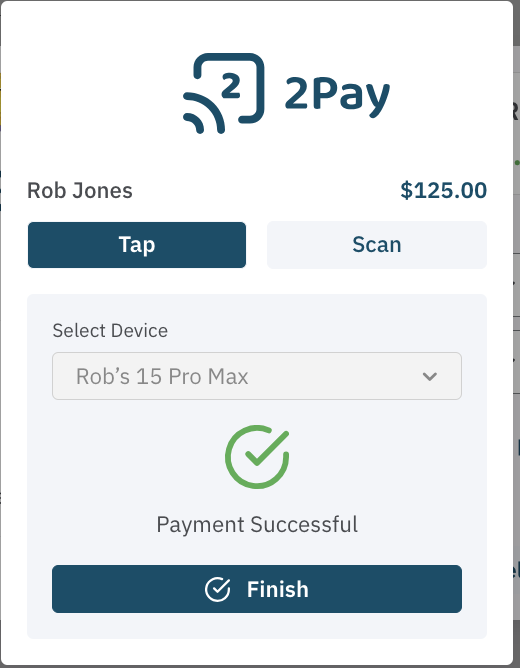
Once the payment details are correct, select Finish Sale.
- If you are using 2Pay the client will pay on your device using tap or scan payment method.
7. Receipt Options
After completing the transaction, you have the option to provide a receipt:
- Print Receipt: Select this if you want to give the client a printed receipt.
- Email/SMS Receipt: You can also send the receipt via Email or SMS, depending on the client’s preference.
If a Gift Voucher was purchased, voucher details will be included with the receipt.

<— PREVIOUS ARTICLE | NEXT ARTICLE—>